How to make Panna Cotta

Panna CottaLast few days have been a lot of work, to put it mildly. Started with the butterfly being sick and out of school for more than a couple days and then it was the little one’s turn. Severe cough, cold and congestion. It’s terrible when the baby falls sick. Not that it’s any better if the older one does but at least she can share here pain. With the little ones all they can do to express their despair is cry and that makes it worse on them and on us. Last night was a first in few days when we all of us got to sleep through it. Past few were spent lying half awake next to a sick wheezing and coughing baby, rubbing balm on her chest, measuring temperature every couple hours and checking the settings of the humidifier. Valentines and Presidents Day came and went by without us even noticing. Not that I am the Valentine’s Day kind. I am one of those who never remembers birthdays and anniversaries. Friends actually call and remind that I should be wishing them. And then I do after profusely apologizing. Although I know that they do not need the apology and so do they. I still try to be nice, on their birthdays!

Panna CottaThankfully the husband is the same, so no uncomfortable pauses or silent complaints. First couple years of our marriage we tried our best though, to remember the days and buy gifts. Several firsts and seconds you see. But as the marriage grew, so did we, into each other. So now a kiss in the morning and a few ” I love you(s)” snuck here and there work better for us than remembering buying gifts. One thing we still try to do though, if we can, is cook something nice within the comforts of our own kitchen. This Valentines Day it was tough so something decadent yet quick had to be thought of. Panna Cotta came to mind. It’s easy, it’s quick, absolutely luscious and extremely simple. Exactly what was needed.

Now considering the simplicity of the dish I thought instead of just sharing the recipe how about I share all I know about Panna Cotta so that you can tweak it the way you’d like to better suit yours and your family’s palate.

Panna Cotta
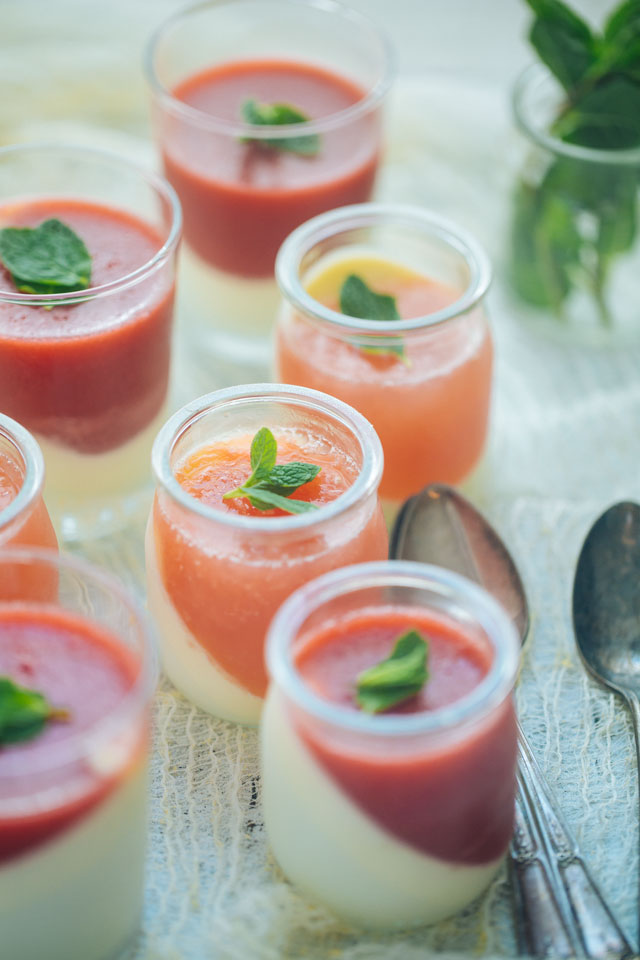
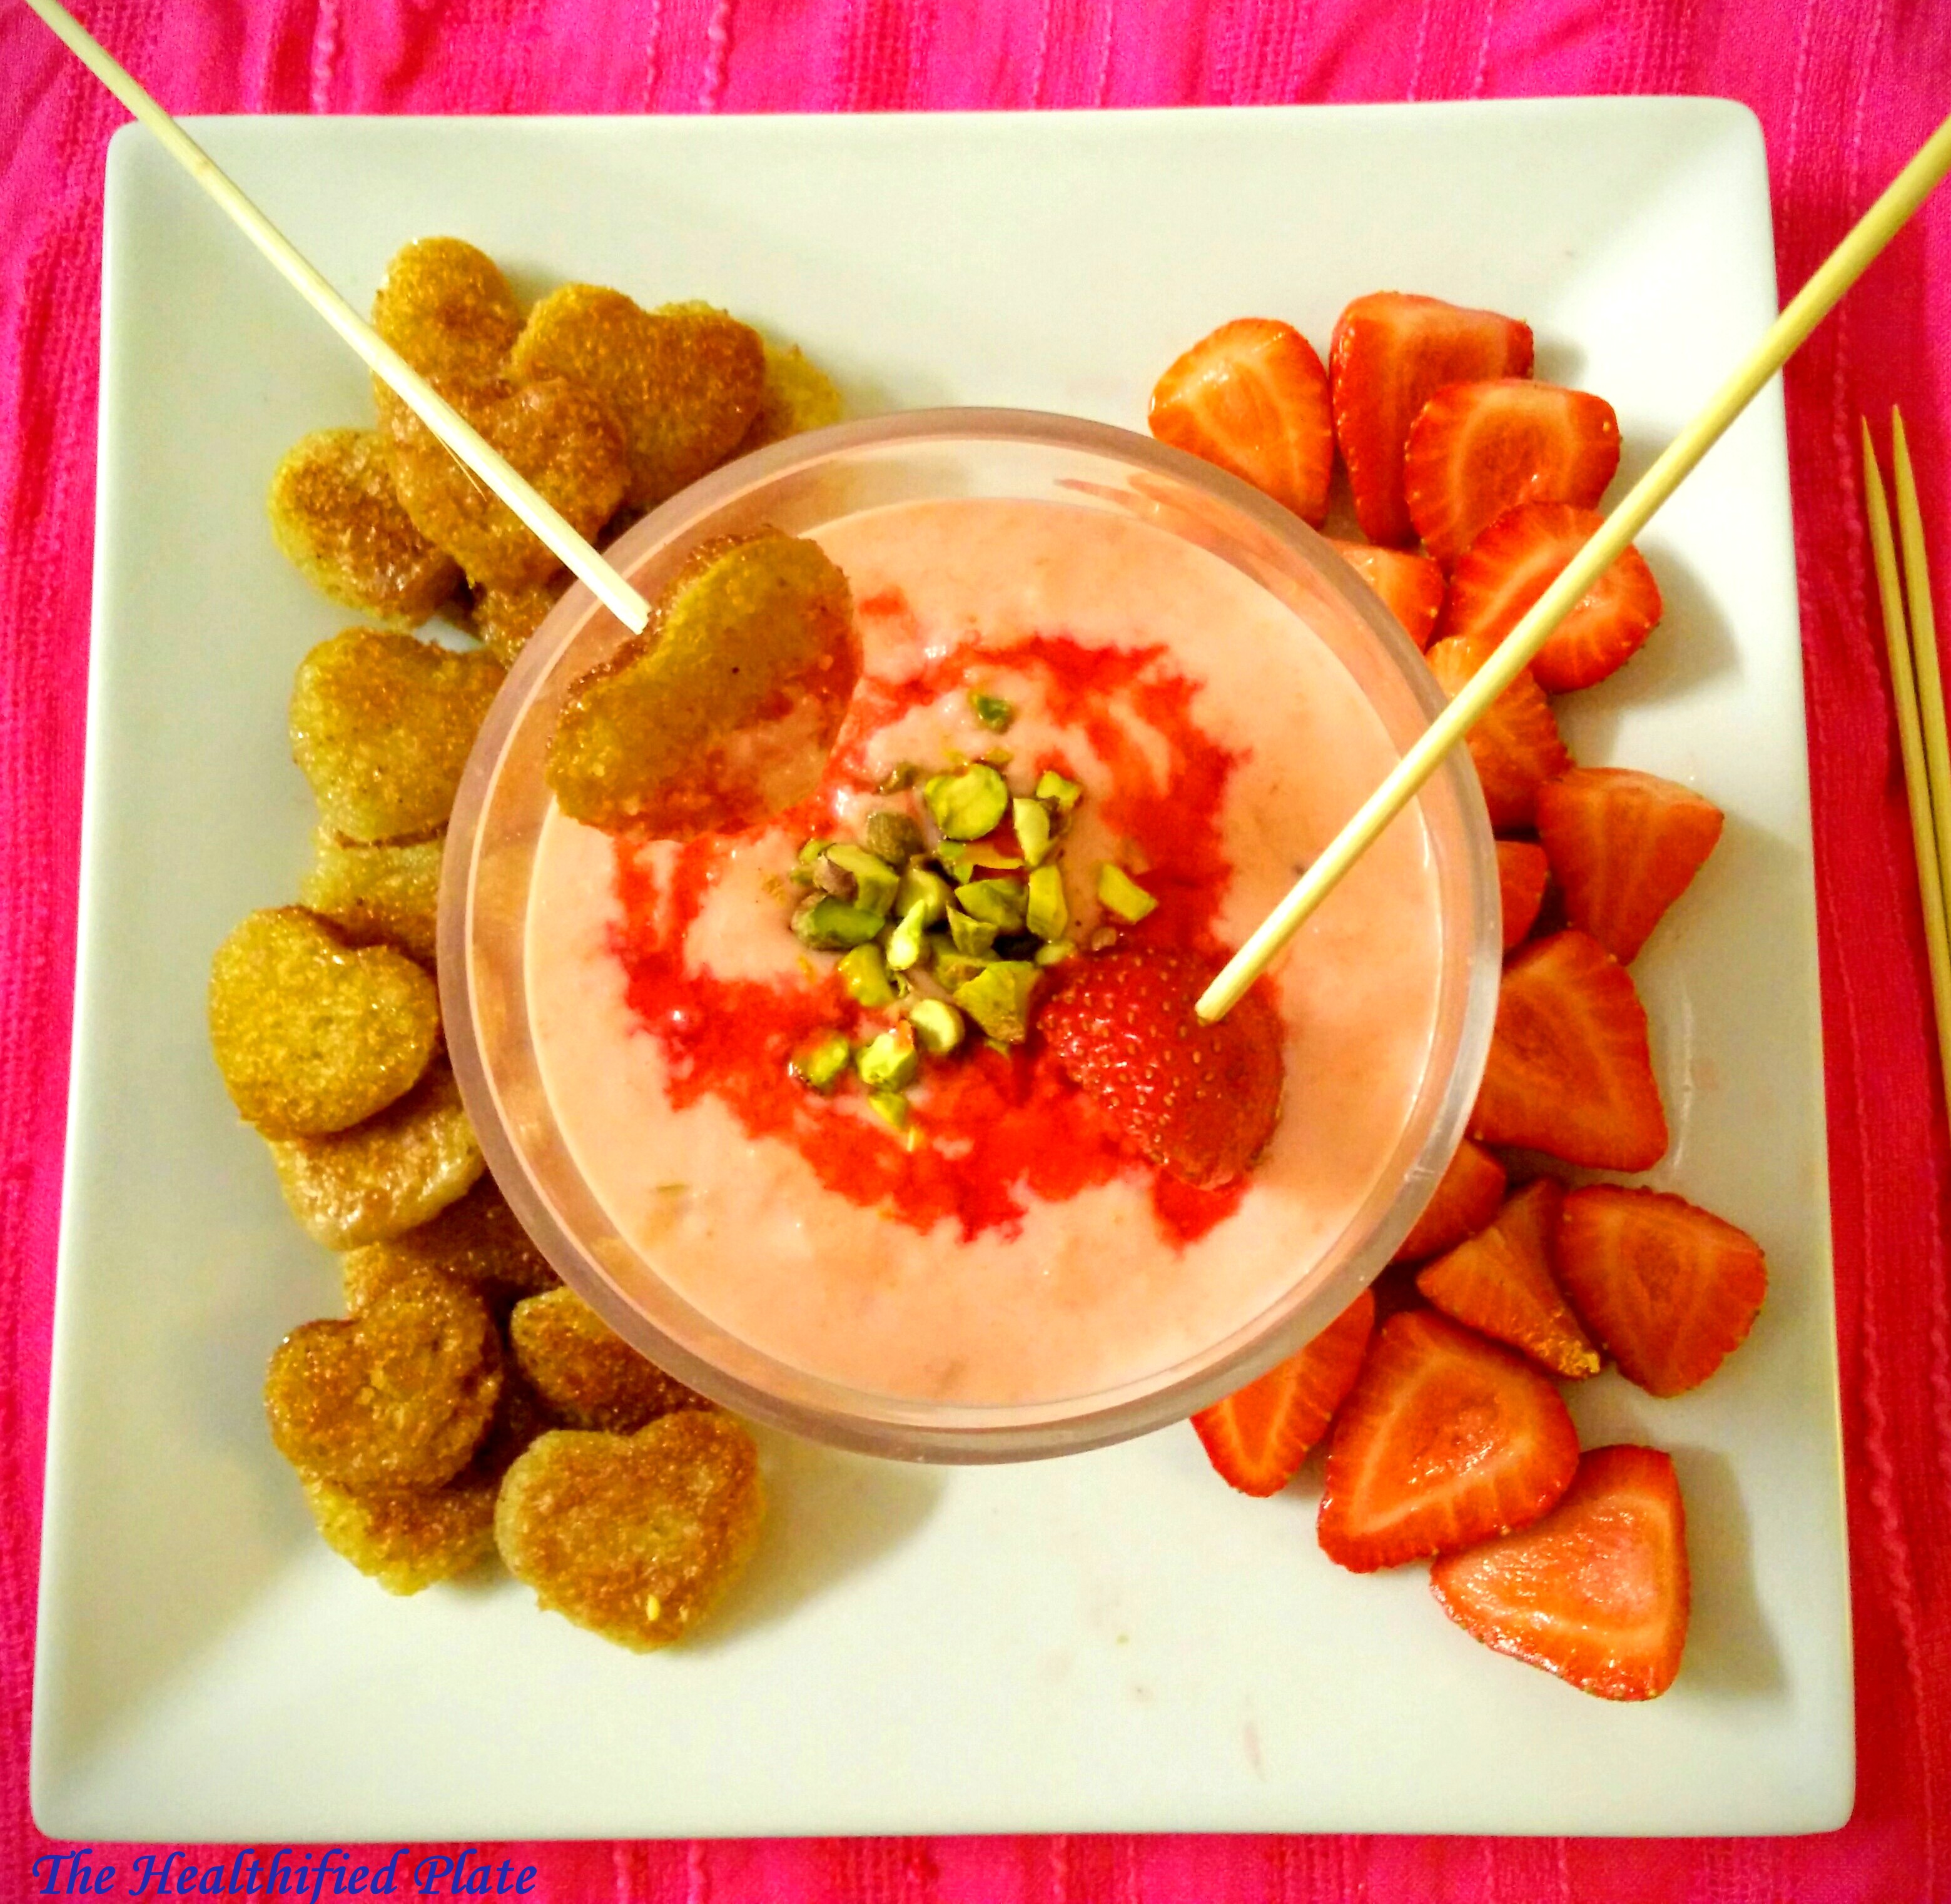
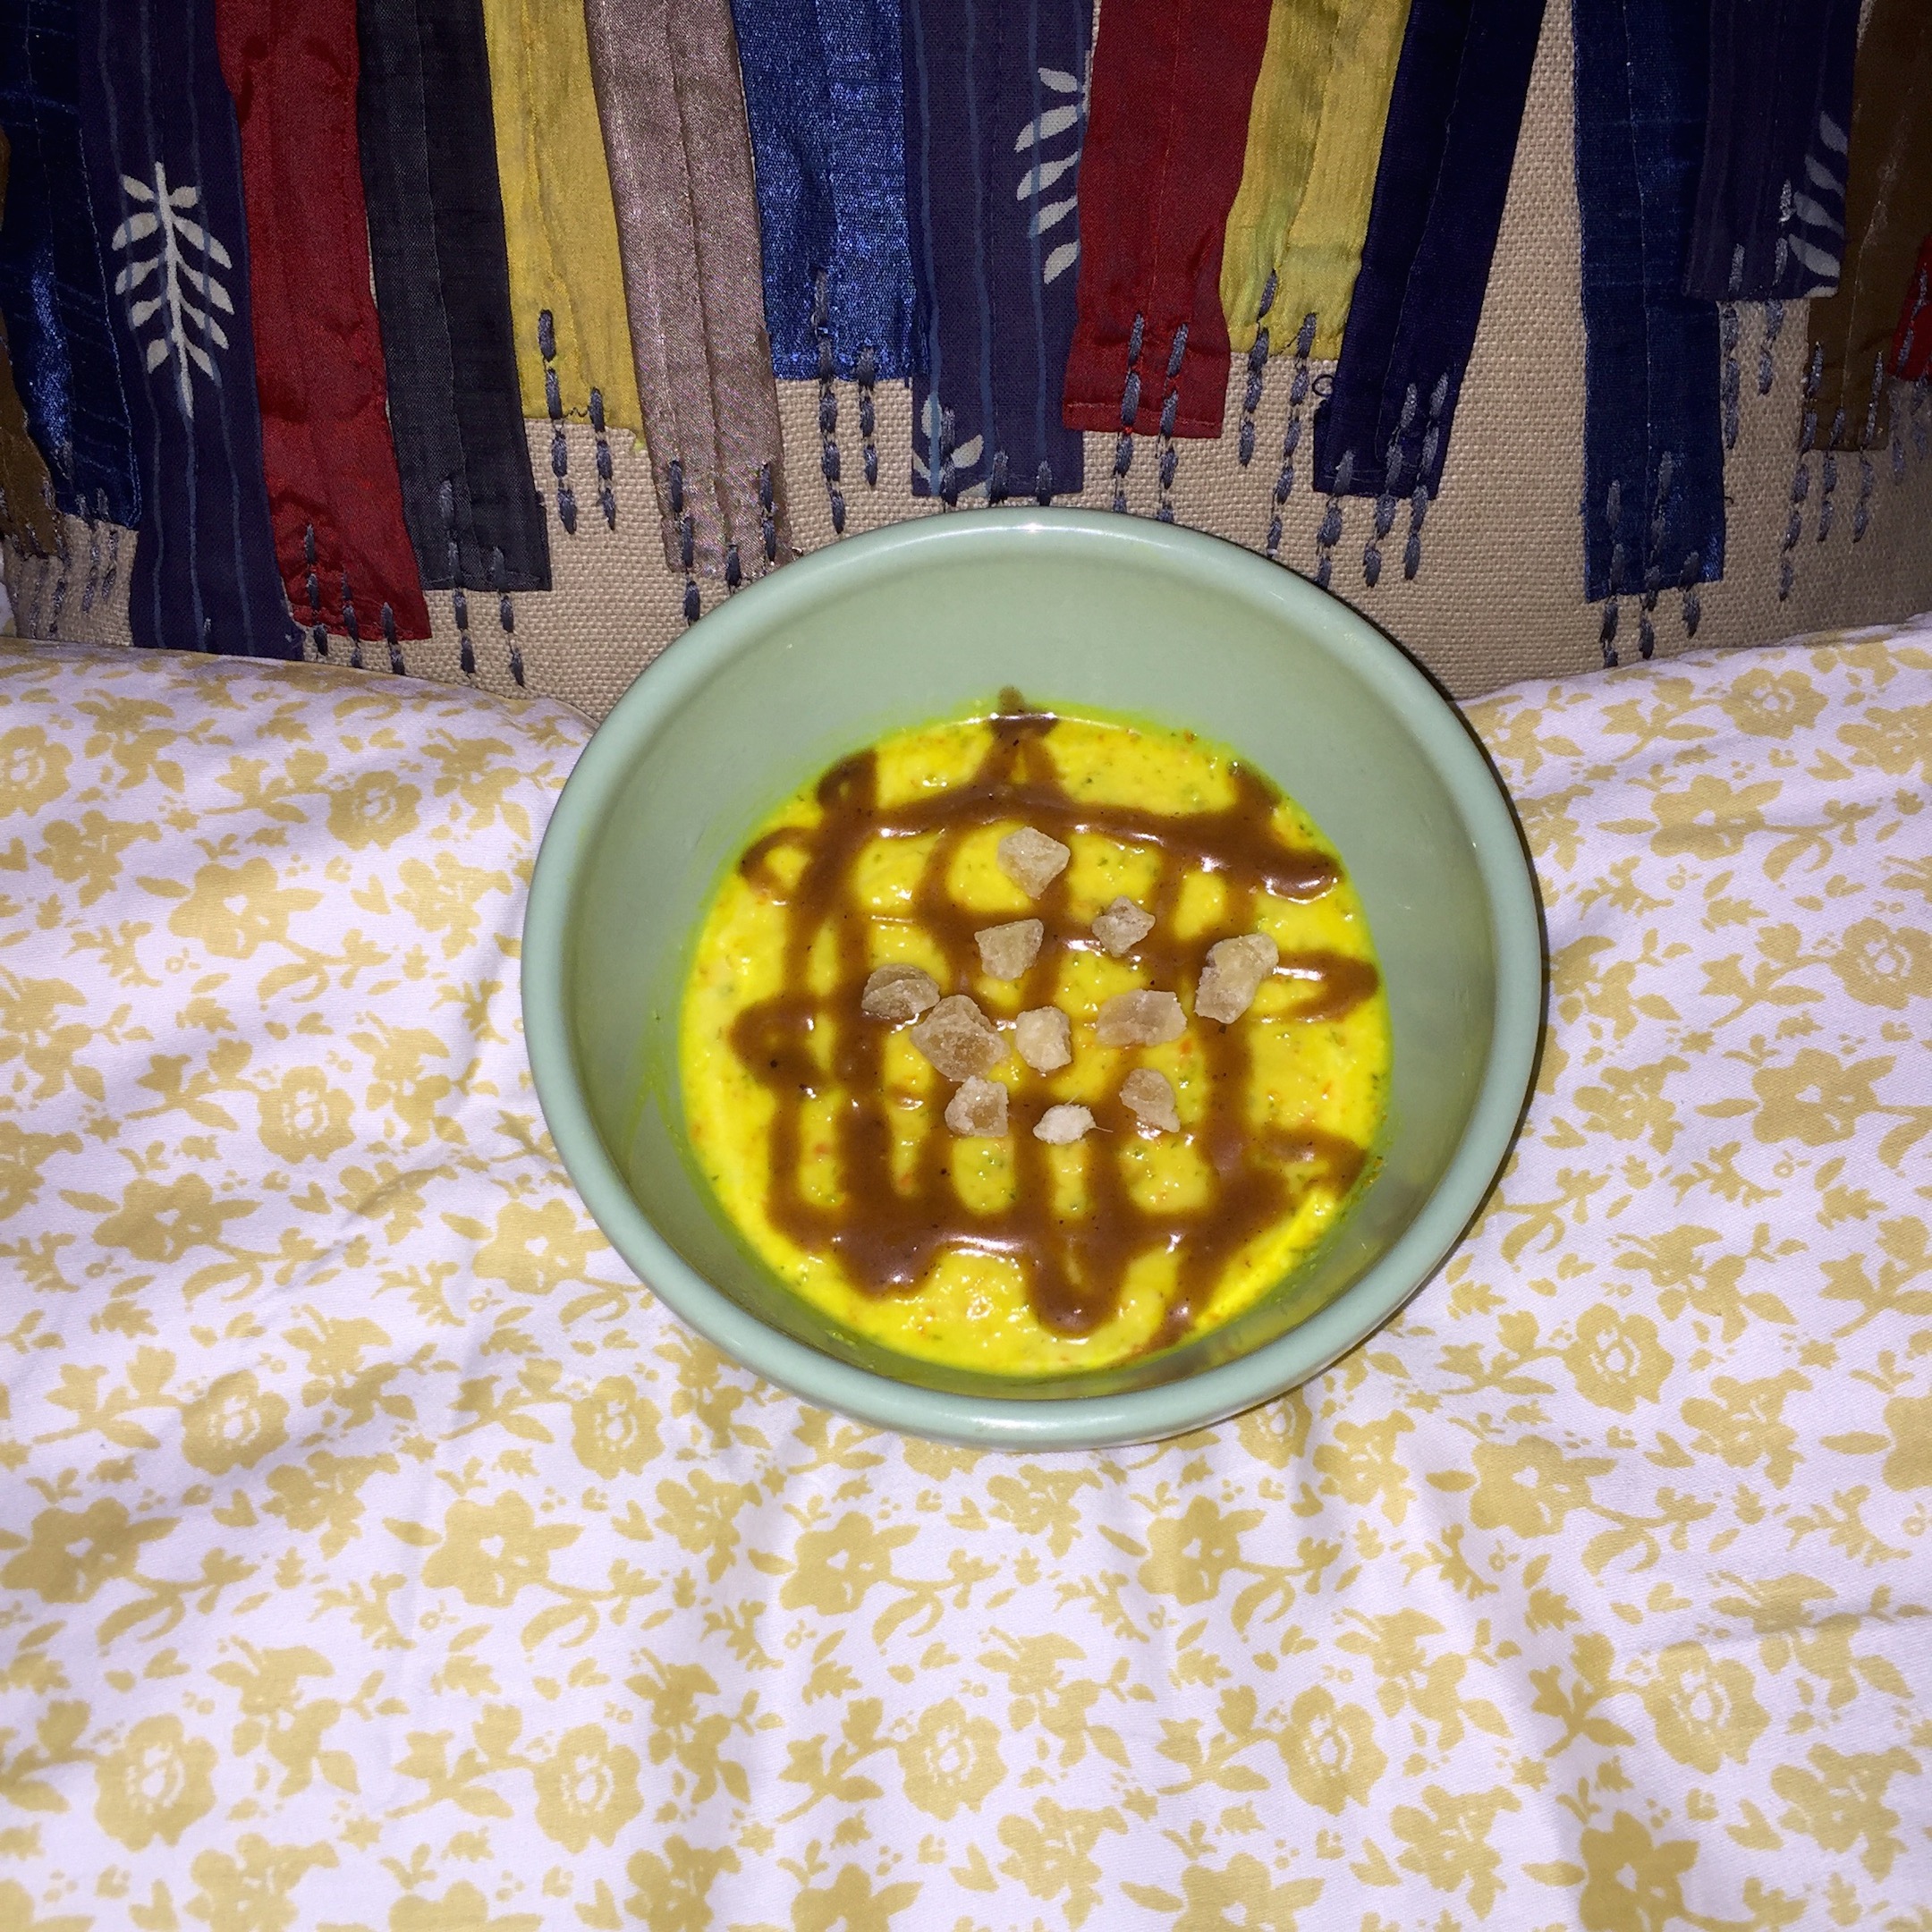
Let’s start with what is Panna Cotta. It’s a thick, creamy pudding like dessert born in Italy, Tuscany to be specific. A basic panna cotta recipe mixes three simple ingredients, cream, sugar and gelatin to make a thick, creamy and rich jelly like dessert. I normally use half milk half cream in my panna cotta but some say half n half works better. Some use all cream which for obvious reasons is more creamy. There’s no eggs involved here and no baking either so pretty much all you have to do is get the balance of cream/milk/dairy to the amount of gelatin right, add some flavoring and let it cool and set. A good panna cotta or a panna cotta when done right should hold its shape when unmolded on a dish and should have no grits if cut through it. You can then either top it with some fruit jelly, a compote, nuts or enjoy it just as is. The recipe I am sharing today is of a panna cotta served in a cup layered with fruit gelee.

Panna CottaPanna CottaYou can also make a dairy free, vegan panna cotta using nut milk (eg: almond milk or cashew milk), coconut milk, or even soy milk. You simply have to balance the amount of gelatin to milk, to achieve the right consistency. Now gelatin is made with animal products so if you want you can also use agar-agar or other plant based gelatin instead. Anyway let’s get to the cooking part and take it one step at a time. I feel embarrassed about even writing that last considering all it takes to cook this dessert is a total of 5 minutes. And if it is taking you more than that, there’s something wrong.

Panna CottaIngredients: Makes about 6 medium sized servings

For Panna Cotta: (Adapted from The Kitchn)

1 1/2 cups milk

1 1/2 cups heavy cream

3 teaspoons of gelatin

1/2 cup sugar (I used powdered sugar as it dissolves easily. Fell free to use granulated or brown per your liking)

1 teaspoon cardamom powder (I crushed seeds from the cardamom pods to use here. If using store bought cardamom powder, you will need extra. Adjust quantity to your liking. Also feel free to add other flavorings like vanilla, coffee, salted caramel, etc)

A little oil (If planning to unmold the panna cotta then you will have to lightly oil the ramekins or the mold you are using.)


Method:

For Panna Cotta:

Blooming the gelatin: In a small bowl pour 1/2 cup milk. Sprinkle gelatin powder into it. Let is sit for 5 minutes. In the end the gelatin should bloom and turn into a cloudy mass.

Dissolve gelatin and sugar in milk: In a sauce pan pour rest of the milk. Turn on the heat. Add bloomed gelatin into the milk and stir well while slowly heating up the milk. keep in mind we do want to boil the milk but only heat it gently so the moment you see vapors rising turn down the heat to low. Stir continuously. To check whether gelatin is dissolved well, look at the back of the stirring spoon. If you see granules then it still needs time. Mix in sugar. Let it dissolve completely.

Remove from heat.

Add cream and flavoring. Mix well.

Panna CottaPour into containers: I served my panna cotta with gelee in cups so I have different steps to follow from here on. But if you want to unmold your panna cotta then pour the mixture into lightly oiled ramekins and pop into the refrigerator.

In case of this recipe, place your cups in a cupcake baking tray in tilted position. Carefully pour the mixture into the cups filling only half of the container. Transfer into the refrigerator and chill for about 2 hours until the panna cotta is firm.

Unmolding: If unmolding the panna cotta simply place the ramekins in a container with warm water covering it right under the rims. One at a time using a butter knife gently release the vacuum from the edge of the panna cotta and invert it on to the plate. If serving with gelee skip this step.

Making of Gelee:

Ingredients:

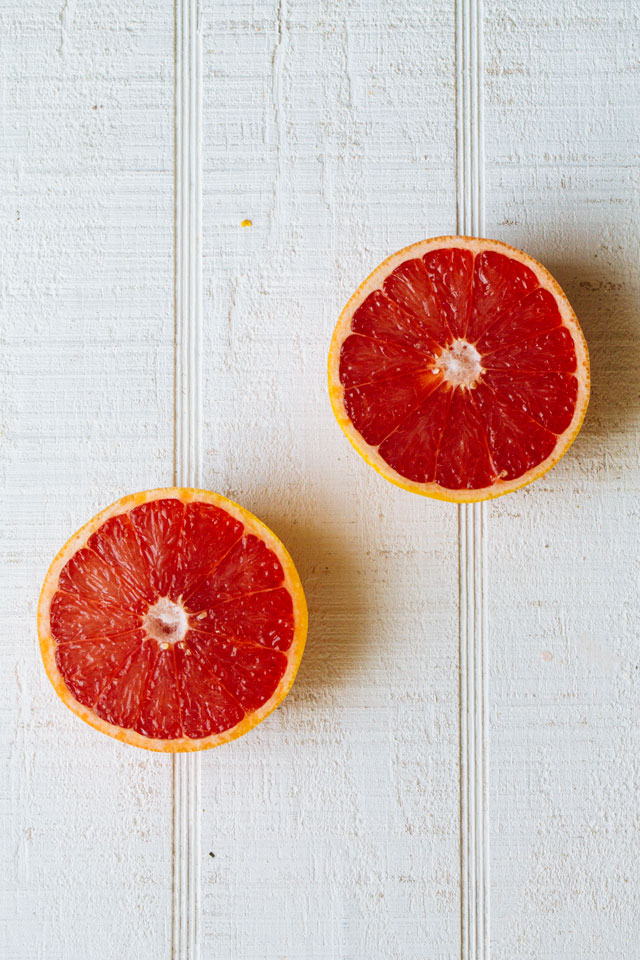
1 cup fruit juice (I squeezed fresh grapfruit juice for my grapefruit gelee and cleaned, cored and blended some fresh strawberries which I later strained through a strainer for my strawberry gelee. Feel free to use fruits of your choice. Keep in mind acidic fruits like pineapple and kiwi do not work great with gelatin so try to stay away from them)

1/4 cup water (for certain fruit gelee)

1 teaspoon gelatin

1/3 cup sugar

Method:

S94A7721Get the fruit juice ready: Squeeze fresh juice or blend the fruit of choice in a blender. Pass the juice through a strainer into a bowl. Discard the pulp. Mix water if using a juice extracted from pulp.

Bloom the gleatin: Pour 3 tablespoon of juice in a small bowl. Sprinkle gelatin over it. Give it 5 minutes to bloom.

Dissolve gelatin, juice and sugar: Transfer juice into a sauce pan. Turn on the heat. Stir continuously add the gelatin mass and dissolve it into the juice. Once the gelatin is dissolved add sugar. Mix well. Make sure you do not boil the juice.

Panna CottaLayer on Panna Cotta: Pull out Panna Cotta from the refrigerator. Place them on a tray, flat. Pour gelee liquid in panna cotta jars.

Chill: Transfer the jars back into the refrigerator. Let it chill for another 1-2 hours. Garnish with a choice of fruit, nuts or mint/basil leaves. Serve chilled.

Using this basic recipe you can play around with flavors and shapes. Stir in some chocolate to get chocolate panna cotta, coffee, caramel, touch of spices like cayenne, cloves or cinnamon are a few options.

Kala Chana Masala

Kala Chana masala

With almost the same nutritional values and taste, if you get past its thicker outer skin (which in my opinion is not a huge hurdle to cross) Kala Chana or otherwise known as bengal gram is a close cousin of garbanzo beans or chickpeas. It might still need a lot of work to do to achieve the respect it deserves in the western world but it’s definitely a very common household name in Indian kitchens. I have fond memories of slurping spoonfuls of spicy kala chana masala my dadi (grandma) made. Curry would be thin and flowing almost watery but spicy, with nuggets of meaty kala chana. Was supposed to be eaten with white steamed rice and if you go by dadi’s suggestion, with a dollop of ghee, which will slowly melt away and mix into the curry making it ever so comforting hugging your belly. I’d eat a couple bowlfuls as is before reaching out for rice.

Kala Chana masalaAlthough nothing could beat dadi’s recipe but the one, one of my neighbors made growing up was a close second to dadi’s. Her’s had nearly no gravy and thick masala paste would be hugging every chana in the bowl. It went better with rice or even hot sizzling parathas because it would hold better mixed with rice in a spoon or wrapped around a piece of paratha. Yup, divine again!

The recipe I am sharing today is very close to our neighbor’s. Although I still like the soupy one better but this is what my family prefers so this is what I make more often. To get a soupy consistency though, all you have to do is add more water to the curry depending on how runny you like yours. Try this recipe for spicy and tangy masala marrying meaty kala chana. I promise it’ll make you fall in love with this humble bean.

Ingredients:

1 1/2 cups dry Kala Chana (black chickpea) (soaked in water overnight)

1 1/2 cups Curry Paste Please follow the recipe here for the curry paste.

Salt to taste.

1 tablespoon Amchoor (dry mango powder)

1/4 cup Cilantro (chopped)

Method:

Add 4 cups water to soaked and then drained kala chana. Add salt. Pressure cook or boil the chickpeas until cooked through.

Add curry paste and amchoor (dry mango powder) to the cooked chickpeas. Simmer for 10 minutes until the masala mixes well to the chickpeas. Adjust water based on how thin you want the gravy.

Garnish with cilantro. Serve hot.

Slow Cooker Chicken Tacos

Slow Cooker Chicken Tacos
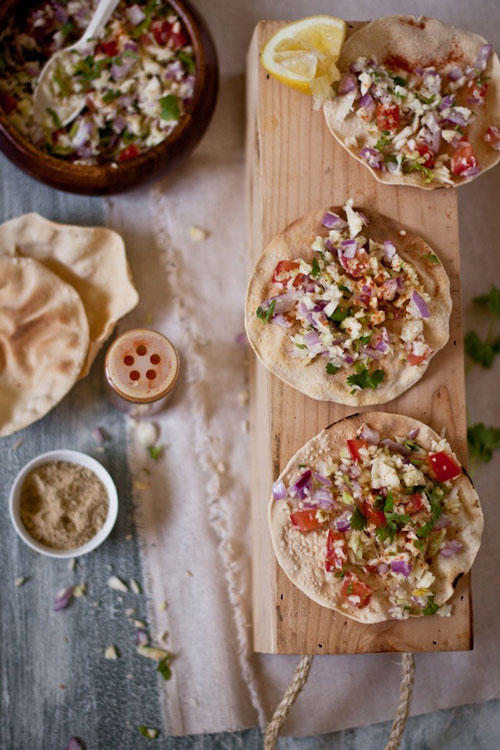
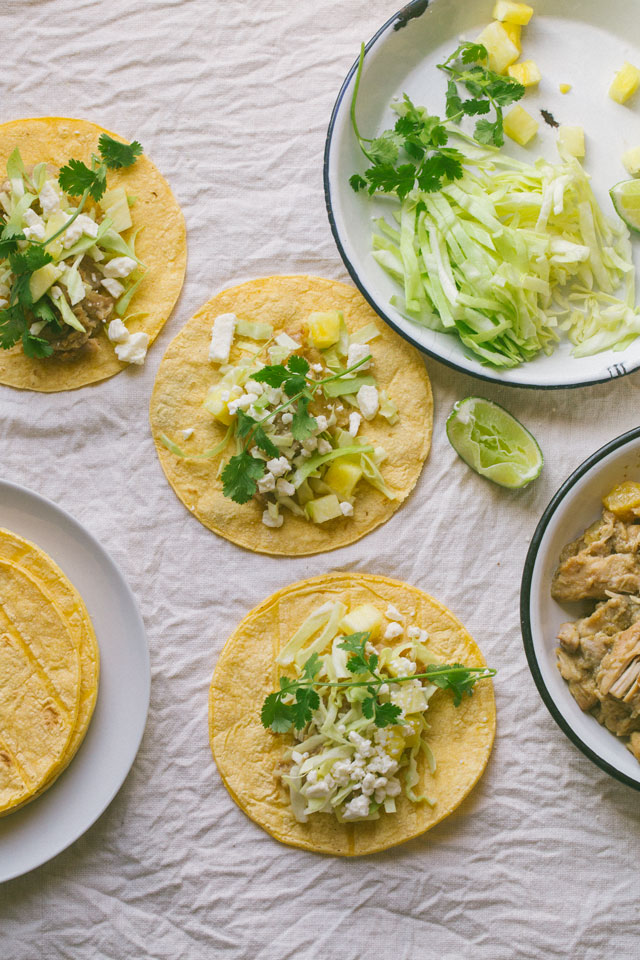
For most of us weekdays are just so busy that at the end of the day putting dinner on the table seems like one of the biggest challenges. Making it fun and appealing for “fun living peeps” in the family is a whole different mountain to climb! This recipe for Slow Cooker Chicken Tacos might make your life a little easier. Slow Cooker is one of my best friends on weekdays and this Slow Cooker Chicken Tacos recipe is one of or family favorite because every one gets to assemble their own tacos their own way, no drama or meltdown over who likes what (and what not!) and everyone’s happy.

With the recipe today also sharing a fun video that I undertook initially as a project but later ended up having more fun that creating a usual post. Hope you like both. The video and the recipe!

Ingredients: (Refer complete recipe in the video)

For the Slow Cooker Chicken:

1 lbs boneless chicken pieces (thighs and/or breast)

1 cup pineapple (cut into smaller chunks)

1 tablespoon hot tikka masala (adjust per taste)

1 1/2 teaspoon ginger garlic paste

1 1/2 tablespoon coriander powder

1 1/2 teaspoon corn starch

Salt to taste

1 1/2 tablespoon olive oil

For the Tacos:

Small tortillas (I used corn)

Cabbage (or lettuce)

Pineapple salsa (or any other of your choice)

Feta Cheese

Cilantro

Squirt of lime juice

*Feel free to jazz up your taco as you like. Enjoy!

How to make buttermilk at home

Has it ever happened to you that you are right in the middle of a recipe, everything’s looking great, things are coming out wonderfully and then you suddenly realize that you are short of just one egg or that crucial half a stick or butter in most commonly in my case that ever so important buttermilk? God, its not only frustrating but it happens to me so often that for the longest times I’d just give up trying a recipe if it asked for buttermilk. The real problem is that I also do not know what to do with the rest of the bottle of buttermilk after I’m done using that one cup the recipe asked for. Well, then a good soul suggested I should not give up so easily and instead of using store bought buttermilk, I should just make mine at home when I need. That was one of the life changing moments because from then on there’s no looking back.

Sharing a quick video of how to make buttermilk at home and the measurements are mentioned below. Enjoy this little moment of liberty!

Ingredients:

1 cup cool milk

1 tablespoon lemon juice or vinegar

20 Recipes For Your Super Bowl Party

Whether your team is playing or not, all of us will be gathered around the television this Sunday afternoon.  With some of our favorite people around, either rooting for a team (or maybe against it?) or just to check out fun Super Bowl commercials. Whichever category you belong to, there’s one thing all of us will have in common. Food! How about this Sunday we ditch the same old hot dogs and sandwiches and cook something more fun and in this case SPICY!

Check out our 20 favorite recipes for this Super Bowl Sunday-

Fiyazis

Fiyazis

Tandoori Chicken Wings

Tandoori-Chicken

Dahi Ke Kabab

Dahi-Ke-Kabab

Kati Roll

Kati-Roll

Sheesh Kabab

Sheesh-Kabab

Masala Papad

masala_papad

Sprouts Chaat Papdi

Sprouts Dahi Papdi

Paneer Stuffed Mirchi Bhaji

Mirchi-Bajji

Spicy Oven Roasted Brussel Sprouts:

Roasted_Brussel_Sprouts_t-11

Honey Chilli Potatoes

Honey-Chili-Potatoes

Aloo Chops

Aloo-Chops

Chicken Cream Kabab

Malai-Chicken-Kabab

Keema Cutlets

crispy-mutton-or-beef-cutlets

Lamb Kabab

Lamb-Seekh-Kebabs-10

Vegan Sugarcane Cake

Bajra-Pumpkin-Cake

Baked Nutella Samosa

Nutella-Samosa

Chocolate Barfi

Chocolate-Burfi-H1-O

Puran Tarts

Puran Tarts

Gulab Jamun and Saffron Yogurt Tart

Gulab-Jamun-and-Saffron-Yogurt-Tart

Apple Almond Halwa with Orange Whipped Cream

apple-halwa


Quick Microwave Aloo Fry

Microwave Potato Fry

Like any other mom in the world (although a much saner and more accommodating version of the present me!) mummy wanted me to eat my greens. I on the other hand was quite a handful. Green leafy veggies, too green for my taste. Bitter gourd was, well, bitter! Pumpkin or squash of any kind was either too sweet or mushy or had “too much water in them”. Who does that? Who comes up with excuses like- too much water in this vegetable! But I did. And now when I have my own picky, 6 year old, way too smart for her age, kid, I realize how patient mummy was with me. One group of food I did like was meat. So she would make stories where soy chunks turned into little chicken nuggets, Arbi or Tarro root would be cooked like fried fish (and trust me the ones she cooks taste like one) and lauki or bottle gourd would take shape of meatballs and then I’d gobble them up like no man’s business.

Quick Microwave Potato Fry
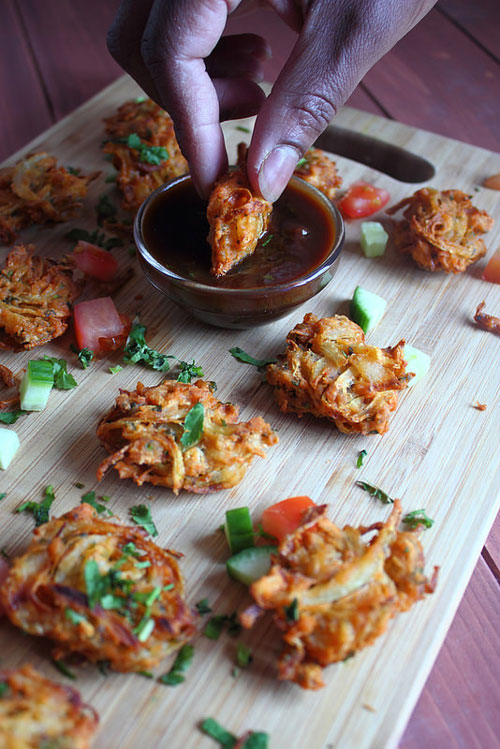
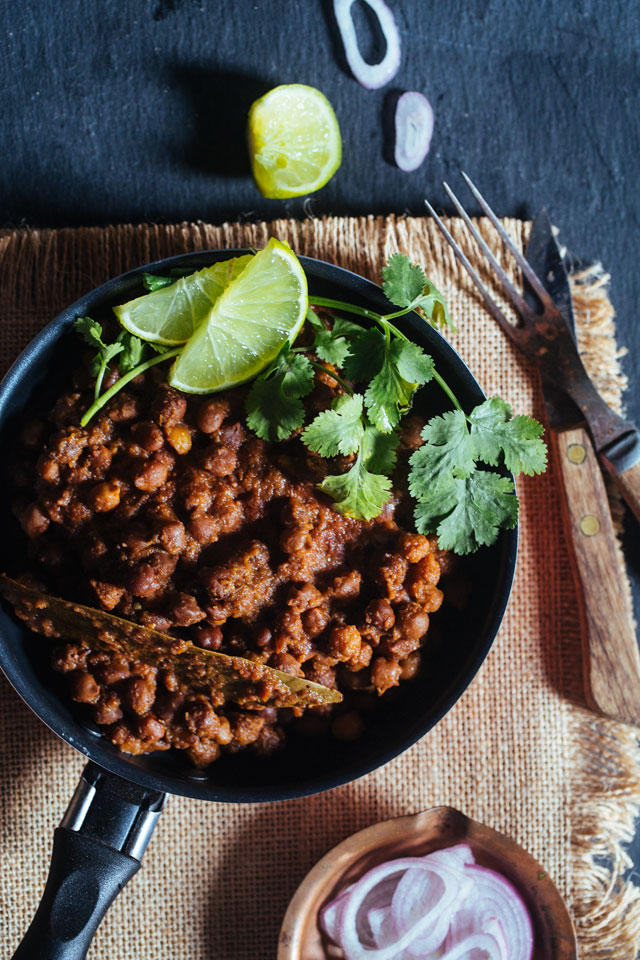
But she wouldn’t get lucky all the time and then the caring Indian mum in her, who wouldn’t let her kid go to bed hungry, gave in and results would be potatoes for dinner. Sometimes for breakfast, lunch AND dinner. I’ve eaten a lot of potatoes growing up. So much so that now there’s only a few dishes, I really enjoy, have potatoes in them. You have to admit though, in an Indian kitchen potatoes are the unsung heroes. It has carried a lot of us picky eating Indian kids through their childhood and even today when nothing else works, potatoes still save the day. Aloo paratha, Tikki Chaat, Dum Aloo or something as simple as aloo fry (simple stir fried potatoes) are some of the dishes you can cook like a breeze and feed an army without rushing to the store for special ingredients.

Quick microwave potato fryThere is one such potato dish that has always come to my rescue at difficult times. Times when we are out of groceries or on a time crunch or well, have a picky eater in hand! Its simple, no frill or drama. Its a quick microwave aloo fry recipe or aloo bhujiya that goes great with parathas, poori or a humble daal chawal. Done before you know it and dinner will be ready before the kids even finish setting up the table. Play around and add onion, ginger garlic or green peas to your liking.

Ingredients: Serves 4

3 medium sized potatoes (I used red skinned but any variety is fine), Peeled and sliced

1 tablespoon olive oil

1/2 teaspoon turmeric

1 teaspoon cayenne pepper (adjust per taste)

1 teaspoon garam masala (can get creative and use tikka masala, tandoori powder or goda masala)

1/2 teaspoon roasted cumin powder

Salt to taste

Lime juice (just a couple squirts per taste)

Method:

Toss all the ingredients together in a big bowl coating the potatoes well.

Transfer to a wide mouthed microwavable dish. Spread the potatoes evenly. Cover with a cling/plastic wrap. Microwave on a high for 8-10 minutes, stirring once after 4-5 minute mark.

Take a plastic wrap out and mircrowave again for two minutes gently stirring the potatoes once after 1 minute mark.

Serve as a side with poori, paratha, filled in a sandwich or the possibilities are endless!


Rose Rabri Fondue with Shahi Tukra Hearts and Strawberries.

0

Rose Rabri Fondue with Shahi Tukra Hearts and Strawberries.

They say Chocolate Fondue is THE dessert for Valentine’s Day. Then ‘we should make it’ but in our own way. Not chocolate fondue, ‘Rose flavored Rabri Fondue’ instead. Not cakes and fruits to dip, ‘Shahi Tukda Hearts’ and ‘Rose Water marinated Strawberries’ instead. This Valentines Day surprise your Valentine by making this lovely looking platter and enjoy together.

Rabri Fondue is made with milk, cream and white chocolate and flavored with rose syrup and cardamom. To make it quick and easy, I added fresh bread crumb that was left over from hearts. Shahi tukda is made in bite-sized heart shapes. Strawberries are marinated with rose water for lovely scent and flavor. Serve this Rabri warm or chilled as you like.

Ingredients:

Serves 2 people

Rose Rabri Fondue:

Milk: 1 1/2 cups
Cream: 1/2 cup (You can use Heavy Whipping or Half and Half)
Fresh Bread Crumbs: 3 tbsp (Made from left over bread after cutting heart shapes)
White Chocolate: 1/4 cup, chopped
Rose Syrup: 2-3 tbsp
Cardamom Powder: 1 tsp
Rose Water: 1 tsp
Pistachio: 2 tbsp, roasted and chopped

For Shahi Tukda Hearts:

White Bread: 8 Slices(Cut with 1″ inch sized heart cutter to give 3- 4 hearts in each bread)
Ghee: 1/4 cup
Sugar: 1/2 cup
Water: 1/4 cup
Cardamom Powder: 1/4 tsp

Rose Water Marinated Strawberries:

Strawberries: 10, cut into 1″ size
Rose Water: 2 tbsp
Sugar: 1 tbsp

Method:

For Rose Rabri Fondue:

In a wide non-stick pan, bring milk and cream to quick boil.
Add fresh bread crumbs and simmer for 10 minutes until it gets thick.
Add Chocolate and mix well. Bring to the consistency of ‘coating the back of the spoon’.
Switch off the flame and add rose water and cardamom powder.
Transfer to a bowl and top with some rose syrup and chopped pistachio.

For Shahi Tukda Hearts:

In a sauce pan, make a sugar syrup by heating sugar and water until sugar dissolves. Add Cardamom Powder and set aside.
Heat ghee in a pan and shallow fry heart shaped bread until golden from both the sides.
Dip the fried bread only for few seconds in the sugar syrup. The bread should not turn soft. It should be crusty and lightly coated with sugar syrup.

For Rose Water Marinated Strawberries:

Mix together, chopped strawberries, sugar and rosewater and let stand for 5 minutes.

For plating, serve Rabri warm or chilled as you wish in a bowl. Arrange hearts and strawberries in the platter along with skewers and have fun.

Fresh Turmeric & Lime Custard with Curried Caramel

Fresh Turmeric & Lime Custard with Curried Caramel

CUSTARD! Eggs, cream, sugar. What’s NOT to like?! Added bonus: for a lady & lover on a budget, this Valentine’s Day dessert doesn’t have to break the bank & more often than not, all three of those items are already in my cupboard or fridge. I have to admit, I got a juicer for Christmas & picked up a carton of fresh turmeric root which has been a delicious addition! That beautiful orange root really was the inspiration for this tastebud-busting dish. It pairs freshly grated turmeric & lime to pack a zesty punch, along with a bit of fresh squeezed lime juice that is tart but tempered by the creamy custard. CARAMEL! Butter, cream, sugar. I’m seeing a trend… very unlike me, I did not have any butter but I did happen to have a new (FIRST!) jar of ghee – even better! That got me thinking: how could I put a twist on this? The first thing that came to mind (and pretty catchy if i do say so myself), curried caramel. I actually googled it and could not find a single thing which was reminiscent of that. Now again, I’m working on a budget & also found out about this contest pretty last minute (lucky for me, I have Tuesdays off)! I would love the opportunity to make a curry mix from fresh herbs/spices but alas, I found myself scouring the bottle spice aisle. Nothing was cutting it for me (perfectionist much?) & then there it was – one lone bottle of “Chinese Five Spice Blend” BUT it had exactly the flavors I was looking for: anise, fennel, cinnamon, cloves, black pepper. A sweet, savory, spicy concoction. With jar in hand, I was off, homebound in excitement & anticipation of bringing this brain baby of a dessert to life! Speaking of, my taste-tester is on his way….

Ingredients:

Custard:
1 cup organic heavy cream
6 egg yolks
1/2 cup cane sugar
1/2 tsp himalayan pink salt
2 limes, zested (use one for juice)
2 Tbsp turmeric, grated

Curried Caramel:
1/2 cup organic heavy cream
1 cup dark brown sugar
4 Tbsp organic ghee
1/2 tsp Himalayan pink salt
1 Tbsp vanilla
1 Tbsp Five Spice Blend (anise, fennel, cinnamon, cloves, black pepper)
1/2 Tbsp nutmeg
1 tsp cumin

*candied ginger for garnish*

Method:

Zest both limes & turmeric into a bowl. Set one of the limes aside for later.

CUSTARD:
In a medium bowl: mix heavy cream, egg yolks, sugar & salt. Do not whip, just stir until yolks are mixed in. Pour raw custard into pot & cook over medium heat, stirring consistently for about 5 minutes to avoid egg cooking to pan. When it begins to thicken (you may see chunks, that’s okay as long as it’s not turning into scrambled eggs!), keep stirring for another minute or so. You can always lower the heat or take it off the heat to avoid overcooking. Once off the heat, stir vigorously or whip with a spoon to smooth out chunks.

Transfer hot custard into individual ceramic serving dishes, so it can begin cooling.

Grab that lime you set aside, cut in half & squeeze both halves into the bowl with lime zest & turmeric. Stir until it is all mixed evenly. Portion fresh mixture into serving dishes & fold gently into custard. Cover with foil & place in fridge to chill for 2 hours.

CURRIED CARAMEL:

In medium saucepan: mix cream, brown sugar, ghee & salt and continually stir over medium heat until sugar is dissolved & ghee is melted. It should be thicker at this point; add vanilla & stir for another minute or so and then remove from heat.

[I realized at this point that I had way more caramel than I needed for this recipe, so I split it in half & jarred some plain caramel for the future]

Pour half the caramel into a bowl and add Five Spice Blend (or homemade blend), nutmeg & cumin. Mix in well. Feel free to season to taste! Cover with foil & put in fridge to cool.

After 2 hours, remove custard & caramel from fridge. Stir caramel to warm it up a bit & make it ideal for drizzling. Top custard with caramel & candied ginger… and surprise your mouth!

CHEF’S NOTE: I wanted to show off the vibrant color of the custard in the pictures & went with drizzled caramel but found that the flavors in the caramel were overpowered a bit & there wasn’t enough caramel to go around bite for bite. I would definitely suggest covering the entire top with the caramel for a more balanced flavor experience. I mean, the caramel is crazy good enough to eat alone, which is also strongly recommended 😉

Valentine’s Day surprise inside cupcakes

Valentine's Day surprise inside cupcakes

On the outside it’s a normal cupcake, nothing much to talk about, but take a large bite and you’ll see a cute little heart staring back at you. Now that’s what I’d call ‘going that extra mile’ to make someone feel special. It would also come in handy if you’ve forgotten to buy a gift. It takes no more than an hour or two at most to put these together.

Addition of Rose extract up’s the Valentine’s Day dessert to a new high.

Ingredients:

112g of plain flour
2 tsp baking powder
1 pinch of salt
190g of granulated sugar
3 eggs
120g of plain yoghurt
1/4 tsp vanilla extract
105g of oil, flavourless (I used vegetable oil)
Red food colouring, or colour of your choice (I used poppy red gel colour paste)
1/4 tsp rose extract/ essence

Cream cheese frosting
280g of cream cheese
65g of icing sugar
1/4 tsp vanilla extract
117g of whipping cream, or double cream

Method:

Preheat the oven to 175C/gas mark 4. Grease and line a 9 in square baking pan with baking paper. Also line a muffin tray with liners

Whisk together the flour, baking powder and salt in a bowl until well combined. Take another large mixing bowl and add the sugar, eggs, yoghurt and vanilla extract

Using a hand mixer or wire whisk beat the mix till pale and well combined. While still beating, slowly add the flour bit by bit, mixing well after each addition and making sure no traces of flour is seen after the final addition

Finally, pour in the oil and using a rubber spatula fold it into the batter. Don’t mix it too vigorously. This may take a few minutes

Transfer 3/4th cup of this batter into another bowl and cover the remaining batter with cling film

Into the smaller batch, add the food colouring and rose extract mix evenly, adding more colouring if necessary. Make sure the batter is evenly coloured

Pour this batter into the prepared baking tray and bake in the oven for 10 to 12 minutes, or till a skewer inserted into the centre of the cake comes out clean

Transfer to a wire rack and after five minutes turn it onto the rack and leave to cool. The cake needs to be completely cooled to be able to cut, so I put it into the refrigerator for about 15 minutes to speed up the process

Using a heart shaped cutter (small enough to fit in a muffin hole) cut out around 8 to 9 hearts from the coloured cake. Keep aside

Pour around 1 tbsp of batter into each of the muffin holes and carefully place the cut out hearts into the centre of the batter, upright. It would help if all your hearts are facing the same direction. But to be on the safe side mark the muffin liners with a pen to know which direction the hearts face (so you’d get the shape intact when you cut into it)

Pour the remaining batter on top of the hearts slowly, so you don’t disturb them, until about 3/4th full. If they have moved a bit, using a skewer or toothpick just place them upright

Bake in the oven for 20 to 22 minutes or till the skewer inserted into the centre comes out clean. Transfer to a wire rack and cool completely before frosting

For the frosting, using the paddle attachment of a mixer beat the cream cheese and powdered sugar until just smooth. Don’t over do the beating or else the mix would become too loose and there’d be no way to fix it

Change to whisk attachment and pour in the vanilla extract and whipping cream. Whisk on high until stiff peaks form. Again if you overwhisk it, the mix would split and you need to start from scratch. So keep a close eye

Transfer into piping bags (I used a rose tip) and pipe away. You can use the remaining cake after cutting out the hearts for cake pops. You can use any cutter of choice in place of the heart and get a similar surprise! The cake can be easily doubled to make more cupcakes

Baked Yogurt Pudding With Pomegranate Coulis, Nuts & Roses

Baked Yogurt Pudding With Pomegranate Coulis, Nuts & Roses

This yogurt pudding is inspired by bhapa doi, a traditional Bengali dessert. Bengali cuisine is famous for their delectable desserts, most of which are made with a minimal number of ingredients, but incredible technique.
You can make your own bhapa doi easily at home by using a couple of simple ingredients like Greek yogurt and condensed milk. Luscious and delectable, this silky pudding has been jazzed up with a quick pomegranate coulis, crushed nuts and rose petals. Perfect for entertaining or for days when you simply feel like it!

Ingredients:

For the bhap doi (baked yogurt pudding),
Condensed milk – 1 cup
Greek yogurt – 1½ cups
Cornstarch – 1 tsp (optional)
Milk – 1 tbsp (optional)

For the pomegranate coulis,
Pomegranate – 1, large
Water – ¼ cup (or as needed)
Sugar – 2 tbsp (or as needed)
Lemon juice – 1 tsp
Cornstarch – 1 tsp

To garnish,
Almonds and cashew nuts – a small handful, crushed
Dried rose petals – a few

Method:

1. Bhapa Doi (Baked Yogurt Pudding): Pre-heat the oven to 300 deg.F. Boil water in a kettle for the bain marie. Line a large baking pan with a folded kitchen towel and set aside.
2. In a mixing bowl, whisk together the condensed milk and Greek yogurt. Mix the cornstarch in milk and add to the mixture. Mix well so that no lumps remain. (The cornstarch is totally optional, but it helps to ensure a well-set pudding).
3. Divide yogurt mixture among four large ramekins or 6-8 smaller ones. Place ramekins in the prepared baking pan and fill with hot water so that it comes halfway up the sides of the ramekins. (The kitchen towel under the ramekins will keep them from sliding around in the hot water.) Bake for 30-35 minutes or till yogurt is set, but slightly jiggly in the center.
4. Remove and cool down to room temperature. Cover and chill in the refrigerator for a couple of hours. This keeps well in the refrigerator for a couple of days.
5. Pomegranate coulis: Prepare pomegranate coulis when pudding is in the oven. Dissolve cornstarch in a tablespoon of water and set aside.
6. Remove the pomegranate arils and blend them together, reserving a few arils for the final garnish. Add enough water to make at least a cup of juice. Strain this mixture and discard the seeds.
7. Take pomegranate juice, sugar and lemon juice in a saucepan. Bring to a boil, add the cornstarch slurry and simmer for 4-5 minutes or till sauce thickens slightly. Taste and adjust sweetness accordingly. Cool this down and store in a glass jar in the refrigerator till needed.
8. Serving bhapa doi: To serve the pudding, top each ramekin with some of the pomegranate coulis, fresh pomegranate arils, crushed nuts and dried rose petals.

Notes:
1. Dried rose petals are available at specialty food stores. Or use fresh petals if you have access to organic roses.

Read full post: Baked Yogurt Pudding With Pomegranate Coulis, Nuts & Roses

Strawberry shrikhand eggrolls with chocolate drizzle

Strawberry shrikhand eggrolls with chocolate drizzle

Nothing says love like chocolate and strawberries, and then be it fried – that takes it to a whole different level of indulgence and yumminess. I’ve made these egg rolls with a variation of fillings but this strawberry shrikhand is hands down my favorite and everybody who has tasted these agrees! The slight tangy sweetness of the shrikhand and the rich chocolate drizzle makes this dessert a hard to let go treat and is visually enticing. I hope you will give this recipe a try and enjoy it this Valentines day or any day, because love doesn’t last just one day, or whenever you want to enjoy a crispy treat that oozes flavor as you bite into it.

Ingredients:

For Shrikhand:
Whole milk Yoghurt – 2 cups
Fresh strawberries – 1 pint
Confectioners’ Sugar – to taste
1 green cardamom – seeds removed and crushed/ground in a mortar pestle
For Chocolate Drizzle:
Semi-sweet chocolate chips – 1/2 cup
Heavy cream – 3 tbsp
To assemble:
Egg Roll wrappers
Water – few tablespoons
Oil to deep fry
Confectioners sugar’ – 1 tbs to sprinkle

Method:

To make shrikhand:
I would start at least six hours before I want to fry the egg rolls. Its best to use fresh yogurt (dahi) that’s not sour, Drain it in a sieve lined with few layers of cheese cloth. Once the water has drained, gather the hung curd along with the cheese cloth, place it in a dish and put in the refrigerator weighed down by something heavy (I used my mortar) for few hours to chill and set. Hull and chop the strawberries. Add some sugar to the strawberries and mash with a fork. If you like a smooth consistency to your egg roll filling, you can whiz the strawberries in food processor. Let the strawberries sit at room temperature.
Take the yogurt out of the refrigerator, add cardamom powder, confectioners’ sugar and the strawberries, making sure not to add to much liquid from the strawberries. You don’t want your shrikhand filling to be runny. Check for sugar and adjust to taste. Your Shrikhand filling is ready.
For Chocolate drizzle/dripping sauce:
Melt the chocolate and heavy cream in a double boiler or microwave until just melted and shiny. Set aside.
For Eggrolls:
Heat oil. Lay single eggroll wrapper on a clean surface, with a corner pointing towards you. Place about 1.5 tbsp of shrikhand near the bottom half of the wrapper. Fold the corner pointing towards you over the filling. Wet your fingers in water and paint rest of the edges. Fold in the opposite sides and roll the wrapper. Seal the tip with some more water. Repeat with other wrappers till the filling is gone. You should get at least 12 egg rolls. Keep the rolled egg rolls covered with a damp kitchen napkin. Once you are ready to fry, gently leave the egg rolls in the oil and cook till golden brown on all sides, turning a few times. Place on paper towels to drain.
To Serve:
Drizzle the egg rolls with chocolate sauce and sprinkle some confectioners’ sugar. Enjoy with some chocolate dipping sauce and/or whipping cream.

Misti Doi Cheesecakelets with Raspberry and White Chocolate (Baked Yogurt Mini Cheesecakes)-Eggless

Misti Doi Cheesecakelets with Raspberry and White Chocolate (Baked Yogurt Mini Cheesecakes)-Eggless

Red berries and Chocolates are obvious for Valentines Day desserts. But lets put them in a Desi way by making our Indian Cheesecake like dessert -Bengali Misti Doi. Smooth, luscious Misti Doi is perfect for making cheesecake. This cheesecake is made in mini sizes to be perfect for two. These are quick and easy to make, made of healthy ingredients, light and delicious to taste. Use chocolate flavored biscuits for the base, white chocolate flavored misti doi for first layer and raspberry flavored misti doi for second layer. Top it off with fun chocolate carvings in heart shape and enjoy.

This recipe is inspired from here :Passionate About Baking

Requires 4 mini tart pans with removable base of 3.5″ x 0.63″size or can make one 6″ tart pan.

Ingredients:

For Raspberry Sauce:

Frozen or Fresh Raspberry: 1/2 cup
Honey: 2 tbsp
Lemon: 1 tsp
Water: 1/2 cup
Cornstarch: 1 tsp

For Biscuit Base:
Chocolate Flavored Biscuits: 10-12 (I used Bourbon Biscuits)
Melted Butter: 2 tbsp

For Misti Doi Cheesecake:

Hung Yogurt: 1/2 cup (Take 1 cup of regular yogurt and hung in muslin cloth for 6 hours at least, in refrigerator)
Regular Yogurt: 1/4 cup
Condensed Milk: 1/2 cup
Raspberry Sauce: 2 tbsp (Can also use store bought Raspberry Preserve)
Melted White Chocolate: 2 tbsp
Vanilla Extract: 1/2 tsp

For Chocolate Hearts:

Dark Chocolate Chips: 1/4 cup
White Chocolate Chips: 1/4 cup
Frozen Raspberry: a few

Method:

For Raspberry Sauce:

In sauce pan, bring raspberries, honey and water to boil.
Make a slurry of cornstarch and little water and add to the sauce pan and let the sauce thicken.
Let it cool, blend and sieve. You can store this sauce in air-tight bottles for many weeks in refrigerator.

For Biscuit Layer:

In blender, add roughly crushed biscuits, melted butter and pulse until it resembles wet sand.
Grease the tart pans with oil and press the biscuit mixture evenly into the base of the tart pan.
Chill in refrigerator for 30 minutes.

For Misti Doi Cheesecake:

Preheat the oven to 350F/180C
In a bowl, whisk together hung yogurt, regular yogurt, condensed milk and vanilla extract until smooth.
Transfer the half of the mixture to another bowl.
In first bowl add melted white chocolate and in second bowl add raspberry sauce.
Pour the first mixture on the biscuit layer and then the second mixture.
Pour one or two drops of raspberry sauce on the top and with a tooth pick make swirls.
Bake them for 10 minutes or until the top is set when touched. If not set, bake for more 5 minutes.
Let chill for two hours at least or 6 hours for the best results.

For Chocolate Hearts:
Layer a tray with wax/parchment paper.
Melt the dark chocolate in microwave or double boiler until smooth.
Pour it in zip-loc bag and make a small hole with scissors. Quickly draw heart shapes on the wax paper. Press some crushed raspberry on the top of the chocolate.. Refrigerate until set.
Similarly, melt white chocolate and make heart shapes and swirl with raspberry sauce.

For Plating:

Brush some raspberry sauce on the serving plate, place one cheesecake on it and serve with fresh berries and chocolate hearts.