Falooda Kulfi – A little something from the streets of India

If you grew up in India like me then I’m sure you must have memories of Indian summer and if you remember that summer, then there must also be kulfi somewhere there. Well! I have some fond memories of those summer evenings. In our town, like any other town of India, we had a street where all these vendors would come and line up in the evening selling street food. Aloo chat, gol gappe, sugarcane juice and then there were Falooda Kulfi stalls!

IMG_1502

That was the favorite place to hang out for everyone. Our dad would take me and my little brother there. We would go in our Maruti 800 car, which by the way was my dad’s third child. He would park it as close possible to the kulfi stall so that we could sit on the roof of the car and eat Faluda Kulfi. Did you also play this game with your sibling where whoever eats last wins? NO? I guess we are were the crazy ones ! My brother would always lose and then I would eat my kulfi little by little just to piss him off. Ah, good times!

IMG_1524

I thought that summer is almost coming to an end and I haven’t made kulfi yet this season. So like every summer I call my mom  to ask for the recipe of Faluda Kulfi. And she goes… Cook milk in a large pot. Stir it and stir it and stir…until it reduces to half and… I said to myself  “this summer is very different from the rest of the summers that I’ve had in the past”. This summer I have an 11 month old who will come and cling on to my leg if I stood in my kitchen stirring and stirring and stirring…
So I found a shortcut. This shortcut is super short and super yummy! I can only say that try this recipe and if you think its not too ”low cal” for you then go run a few miles but then when you come back and eat this kulfi you sure will thank me.

IMG_1473

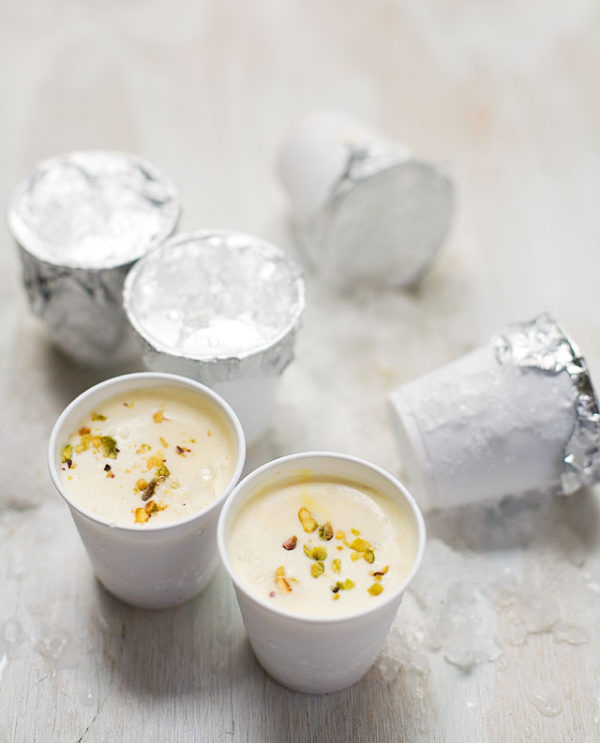
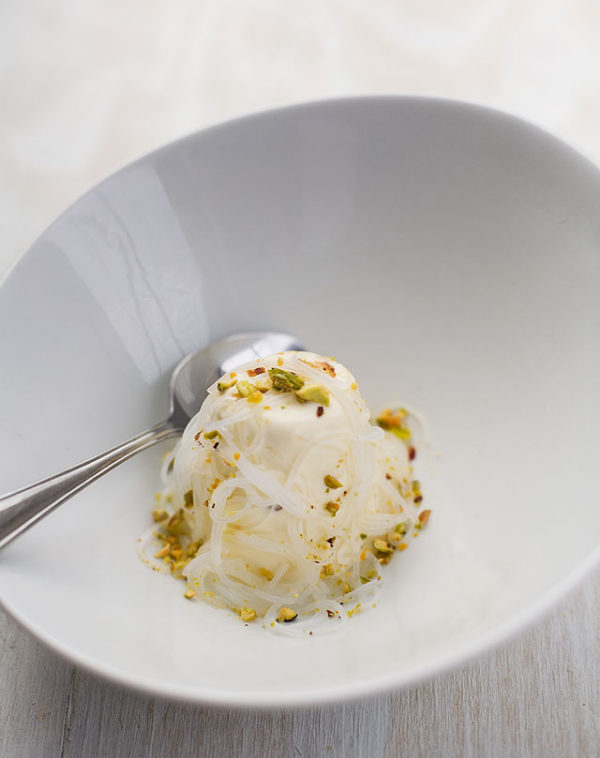
A little something: So let me tell you a little about Fallooda Kulfi which is nothing but an Indian ice cream. Kulfi was traditionally prepared by evaporating sweetened and flavored milk by slow cooking, with almost continuous stirring to keep milk from sticking to the bottom of the vessel where it might burn, till its volume was reduced by half, thus thickening it, increasing its fat, protein and lactose density. It has a distinctive taste due to caramelization of lactose and sugar during the lengthy cooking process. The semi-condensed mix was then frozen in tight sealed molds that are then submerged in ice mixed with salt to speed up the freezing process. The ice/salt mix, along with its submerged kulfi molds, is placed in earthen pots or matkas (hindi) that provide insulation from the external heat and slow down the melting of ice and because they are made in matkas or pots they are called Matka Kufi. Kulfi, thus prepared by slow freezing, also renders a unique smooth mouth feel that is devoid of water crystallization. Its then garnished with nuts or falooda which is nothing but boiled vermicilli dipped in rose water.

But we are not doing all that. We will just get all the ingredients, mix them up and freeze.

Ingredients:

collage1

For Kulfi:
1 (16oz) cup heavy cream
1 (14 oz) can of evaporated milk. If you want you can use low fat.
1 (14 oz) can of condensed milk
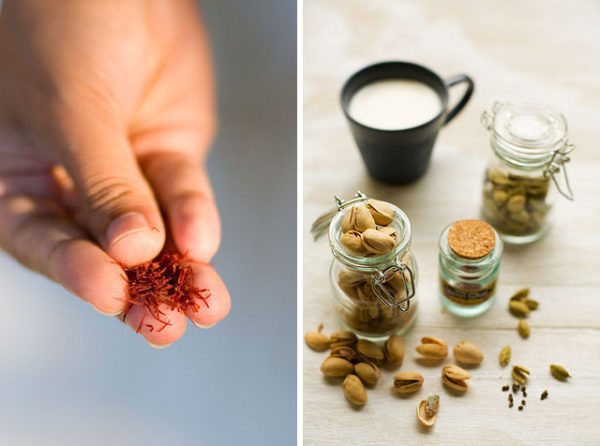
8-10 strands of saffron (It is sort of a culinary jewel and I would say a must in kulfi which you can find it in any Indian/international store. I would say buy mexican saffron, they are cheaper than the high quality Indian ones.)
Seeds of 5-6 cardamom pods
2 tsp sugar
2 cups cool whipped topping
1/2 cup coarsely crushed nuts. Divide into two parts. Coarsely grind half of it. ( I used pistachios but you can also add almonds, cashews. And you can powder it all if you want as well I like it when I can get them in small bites )

Method:

With a mortar and pestle, grind together sugar, saffron and cardamom seeds. Set aside.
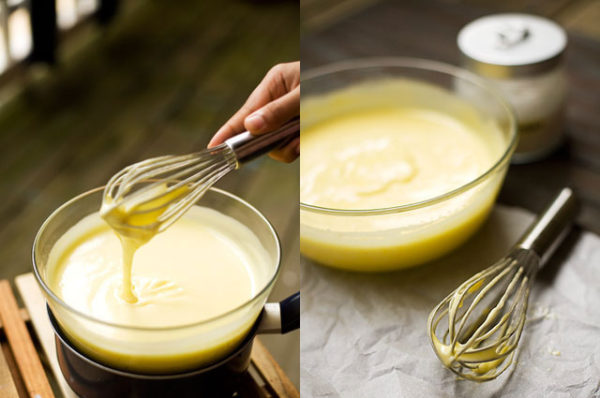
In a large mixing bowl, combine sweetened condensed milk, evaporated milk, heavy cream and cool whip.
Using a whisk gently mix everything together. You need to be gentle otherwise cool whip melts very easily making the mixture more watery and you want it light and airy.

Stir in ground pistachio powder.
Add in saffron, sugar, cardamom mixture and coarsely crushed  nuts. Mix well.

collage2

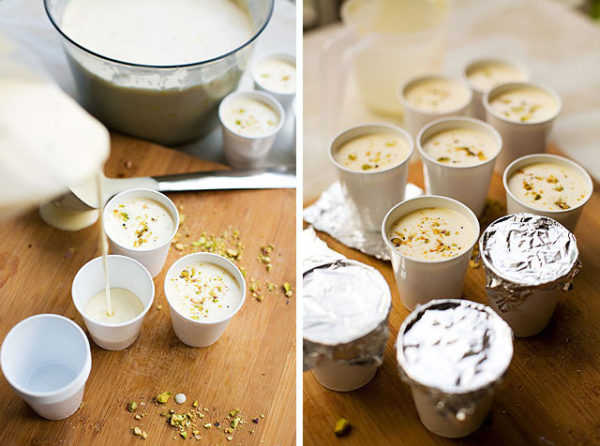
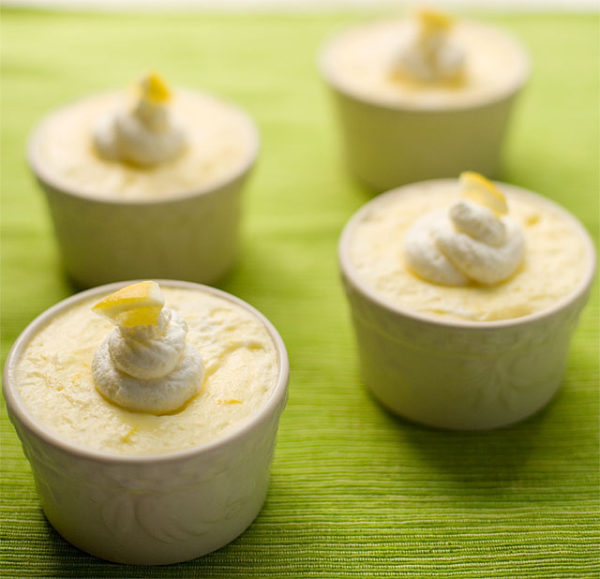
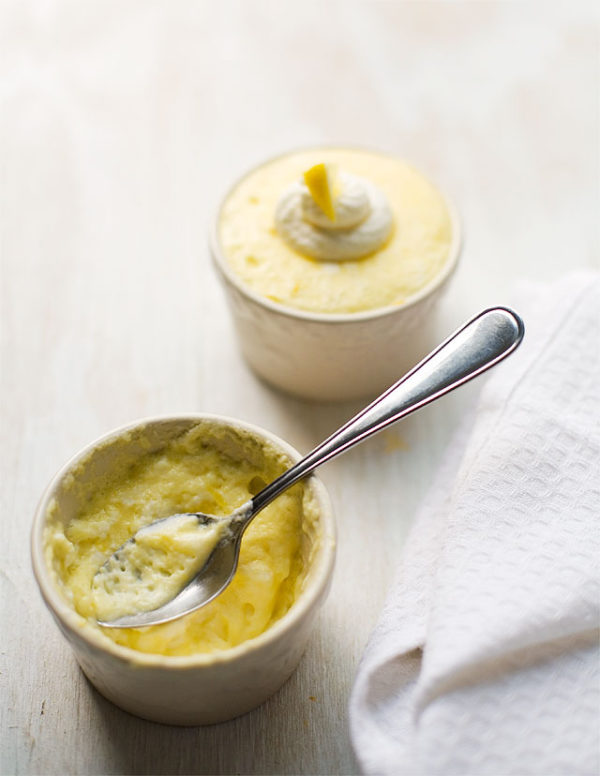
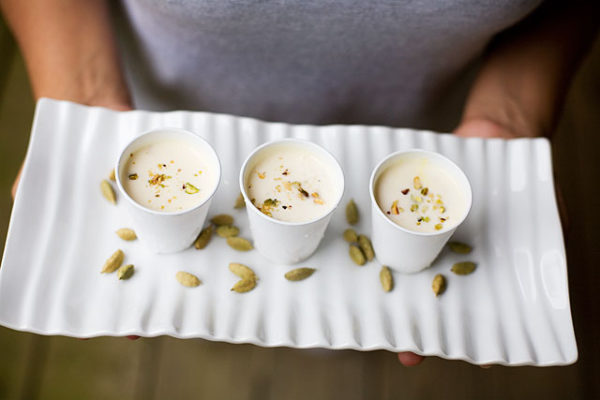
Pour mixture into small dixie style plastic cups and cover with plastic or aluminum wrap. If you don’t have cups just pour it all in a bowl or a deep dish and cover it with a plastic wrap touching the surface of the liquid.
Freeze Kulfi for at least 4 – 6 hours, preferably overnight.
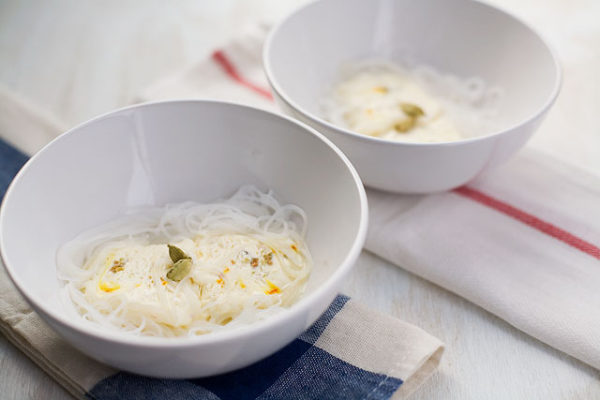
IMG_1490

For Falooda:

9 tablespoons rosesyrup
3 ounces vermicelli

Method:

Boil the vermicelli, drain the water out of it, and let it cool for some time (it’s best to refrigerate it by putting it in a container and snapping its lid in place so it won’t get stiff by cooling).

IMG_1514

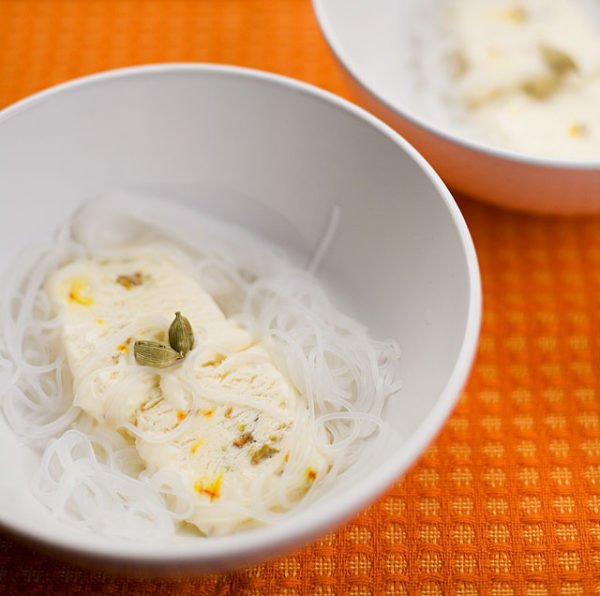
Before serving take out the kulfi glasses. Rub them between your hands to warm the sides and if you have used a bowl stick it inside warm water for a few seconds. Flip and the kulfi will come out. Garnish with some falooda and rose water and serve. You sure going to get a little taste of India in every single bite that you take!

Lemon Mousse

IMG_1289

Today I want to share a secret love of mine which I’ve decided not to keep a secret anymore. I told all about it to my husband as well and I think he is now fine with it. So the thing is that I think I’m in love with Ina Garten. There.. I said it! Yes, if I could I would marry Ina right now! Her soft voice, that friendly smile and out of the world cooking mesmerizes me all the time. I mean what else does a person want?

IMG_1297

She was the one who taught me my first chocolate cake which now people kill to have a bite of ( Ok not really kill, but it tastes decent!) and now she taught me how to make my first lemon mousse. And I can’t even tell you how delicious it is. I mean Its Good!

collage1

Since I tasted that lemon curd for the first time which one of my dearest friend made for her own baby shower I’ve become a big fan of lemon desserts. So recently when I saw one of Barefoot Contessa’s episode where Ina made a lemon mousse I thought I gotta try this recipe. I mean lemon and mousse. How can you go wrong with that? I tried it for the first time, I loved it. Then I made it again with a few changes in the recipe, I loved it again. So when I thought of making it for the third time in the same week, I decided I have to share it with you.

IMG_1208.2

I tried making a low fat version of the same recipe and it actually tasted pretty good. It was not very different from the original ‘not so low fat’ one but I felt that mousse asks for that creamy texture which was not really happening when I made it low fat. So if you are not planning on making it three times in a week, you can certainly go for this recipe.

IMG_1292

Ingredients: Adapted from Ina Garten’s Barefoot Contessa.

3 extra-large whole eggs
3 extra-large eggs, separated
1 cup plus 2 tablespoons sugar
2 teaspoons grated lemon zest
1/2 cup freshly squeezed lemon juice (4 lemons)
Salt
1 cup heavy cream

Ina also used 1/2 cup bottled lemon curd which I didn’t. For me the mousse was lemony enough without it but if you want yours extra lemony, you can add the lemon curd. When? I’ll let you know.

Method:

Break three eggs in a heat-proof bowl. Now separate the remaining three eggs and add the yolks into the same bowl saving the while for later. Also add 1 cup sugar, the lemon zest, lemon juice, and a pinch of salt. Place the bowl over a pan of simmering water and cook, stirring constantly with a whisk.
This is the time to work those muscles a bit because you have to whisk, whisk and whisk until the mixture is thick like a pudding. You can also switch to a hand mixer once the liquid starts getting thick.

collage2

Take off the heat and set aside for 15 minutes.
Cover with plastic wrap directly on the surface and refrigerate for 1 to 2 hours, until completely chilled.
Now take out the saved egg whites from before, add a pinch of salt and place it in the bowl of an electric mixer fitted with the whisk attachment. Beat on high speed.
Add the remaining 2 tablespoons sugar and continue to beat until the whites are stiff and shiny.
Add it to the bowl with lemon custard and fold very carefully or just wait for the whipped cream.
Place the cream in the same bowl of the electric mixer fitted with the whisk attachment and beat on high speed until the cream forms stiff peaks.
Fold it all together with the lemon custard. If you want to add lemon curd, this is the time to do so.
Chill for a couple hours before it all vanishes.

IMG_1304

Pasta in creamy tomato sauce with pumpkin seeds

I love Italian food! I love eating it, I love cooking it and I even love just looking/staring at it! I love the layers and layers of flavor in it. Its complex but still there’s a straightforwardness to it, just like Indian food. You can smell the rich culture through the food. I’m not sure whether what we get here in this part of the world is what real Italian food tastes like but I would love to one day go and eat on the streets of the country where it all started!

IMG_1110

I was speaking with my friend the other day who happens to be a pastry chef and has just come back from a dreamy trip to Italy. She was talking about olives and wine and the picture perfect villages of Italy and how life just doesn’t get any better than that. Within minutes, I found myself dreaming and nearly transported to Italy.

IMG_1057

I couldn’t stop thinking about it for days and knew that somehow it would translate to me doing something different in the kitchen. So I decided to make some pasta.

collage

My fridge was not in a very good mood though because I didn’t put a lot into it lately so it was not cooperative. I couldn’t find anything interesting and I sort of gave up on the idea and that’s when I found some pumpkin seeds in the pantry. Now are pumpkin seeds in a pasta unusual? I don’t know. But do they play well together? Definitely! I made a Pasta in creamy tomato sauce with pumpkin seeds in it. It was creamy and decadent and quick.

IMG_1118

Here’s how I made it:

Ingredients:

1 pound pasta of your choice (I used spaghetti)
1/3 cup of pumpkin seeds
2 medium size tomatoes
1 tbsp red pepper flakes
1 tbsp parsley (chopped)
1/2 cup half & half (I wanted to make it rich for my little one so I used half n half but for the figure conscious, normal milk can be used just as well)
1 tbsp flour (optional)
Parmesan cheese (optional)
olive oil
2-3 cloves of garlic (minced)
Salt

Method:

Boil a pot of water. Throw in salt (about 2 tbsp) and olive oil (about 1 tbsp) and then the pasta. Let it cook until al dante.
In the meantime pour 1 tbsp olive in a pan and add minced garlic and red pepper flakes. Turn on the heat to medium. Wait for the garlic to slowly turn light golden.
Puree the tomatoes and pumpkin seeds in a blender making a nice smooth paste. Add the puree into the pan when garlic is golden.
Stir occasionally. Let it simmer until all the liquid from the tomato is gone.
Now add half n half and let it simmer. (If you are using milk then after adding it let it simmer as well and then add a tbsp of flour and whisk thoroughly so that there are no lumps formed.)
Once the sauce is thick enough according to your choice, turn off the heat. Mix it together with the pasta.
Garnish it with some chopped parsley and if you want then some shaved Parmesan cheese on top.
Enjoy!

IMG_1123

New idea & a quick recipe

You must have heard it a gazillion times that a picture speaks louder than words and writing this right now is making me feel cheesy already. But I just want to share something with you today.

IMG_0950

So I have probably not shared this with you earlier but I was not really a camera person before I started this blog. I love food and anything related to it but I never thought that food could lead me to something like photography. My husband inspired me to pick up the camera and try and make my food look pretty and now I’m loving every bit of it. I love picking up the camera and freezing some of the most beautiful colors of life and nature, be it food or a dry leaf in my backyard or my daughter’s beautiful brown eyes. There’s also something else that this blog has helped me love and that is sharing what I want with you strangers who in some weird way are no stranger. So I want to combine these two new found loves of mine and try and take it one step forward. I was thinking of starting a series ‘Wordless Wednesday’ which will be in every way similar to the wordless wednesday you’ve heard of. I would choose one picture every Wednesday from the past week and share it with everyone. What do you think? I hope you’ll like it and even I hope that I’d be able to make it happen!

IMG_0920

Ok! so now the recipe.. If you meet me here regularly then by now you must know that I am a stay-at-home mom who struggles to be a super mom and do every thing she thinks she’s supposed to do. In the middle of all the craziness I have to deal with, its almost impossible to fix a lunch for myself when there’s no help. Because of that I try some new recipes which are quick, easy to fix and I don’t need to stand in front of the pot stirring. Here’s one such recipe I want to share with you today. ‘Peppery Rice’. 

IMG_0871

Ingredients: 

1 cup Basmati rice
10-15 peppercorns coarsely crushed
1/2 cup chopped carrots (optional)
1/4 cups frozen corn (optional)
1 cup chopped red onion
salt to taste
2 tbsp olive oil
2 cups of water

IMG_0917

Method:

What I do is soak crushed peppercorn in olive for a few minutes and then pour oil in a pan and then turn on the heat to medium. That really infuses peppercorn’s sweet and peppery flavor in the oil. If you don’t have that much time or patience, just heat oil in a thick bottom pot, throw in crushed black pepper then onion  and fry onion until its golden brown.
Add carrots and fry for about a minute and then add thawed corn (adding veggies is optional, I do so sometimes in order to add vegetables to my diet. If you want you can omit them).
Now add black pepper, rice and salt and add water, mix them well. Bring it to a nice boil and then cover with a lid and turn heat to low. Let the rice cook for about 15- 20 minutes or until its cooked.
You can garnish it with cilantro and your Peppery Rice is ready to eat..
It can be served with raita or green chatni although I eat it as is.

Veggie Parathas

IMG_0829

I took my little monster to the doctor this Friday. Nothing major, just the same old reason which has been troubling every parent since eternity. My kid doesn’t eat very well! She would eat anything in the world except her food and that’s the reason she’s not gaining weight so her doctor wants to keep a close eye. As it turns out, planning and cooking food for my 11 month old is way too difficult for me than planning a menu for a big party. She hates vegetables, wouldn’t eat meat if not cooked in a certain way and her favorite thing to do with cheese is throwing it around. And did I tell you that the little one wouldn’t touch food that could make her cute little hands dirty? Yup, we have a nosy princess in our house!

IMG_0840

So I have been experimenting a lot lately and the good part is I get some good recipes out of it. One of my friends gave me this paratha recipe and I sort of fell in love with it mostly because it has so many vegetables in it and ofcourse because it tastes wonderful.

collage1

The part of India where I come from Roti/Paratha is kind of a staple. I have some fond memories of us sitting and drooling, holding our plates and staring at the tava (skillet) while my mom would cook each paratha on low heat until perfection. So you can say that we take our parathas a little too seriously. But now when I’m cooking I have a little problem with adding oil/fat to anything and probably that’s also the reason why I loved this paratha recipe.

Ingredients:

1 bunch spinach
1 cup grated carrots
1/2 cup shredded paneer/cottage cheese
1/2 finely chopped onion
1 cup boiled and mashed potatoes
2-3 cloves garlic
1 tbsp ginger paste
1-2 green chili minced (if you are making it for kids you have to go easy on it)
1 tbsp fennel seeds
1/2 tbsp ajwain seeds (this again is good for the kids as its very good for digestion so I added them, you can totally omit them if you can’t find them)
1 1/2 cups of whole wheat flour
3/4  cups Semolina/ Cream of wheat
Salt
Oil spray
You can grate and add as many vegetables as you want. I used what I had handy.


Method:

IMG_0776

Grate carrots and paneer and chop the rest of the vegetables. Mix them all together in a large bowl and add the rest of the ingredients.

IMG_0787

Mix everything all together with your hand applying a little pressure and try to bind them all together. You don’t want to add any water because vegetables themselves will leave a lot of water, enough to make a dough out of it. Then divide it into smaller balls about 2.5 – 3 inch in size.

collage2

Using a rolling pin flatten them just like you roll a roti (if you want to see a step by step recipe for a roti you might want to go here). Vegetables lose a lot of water and that can loosen the dough fast so you must dust it frequently while rolling. This can be the part where you need to be patient because it can be a bit of a struggle!

IMG_0812.2

Nicely heat a tava or griddle. Put a paratha on the griddle. Do the first flip after 20-25 seconds. As soon as the first flip is done, spray a bit of oil on the top to spread well over the surface of the paratha. Flip again in 30 seconds and spray oil on this surface too. The paratha is done when both sides are crispy and golden brown. Try not to overheat the griddle or the parathas will brown from outside and stay undercooked, so once the griddle is hot enough turn the heat to medium.

Serve with chilled yogurt and your favourite pickle or chutney.

Sprouts Salad

13

IMG_0415

A‘s childhood friend and his wife who happen to be a very close friends of mine as well were visiting us for the weekend. Remember I was in California visiting some friends with my little monster? Yeah! now they were visiting us. They missed junior so much that they had to fly all the way from the west coast to east. How sweet is that?

IMG_0372

My husband and his friend have known each other and have been the best buddies since he can’t even remember when. Probably 3rd grade and by luck they’ve been together since. They completed their school together, then they went to the same college, then they moved to the US at around the same time and that too to the same city. Then we got married and guess what?? Our weddings were just two days apart from each-other. I and his better half also moved to the US at the same time and now both of us ladies have become close too. As cheesy as it might sound, I guess nature has helped a lot in keeping the two families so close.

IMG_0392

They too are a big lover of food just like we are. So we ate this past weekend and we ate a lot! From traditional Indian to Thai to Italian to spending a whole day barbecuing and how can I forget dessert? Chocolate cakes and strawberry cheesecake parfaits!
We tried a lot of new recipes and my new Kitchen Aid stand mixer helped us all along. But on hindsight we ate so much that by Monday morning everyone gave up and wanted something light and cool. I always have some homemade sprouts in my kitchen I guess for the days like this. So this time I had some moong daal (mung bean sprouts).

IMG_0425

We grabbed whatever veggies were left in the refrigerator, made some lemon vinaigrette, tossed them all together and a nice, light and healthy breakfast was ready. Although we still ate it like we ate the rest of the weekend – ‘a lot of it’! But you just can’t resist, can you?
So here’s the recipe to our quick fix Sprout Salad.

Ingredients :

For Salad:
2 cups Mung sprouts
1/4 cup chopped red onion
10-15 cherry tomatoes (cut into two)
1 Jalapeno pepper minced
1 orange (peeled and sliced)

For the lemon vinaigrette:
Juice of 1 lemon
1/4 cup olive
1 clove of garlic
1 tsp salt
1/2 tsp coarsely ground black pepper

IMG_0390

Method:

The only part that’s a bit tricky here is to make the sprouts. Which if I think again is not that tricky actually.
Take a cup of mung beans or any other bean or lentil you want and soak them in water overnight. Next morning clean them with fresh water.
Take a damp cheese cloth or any piece of cloth which is just thin enough for the air to pass through.
Put the beans into it and tie all the ends together using a string /rubber-band. Just make sure that you leave enough space in the bag for the sprouts to grow.
Place them either in a dark place like a bowl with a tight lid and into the oven or I just hang them near my kitchen sink so that I can sprinkle some water every-time the cloth dries out.
It’ll take a day or sometimes two for the sprouts to grow.

For the lemon vinaigrette:
In a bowl add freshly squeezed lemon juice, minced garlic, salt and pepper. While whisking it all together, slowly add olive oil to it and combine all the ingredients together.
Now for the salad, mix all the ingredients together in a salad bowl and pour the lemon vinaigrette. Toss them all together and serve.

IMG_0419

Palak Paneer for my birthday

Alright! so yesterday was my birthday.. Is it bad if I’m not all excited and jumping around? Gone are the days when it was impossible to understand that why can not your birthday be a national holiday and you used to start the countdown from a month before. I guess after celebrating a certain number of birthdays you sort of wish if you could just push the date a little further, that’s exactly the age I’ve reached.. Boohoo!

IMG_0667

Anyways this one was definitely a special one for me because this was my first birthday as a mommy and ‘A’ made every effort for me to have as much fun and relax as much as I can. He got me some gorgeous roses and my favorite cake and cooked a nice dinner for the three of us and  guess what I got as a birthday gift??
A Kitchenaid!! That made my day right there.

IMG_0509

For dinner he exceeded all my expectations. He made my favorite Palak Paneer with butter naan, rice pulav and dahi kachumbar/ mixed vegetable raita. How better can a birthday get? Spending it with the most gorgeous people in your life and having the most gorgeous dinner.
Although  I did not make this palak paneer myself but still I’m taking the liberty of sharing ‘A’s‘ recipe here (I did ask his permission  BTW).

IMG_0466

Palak Paneer one of my all time favorite Indian foods, not only because it tastes out of the world but also because its one of those dishes which is rich but you still you don’t feel guilty eating it. Palak which is hindi name for spinach doesn’t need any introduction and Paneer is fresh Indian cheese which rich in protein.

IMG_0494

If you don’t find paneer due to any reason Queso blanco or Queso fresco is the closest thing you can find although unlike Paneer they are lightly salted. Cottage cheese is also another good alternative. BUt I’m sure you can find paneer easily if you know of any Indian food market.

IMG_0453

Palak or spinach gives the dish a  beautiful green color and paneer and cream gives it just the right amount of richness needed for a perfect Indian curry and when you will taste it you will know exactly what I’m talking about.
Here’s the ingredients and the method how A made it.

Ingredients:

1 pound fresh green spinach
8 oz packet of paneer cut into cubes
1 cup red chopped onion
1 cup tomato pureed
3-4 cloves garlic
1 1/2 inch ginger
2-3 thai green chili
1 tsp fennel seeds
3-4 cloves
1/4 cup heavy cream or 2 tbsp sour cream
2 tbsp coriander powder
1 1/2 tsp curry powder
3 tbsp olive oil/cooking oil
Salt

Method:

Boil spinach in a big pot adding fennel seeds and cloves to it. Let it cool and then blend it in a blender. Save the water in which you boiled your spinach.
Grind onion, ginger, garlic and thai chili making a thick paste.
Heat oil in a medium sized pot and add the ground paste of onion, garlic and the other ingredients.
Cook everything until the paste starts changing color from light pink to darker pink and then slowly towards golden. Then add salt.
Stir for a minute and you’ll see onion loosing some oil that’s when you have to add coriander powder & curry powder.
Mix it all together and add pureed tomato.
Cook everything until the paste is thicker and all the liquid from the tomato is cooked. Then you have to add the pureed mixture of spinach, fennel seeds and cloves. Fennel seeds and cloves here are the secret ingredients that I add to my spinach. This gets rid of the spinachy (if there’s any word like that) smell of the greens.
Don’t forget to turn the heat to lowest because as soon as spinach hits the hot pot it would start bubbling and jumping. So continuously stir it on low heat for a minute or two and then cover it with a lid to let it cook. If you think the gravy is too thick for you add a ladle or two of the saved boiled water from the spinach and then cover it.
In a separate sauce pan boil salted water, turn off the heat and then add the paneer cubes. Let it stay in hot water for 2-3 mintes while your curry is being cooked. This helps drain all the excess fat from the cheese making it softer.
Then add cream or sour cream whatever you are using to the spinach curry. Mix well.
Drain our paneer cubes from the salt water and add it to the gravy.
Give it one quick boil and your Palak Paneer is ready. We ate it with some char grilled butter naan.

IMG_0615

The Versatile Blogger Award

7
versatilebloggeraward

So I get an award! M from Bettycrapper gave away an award to me. A versatile blogger award. How cool is that? Well! she did that about a month back and I was busy/lazy enough to accept it. So today after putting my little monster to bed I decided to thank M for her graciousness.

Thanks M for appreciating whatever good or bad I try to do here.

The guidelines for accepting this award are…
  • Thank the person/people who gave it to you.
  • Tell 7 things about yourself.
  • Pass the award on to 15 bloggers, whom you have recently discovered, and think are fantastic.

So here’s some random 7 things about me

  1. I’m crazy for Italian food.
  2. I love traveling but I hate flights.
  3. I’m a big time Food Network junkie
  4. I buy books but barely ever read them
  5. My birthday is 12th of july (its right around the corner..yay!!)
  6. Everyone has a favorite color or place or song.. I don’t think I have one.
  7. It took me hours to write these random things about myself and now I can’t come up with the last one.

My list of favorite blogs changes everyday. This is what I’m driven to right now in any random order.

  1.  Pickycook
  2.  Forkspoonnknife
  3.  Mybakingaddiction
  4. Almostbourdain 
  5.  Veggiebelly
  6.  Cannelle-vanille
  7.  Yasmeen-healthnut
  8. Tartelette 
  9.  Tasteslikehome
  10.  Sophisticatedgourmet
  11.  Bakerella
  12.  Joythebaker
  13.  Mirchmasala
  14.  Zoomyummy
  15. Morethanamountfull


Vegetable Poha Recipe

How does a nice romantic breakfast on a beautiful saturday morning sound, specially while your baby is fast asleep? Well! to me that sounds like the best morning ever..
When you have a super energetic 10 month old then breakfast is the last thing on your list let alone a romantic one but yesterday we got lucky. Little one went to bed just on time so that we could sit and relax and have a nice breakfast together. I made Vegetable Poha,one of my favorite breakfast not only because its delicious but also because you can fix it in minutes and trust me when you have a child at home you know what that means!

IMG_0344

I’ve spent a very big part of my student life in a small city named Indore in Central India or the state of Madhya Pradesh and Pohe (as they call it there) was something we used to eat every morning for breakfast and by that I  really mean every morning! Pohe with lots of sev namkeen on top of it accompanied with Jalebi is favorite breakfast for people there. You can find it anywhere and everywhere from street vendors to any good restaurants. Although nothing can compare to those early morning breakfasts with friends, standing on roadside with Pohe in hand but I often try if not to relive then to remember those days.

What is Poha?

Poha is a traditional Indian breakfast dish made from flattened rice, typically served with a variety of spices and vegetables. It’s a light and nutritious option, popular across India for its simplicity and versatility.

IMG_0547

Is Poha Healthier Than Rice?

Poha, is often considered a healthier alternative to regular rice due to its minimal processing and higher nutrient content. Unlike polished white rice, which has undergone extensive milling, poha retains more fiber, vitamins, and minerals.

Additionally, poha is lower in calories and carbohydrates, making it a suitable option for those looking to manage their weight or blood sugar levels. Its lighter texture also aids in easier digestion. However, the health benefits ultimately depend on the overall ingredients and preparation method, as adding excessive oil or sugar to poha dishes can negate its nutritional advantages.

How To Make Poha At Home?

The beauty of making Poha at home lies in its versatility and simplicity. With just a handful of ingredients, you can create a flavorful and satisfying breakfast dish that’s perfect for any morning. Whether you prefer to add a variety of vegetables like carrots, peas, and bell peppers, or keep it simple with just onions and potatoes, the choice is yours. Adjust the spices according to your taste preferences, adding more chili for extra heat or reducing the sugar for a less sweet flavor. With a few basic cooking techniques and a touch of creativity, you can easily whip up a batch of delicious Poha to enjoy with your family and friends, making every breakfast a delightful culinary experience.

I am sharing a simple recipe of how I make Vegetable Poha at home.

Vegetable Poha Recipe

Savor the aromatic delight of Vegetable Poha, a flavorful Indian breakfast dish featuring tender flattened rice cooked with a colorful array of vegetables and aromatic spices

Course Appetizer, Breakfast
Cuisine Indian
Keyword Appetizers, Flatenned Rice Recipe, Indian Breakfast, Quick breakfast
Prep Time 30 minutes
Cook Time 20 minutes
Servings 4 people
Author Prerna Singh

Ingredients

  • 2.5 TBSP cooking oil
  • 1 tsp black mustard seeds
  • 8-10 no. curry leaves (preferably fresh)
  • 1/2 cup potato chopped
  • 1/2 cup cup carrots chopped
  • 1/4 cup green peas (fresh or frozen)
  • 1 no. thai chili
  • 1/2 cup onion chopped
  • 1 tsp turmeric powder
  • 2 tsp sugar
  • Salt to taste
  • juice of 1 lime

Instructions

  1. Wash the Poha: In a large sieve or strainer, rinse 2 cups of thick poha under cold water. Drain excess water and set aside.

  2. Prepare Ingredients: Finely chop 1 Thai chili, 1/2 cup carrot, 1/2 cup potato, and 1/2 cup onion. Measure out 1/4 cup sweet green peas.

  3. Heat Oil and Temper Spices: Heat 2 tbsp of oil in a pan over medium heat. Once hot, add 1 tsp of black mustard seeds and curry leaves. Allow the seeds to splutter.

  4. Cook Potatoes: Add the chopped potatoes to the pan. Stir and cook for about 5 minutes until they start to soften. If using fresh, add carrots and peas in this step as well.

  5. Add Carrots and Peas: Add the chopped carrots and sweet green peas to the pan. Stir well and cook for another 4-5 minutes until the vegetables are tender.

  6. Incorporate Onions and Spices: Add the chopped onions to the pan. Stirring occasionally, cook until the onions are translucent. Then, add 1 tsp of turmeric powder, 1 tsp of sugar, and salt to taste. Mix well.

  7. Combine with Poha: Add the washed poha to the pan. Gently mix all the ingredients together until well combined. Reduce the heat to low and let it cook for another 2-3 minutes, stirring occasionally.

  8. Finish with Lime: Squeeze the juice of 1 lime, mix with 4-5 TBSP of water. Sprinkle over the poha mixture. Stir well to incorporate the lime juice evenly. Turn the heat off. Cover with a lid and let it rest for 5 mins.

  9. Serve: Transfer the Vegetable Poha to serving plates. Garnish with chopped cilantro leaves, if desired, and serve hot.

IMG_0330
Print Recipe

Let’s cool off the summer with some Aam Pana

Its hot out here! Summer is here around this part of the world. To experience a weather with a temperature in late 90s and 100s  is not a common thing here in the US. People are flocking all around the swimming pool in front of my apartment, sun bathing with cold beverages in hands. Kids have no time for anything else other-than splashing water and here I am sitting in my patio getting back all the memories from our days back in India.

IMG_0399

Summers back home are even harsher than here but they still used to be most fun. Not just because we used to have long vacation away from school and school work or because we were allowed to just go out on the streets and play.. Play n play and just play till the sun goes down and till its dark outside, but also because the season would bring a lot of fun and cool food with itself. Mangoes, lassi, kulfi, a zillion varities of chatni my mom used to make, the list goes on… But something that was kind of a summer staple was Aam Pana.

IMG_0379

This drink basically comes from the streets of Northern India and is popular because of its heat resistant properties. A nice and refreshing drink made of raw mangoes which gives it a tangy flavor and right amount of sugar and gud (jaggery) with a hint of mint makes it a perfect thirst quencher.
I am not going to talk more about it because I know I can go on and on. So lets just get down to business!

IMG_0403

Ingredients: Its so so easy and quick to make and needs some very basic ingredients that you can find at home everyday or atleast in every Indian household on a summer day!

2 raw mangoes
1/2 tsp salt (salt doesn’t really give any flavor to the pana but helps bringing out the tastes of rest of the ingredients)
2 tbsp fresh chopped mint leaves
1 1/2 tbsp sugar
1 1/2 tbsp crushed jaggery (if you don’t have it handy don’t worry just double the quantity of sugar.)
1 jalapeno pepper
1 tsp Toasted and ground cumin (you might not want to overpowder the drink with the cumin because mint should be the hero here!)
Water

Method:

Boil the mangoes with skin on. Let it cool and then peel the skin off. Mash the pulp discarding the seed.
Crush mint and seeded jalapenos together to get a nice paste.
Mix everything together and add water to the consistency of pana you would like and put it in the refrigerator to chill.
Garnish with mint leaves.