Chocolate Cake

IMG_0242

We are having so many ‘firsts’ lately. Yesterday we had another one. “Papa’s first Father’s Day“. This was his first opportunity to be pampered as a daddy and he was loving every second of it. Little monster wished him in her own way by jumping on his face with her open claws while he was fast asleep and he woke up terrified like every morning we do since she’s born and then smeared his face with saliva ,just an innocent attempt to kiss him.

IMG_0265

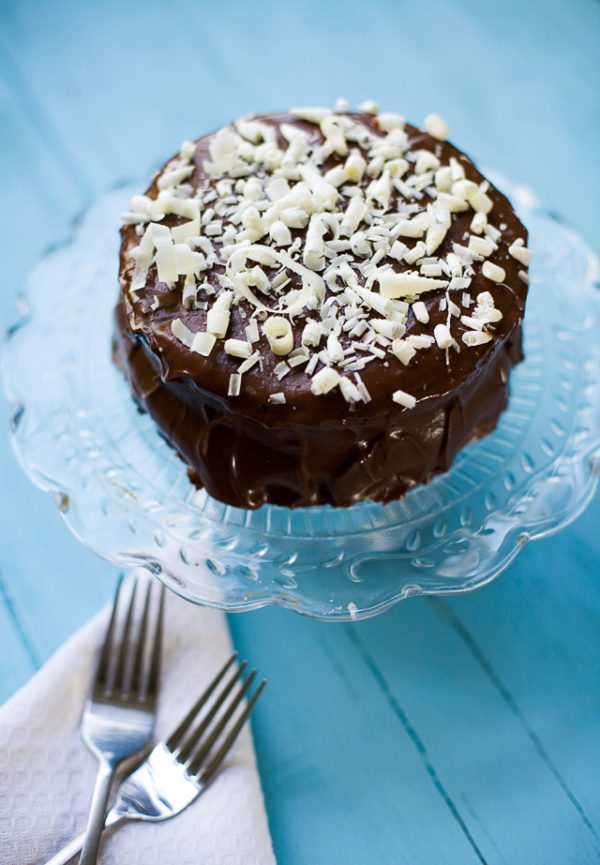
Kids give you so many reasons to celebrate and so many reasons to indulge into, “uh! not so waist friendly food” and yesterday was one of those days. Papa‘s all time favorite dessert is this chocolate cake that I make which is a recipe I stole adopted from Ina Garten.

IMG_0218

Now if you are as crazy about Food Network as I am then you have to know Ina Garten and if you know her then chances are you might if not tasted then have seen this Beatty’s Chocolate Cake‘s recipe which I happen to love. This was probably my first attempt at Chocolate Cake and everytime I make it, it tastes even better.

IMG_0212

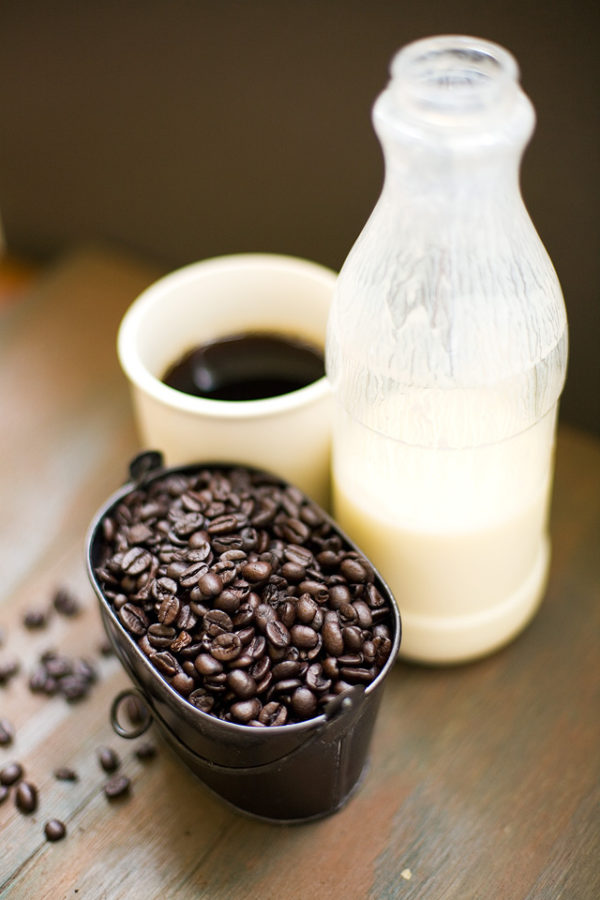
Two secret ingredients… Buttermilk and Coffee! And the cake turns out gooey, moist and delectable!
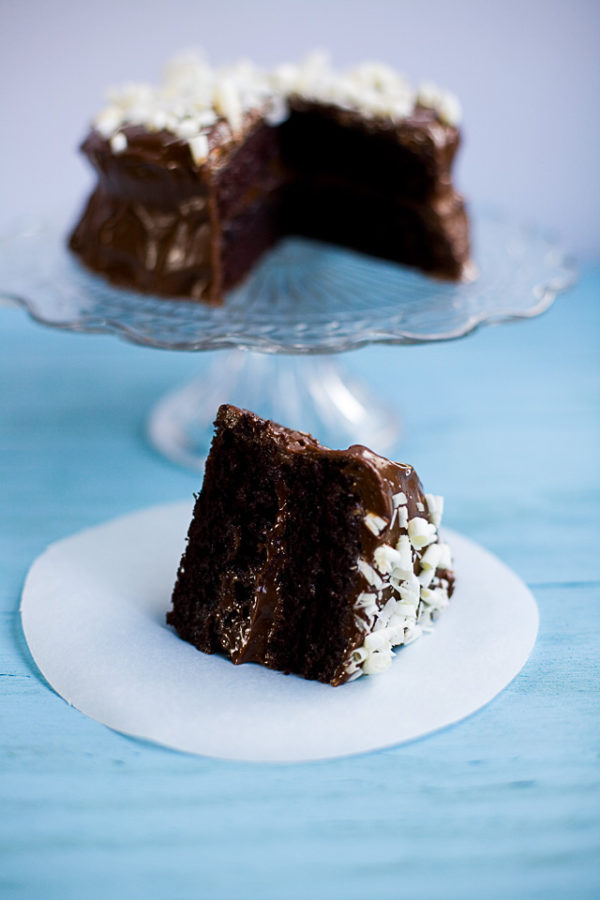
Then I used a simple butter cream frosting and topped it with some shaved white chocolate. Although the shaving I thought sucked but the cake was a hit like always!

IMG_0251

Here’s what I did…

Ingredients: (Adopted by Beatty’s Chocolate Cake)

1 3/4 cups all-purpose flour, plus more for pans
2 cups sugar
3/4 cups cocoa powder
2 teaspoons baking soda
1 teaspoon baking powder
1 teaspoon salt
1 cup buttermilk (2part milk + 1 part yogurt) or if u don’t have buttermilk add 1tablespoon white vinegar to 1 cup/200ml milk and add to the batter right away don’t let it stay.
1/2 cup vegetable oil
2 extra-large eggs, at room temperature
1 teaspoon pure vanilla extract
1 cup freshly brewed hot coffee

Preheat the oven to 350 degrees F. Butter 2 (8-inch) round cake pans , then butter and flour the pans.

Sift the flour, cocoa, baking soda, baking powder, and salt into the bowl and mix on low speed until combined. In another bowl combine sugar, oil and eggs. When mixed all well add buttermilk and vanilla and beat for another 2-3 minutes.
Mixing on low speed, slowly add the wet ingredients to the dry. Mixing still on low, add a cup of freshly brewed coffee. Stir just to combine, scraping the bottom of the bowl with a rubber spatula.
Pour the batter into the prepared pans and bake for 35 to 40 minutes.
To test if the cake is well done poke a clean toothpick or knife right in the center,if it comes out clean the the cake is ready to come out, if not bake until its done.
Let it sit for 10-15 minutes and then take the cake out and cool on a cooling rack.

Chocolate Frosting:

6 ounces dark chocolate
1 stick unsalted butter, at room temperature
1 extra-large egg yolk, at room temperature
1 teaspoon pure vanilla extract
Almost 2 cups sifted confectioners’ sugar (stressing on ‘almost’ because I keep adding my sugar until I get the consistency I want. If you want want your frosting thicker add more if not add less!)
1 tablespoon instant coffee powder

Chop the chocolate and melt it. Set aside until cooled to room temperature.

Beat the butter until fluffy. Add the egg yolk and vanilla and continue beating. Slowly add the confectioners’ sugar in small batches, scraping down the bowl as necessary, until smooth and creamy. Dissolve the coffee powder in 2 teaspoons of the hottest tap water. On low speed, add the chocolate and coffee to the butter mixture and mix until blended. Don’t whip!

Now here’s a wonderful tip one of my friends who also is a pastry chef gave me. If you want your cake to be super moist, take a cup of warm water and dissolve two spoon sugar. Take your cake and place it upside down (u should also level the cake from the top by cutting the shiny and slippery area with a big sharp knife) and brush this sugar syrup over it so that the cake absorbs the liquid ( do the same with both the cakes). Place 1 layer, flat on a cake pedestal spread the top with frosting. Place the second layer on top, rounded side up, and spread the frosting evenly on the top and sides of the cake. If u still want to decorate the cake even more u can go ahead and be creative! I was not that creative and patient so I shaved some white chocolate on top of my cake and ate it!

IMG_0281

Tandoori Chicken with Cucumber Raita.

The past couple days have been really good. I being a new blogger giggle with joy like a baby when I discover something new out here and if something positive comes out of it, that’s just awesome.  I recently got to know about and submitted some of my photographs on Tastespotting and Foodgawker and to my biggest surprise all of them got selected! How cool is that? So you can guess that I’m really excited.

IMG_0159

Today there is another reason for us ( me and my dear husband) to be excited . We today add one more year to our togetherness.  One more year and we did not chop each other’s heads off. We deserve an award for that. But its so amazing that you love someone and decide to spend your life with them and when you are doing that you fall in love with them all over again.

IMG_0142

Anyways! so like every year or like any special occasion in our home I had to make Rajma Chawal for dinner. He loves it so much that its almost meaningless to plan a special dinner for him and forget about that so that was there and then I also made some Tandoori Chicken along-with Cucumber Raita. It turned out to be a great dinner. Best part was the gift BTW, which always is but this time I got this awesome chef’s knife which I had been eyeing for a while. I couldn’t resist showing it off on one of the pictures!

IMG_0138

Now if you know Indian food then you know Tandoori Chicken. Its easy, its delicious and kind of no brainer and as its summer there had to be some cold raita in the menu.
Here’s how I made them:

Ingredients for Tandoori Chicken:

6 chicken drumsticks
2 tbsp coriander powder
1 tsp cayenne pepper
1/2 tsp turmeric
1 tsp curry powder
1 tsp tandoor masala (optional)
1 tsp garlic powder or you can also use 1 tsp garlic paste
1 tsp ginger powder or you can also use 1 tsp ginger paste
1 tsp cumin powder
juice of one lime
2 tbsp yogurt ( I used whole milk creamy yogurt firstly because I had some in the fridge and it also gives the chicken some richness. If you don’t have whole milk yogurt just add a tsp of extra virgin olive oil)
Salt to taste.

Method:

Just mix all the ingredients together. Make a few slits on your drumsticks and rub the marinade on the chicken nicely. Let the chicken marinate for atleast one hour but not more than 24 hours.

IMG_0100

Now there are people who add red coloring to the marinade to give it that restaurant style look but I personally don’t like it so I didn’t do that.

Preheat the oven to 450 deg. F
Place the drumsticks on a baking sheet and place it into the oeven turning the temperature down to 350 deg. F. Let it cook for 20-25 mins and then flip the drumsticks upside down. Cook it for another 10 mins. You’ll see a clear juice running out of the chicken when poked, that means your chicken is cooked and its time to turn the oven to broiler. Place the drumsticks on a cooling rack and then cook it on broiler setting for 5 mins and then flip again upside down and another 5 mins.
Your Tandoori Chicken is ready to be served.

IMG_0145

I served them with Cucumber Raita. recipe follows…

Ingredients for Cucumber Raita:

IMG_0111

1 cup finely chopped cucumber (peeled preferably)
1/2 cup non fat yogurt
1/2 tsp sugar
1/2 tsp salt
1 tsp chat masala
1/2 tsp red pepper powder

Thoroughly mix all the ingredients and you are done!

IMG_0118

“Get Grillin’ with Family Fresh Cooking and Cookin’ Canuck, sponsored by Ile de France Cheese, Rösle, Emile Henry, Rouxbe and ManPans.”

Back home and making some Khaman Dhokla

First of all sorry for being MIA for so long. Was taking it a little easy for a while. First we were out for a tiny vacation with one of our family friends who now have left for India for good and so we wanted to spend some time with them and then after a couple days I and my little one flew to California to meet few close friends who had not seen her and were dying to meet. Both the trips were awesome.

IMG_0015

Took my little monster to the aquarium for the first time. It was such a delight to see her looking at those colorful fishes with her big brown eyes wide open. Gosh! she’s beautiful.

12242009v2

Aimlessly walking on the streets taking some pictures.

12262009-7v2

Shopping & eating a lot of street food.. I mean a LOT of it!

IMG_0049

IMG_0048

It was pure fun!

But now after traveling across the country and having loads of fun we’re back to our nest again and boy does it feel good to be back home?? This is the first weekend when the whole family was together again after the break so I thought of making a nice traditional breakfast. Made some Khaman Dhokla which is basically a Gujrati dish and  a common Indian street food too.

IMG_0085

This was the first time I tried making it after marriage and without my mom’s supervision so you can say it has been yearsss so I was anxious about how its going to taste but it turned out good. Good enough that I gathered the courage to share it with you.

IMG_0074

Ingredients:

For Batter:
Besan/Chickpea flour – 1 1/2 cups
Yogurt – 1/2 cup
Water – 1/2 cup
Baking Soda – 3/4 tsp

For seasoning to be mixed to the batter
Oil – 1 tbsp
Turmeric – 1/4 tsp
Sugar – 1 tbsp
Citric acid – 1/4 tsp
salt to taste

For tempering
Mustard Seeds – 1 tbsp
Green thai chilli – 1-2 (or add more if u like it hot!)
Cilantro leaves – just for garnish
Heeng- just a pinch
Little water + Oil(around 1/4 cup together with a ratio 4:1)

Method:

Beat yogurt first and thin it out adding water. Now take besan and start adding the liquid into it beating thoroughly making sure we don’t leave any lumps. The paste should be thick enough almost like pancake batter. Stir in the baking soda and set it aside to rise for about 1 hr.
After an hour or so when the batter has risen add the rest of the ingredients into the batter. Mix everything together.
Now we need to prepare a vessel for steaming. Best would be a pressure cooker but if you don’t have that you can use a thick bottom pot which has a tight lid with an opening for the steam to escape. Fill the pot upto 2 inches with water and place a small metal/steal bowl upside down. Bring water to boil.
Transfer the batter into a greased baking dish. Your baking dish will sit on top of the bowl inside the pot of boiling water so make sure the dish is small enough to be placed inside the pot.
Cover the pressure cooker or pot with the lid and let it cook on medium high for about 10-12 minutes or until a toothpick comes out clean. Turn off the heat. Cover it for one more minute, uncover and let it sit for 10 minutes.
Then pour/brush the water oil mixture on top of it. Just like brushing cake with water and sugar mixture before this process makes the Khaman even more moist.
For tadka just heat oil, add heeng and mustard seeds. Once the mustard seeds pop add cut green chili. Cook it for 30 seconds and then pour it over the Khaman Dhokla. Garnish with cilantro.
Cut the cake into smaller bite size pieces and serve with green and/or tamarind chutney.

IMG_0079

Stuffed Bell peppers with French bread

IMG_9960

First let me apologize for being MIA for this while. I was busy being a supermom to my superbaby!! No one tells you before or can tell you before how crazy and crazier your life would be everyday after the baby. When she was born I said to myself Gosh! the crazy part is over.. Little did I know that it had just begun. So now that she’s almost 9 months old and can crawl, climb and scream like no man’s business there’s nothing that can stop her. My mom says that I’m lucky I have an easy one and I should be happy she doesn’t do what I did to her.. I wonder what a monster I must be!

IMG_9927

Anyways! I was just trying to tell you what kept me away from the kitchen for the past few days. So today when daddy was working from home I thought of treating myself with something simple yet fancy. I peeked into the refrigerator and found some bell peppers ready to die so I rescued them and made these Stuffed Bell peppers and served them with some grilled french breads with a fancy spread on it.

IMG_9979

Stuffed bell peppers or bharva shimla mirch as we say them in hindi is something that can be made in different ways. With different kind of fillings or with or without gravy. I made it how I usually make with minimum ingredients and grated cheese on top and then baked them in the oven. So thought of sharing my take on Stuffed Bell Peppers.

IMG_9941


Ingredients:

2 medium sized bell peppers
2 medium sized potatoes
1/4 cup grated cheddar cheese
1 tbsp coriander powder
1/2 tbsp amchur (dried mango powder)
1 tsp fennel seeds
1tsp red pepper flakes
Salt

Method:

Take a pot of water and bring it to boil then turn off the heat. Take your bell peppers which have been cut from the middle into halves, have been cleaned from inside and put them in the pot of hot water and cover with the lid. Let it stay for almost 5 minutes not any longer. Take them out and let them dry. This process helps speed the cooking process while baking.
Now boil the potatoes. Peel and mash them. Add all the dry ingredients into it and mix them altogether.
Preheat the oven to 375 deg. F.
Stuff the bell peppers with the potato filling and sprinkle grated cheese on top. Place them on an oiled baking pan and put it in the oven for 20-25 minutes.
When the baking is done the bell pepper should still have a bite to it.
I served them alongwith some grilled french bread with a sour mayo and herb spread on top.

IMG_9976

Chole Masala – Chickpea curry

IMG_9876

Some friends were coming over for dinner tonight and as always I was super confused about what I should make. When I invite someone over I have to plan everything before hand else I start freaking out. So I was confused for days over the menu and then a lovely lady from one of the communities that I’ve joined wrote to me and asked if I can share the recipe of Chole Masala with her. I said sure!

IMG_9904

And then and there the menu was planned. Chole with paranthas, Boondi ka raita, Gobhi ki sabji and Chach for drinks. Thanks to you a lovely lady from the community the dinner party rocked! So sharing the recipe for Chole here.
Although it looks very difficult but is one of the easiest dishes and perfect for parties and events where you want to make something in a larger quantity. You just need to work for the masala (spice mix)  and mix it with as much chole (chickpeas) as you want and voila!

IMG_9871

A little something about it: Chole Masala is mainly a North Indian dish which comes from the state of Punjab. Its a street food sold by vendors along with bhature which is a deep fried bread made with a fermented dough. Its commonly eaten as a breakfast dish and is generally accompanied with Lassi ( a sweet yogurt based drink ).


IMG_9860

Everyone tries to give there own touch to the recipes in different ways so you can find people making Chole Masala in many ways but here I’m trying to share the traditional way to make Chole Masala which has just the chickpeas and curry in it.

Ingredients:

1 cup chickpeas ( I’m using dry seeds but if you want to make it faster you can use canned chickpeas as well) 
1/2 cup red onion coarsly chopped
2 cloves garlic
1/2 inch ginger
1/2 cup tomato puree  
2 tbsp coriander powder
1/2 tsp turmeric powder
2 thai green chili or 1 tsp red pepper powder
1 tbsp good curry powder 
1 tbsp ready to use Chola Masala  powder (optional)
2 tbsp olive oil
Salt

Method:

Wash and soak chickpeas in water overnight or for at least 8 hours. Then cook it in a pressure cooker adding 1/2 a tsp of salt and water four times the quantity of dry chickpeas. If you are using canned chickpeas drain off all the extra liquid and rinse it in cold water thoroughly before using.
Now some people also add potatoes in there Chole Masala. I don’t usually do that but if you want feel free to do so.
Heat oil in a thick bottom pan. Blend your onion, garlic and ginger in a blender to make a thick paste and add throw it in the pan. Add salt. Turn the heat to medium low. Fry the mixture till it starts changing color and turns light golden in color. Then add turmeric, coriander, pepper and curry powder (if you are adding potato to your curry do it now). Stir for a couple minutes and then add the tomato puree. Fry it for 5 more minutes on medium heat (if you are adding potato it would take a little longer for the potato to cook so turn the heat to low and cover the pan with a lid for the all the juices to get inside the potato)
That is it! Your masala is ready. Mix it all together with the boiled chickpeas and add a tablespoon of ready to use chole masala if you want.
This dish is usually served with a little tamarind chutney on top of it along with poori or bhatura.

IMG_9899

Roti.. An Indian staple.

IMG_9724

Indian food is never complete without the wonderful breads that accompany them .Some of the breads that people all around the world can easily guess as Indian are Naan, Parantha, Dosa, Tandoori roti and so on but something that is a staple in a majority of Indian homes in some form of the other is simple roti or chapatti or phulka.
 I was thinking that if I’m not talking about something so basic as roti which is made in our homes almost everyday and without which our meal can not be complete then I’m definitely missing something. So today its nothing fancy, I’m here to share how we make that simple flat-bread called roti at home.

IMG_9713

A little something about it: Breads from India are very different from traditional the western bread loaf. Its basically a flatbread which looks a lot like tortilla. There are a millions of ways to make Indian flatbread and it mostly varies from region to region. Soil in the southern part of India is very good for rice crops so breads from that part are mostly made of rice flour and northern part is fertile for wheat & gram cultivation so wheat flour is what is mostly consumed in the region.

Things Required:

3 cups flour
water
a rolling pin
a little flour for dusting
tava or flat bottom skillet

Now  the basic ingredients for the dough is same as that to make any dough in the world: flour & water that’s it. Usually wheat flour is used in India which if you don’t find anywhere then will definitely get in an Indian store but in case you don’t have wheat flour handy you can use 3 parts all purpose flour mixed with 1 part of whole wheat bread flour.

Start by adding water into the flour little by little and mix it with the flour using the other hand. Trick is to slowly add water so that you have an idea of how the flour is absorbing water.

RCollage1

My mom says that if u add a little bit of milk in the dough while kneading it. that makes the rotis even softer.

RCollage2

Whwn you feel that the dough is formed and you can hold it all together, transfer it to the counter or a flat dish and knead for about 4-5 mins. You know the dough is ready when there’s no excess moisture in it and its all absorbed by the flour. Now wrap the dough in a plastic wrap or a thin and wet kitchen towel and let it rest for about 5-10 mins. This would help it get even softer.

RCollage3

Then take the dough out on the kitchen counter and if you want you can knead it once again for just a few seconds just to make it smooth. I do it but its not necessary.

RCollage4

Now cut small pieces of dough into as many rotis as you want and make ball out of them. Dust the counter and start working on one ball at a time. Using a rolling pin try to flatten the balls into flat round shapes. It take a lot of practice to make that perfect round rotis so don’t try to sweat on the shape just flatten the dough and use a round lid or something and cut it into round shapes. Only the trick is to dust the dough balls atleast 2-3 times while rolling or the dough can stick to the rolling pin.

RCollage5

Preheat a tava ( use a simple pan or skillet if you don’t have a tava). Put a roti on the pan and cook for 15-20 secs or untill you see small bubbles on the surface and then flip it. repeat the same on this side and then transfer it to the other burner with a rack similar to a cooling rack. Roti will puff up in a few seconds and then you have to flip it again for the other side to get cooked as well. Remove from the heat and keep it wrapped in a piece of foil lined with paper towel.

IMG_9716

Your roti is ready to be served. Just add a dollop of ghee ( Indian clarified butter) to give it that extra taste.

Dum Aloo

IMG_9637

The other day I found these gorgeous fingerling potatoes in the supermarket and just picked up thinking that I have to make something out of it. Then they were sitting at a corner in my kitchen hoping to be picked, for days and today was the day. I used them to make Dum Aloo.

IMG_9561

Dum in hindi means pressure and aloo is potatoe so you know Dum Aloo means ‘pressure cooked potatoes’.Traditionally food is placed in a pot, usually made of clay, and dough is used to create a tight seal to prevent the steam from escaping. So the food is slowly cooked in its own juices, allowing the herbs and spices to fully infuse into it, while preserving the nutritional elements at the same time.

No we will not be doing that. We will use a pressure cooker thanks to the new technology! but I wanted to tell about that so in case you don’t have a pressure cooker you can use your usual cooking pots to make this dish.

Facts: Dum Aloo is a part of Kashmiri cuisine. Kashmiri Pandit cuisine to be precise. Kashmiri Pandit food is also very elaborate, and is an important part of the Pandits’ ethnic identity. The food usually uses a lot of yogurt, oils and spices.

Ingredients:

Small potatoes – 1/2 lb ( I used fingerling potatoes but you sure can use small red potatoes)
Paste:
 Onion paste- 1/2 cup
3-4 cloves garlic
1 inch ginger ( peeled)
2 thai green chili (  I prefer green so I used them you definitely can use 1 tsp cayenne pepper or whole red chilli)
Powder:
2 tbsp coriander powder
1 tsp turmeric powder
1 tsp cumin
5-6 peppercorn
1 tsp cinnamon powder
2 brown cardamoms
2-3 cloves
1 bay leave
& 2-3 tbsp olive oil
1/2 cup yogurt
2 tbsp milk
& salt to taste

Method:

The first thing you have to do is clean you potatoes and poke a few holes onto them using a tooth pick or a fork. This would help the spices to enter deep into the potatoes. Now if you wish you can peel your potatoes I liked them as is so I didn’t bother. Then according to the traditional recipe you’re supposed to deep fry your potatoes but I fried them in a pan with lesser oil you gotta watch your waistline! fry them until they’re brown from outside.

IMG_9603

Then make a paste of all the ingredients listed under Paste and also keep the powder ready of all the ingredients listed under Powder.

IMG_9611

Heat a thick bottom pan. Add oil and then the paste of onion,ginger, garlic and chilis. Fry them untill it all turns golden brown or I’ve learnt this from my dad who make the best masala ever that you add salt while frying the masala and fry untill the paste starts leaving oil from the periphery. Then you the Powder of masala that u have prepared. Cook it for a while and then add milk, cook for a few seconds and finally add yogurt. Don’t forget to beat the yogurt before adding it to the masala or it will leave lumps.

You Dum Aloo is almost ready. Add the potatoes into the prepared masala. If you feel that the gravy is too thick for you add a little water. Pour the whole preparation into a pressure cooker, seal it tight and cook for another 4-5 mins. Turn the heat off just before you know the whistle is going to set off.
In case you’re cooking it in a pot, seal the lid from all around with the help of dough so that the steam doesn’t eascape and let it simmer for a while on low heat. This method would take a little longer that the pressure cooker, probably around 15-20 mins.

Serve it with your rice or naan or a simple roti ( working on putting up the recipe for a homemade roti )

IMG_9653

Baked eggs and green peas…Recipe to rescue!

IMG_9542

Recently someone asked me “If there’s one recipe that you can name as a rescue recipe what would that be?” My first reaction was, “That’s an easy one” It has to be Baked eggs with green peas
Well! It was my in-laws first visit after our marriage and they were with us for over a month I know! & I was not really an expert as far as cooking was concerned at that time not that I consider myself one yet but hey, I write a blog now! Most of the time we would cook at home as my father-in-law prefers home cooked meals and as usual I would run out of ideas for what to cook now and then my mom-in-law who herself is a pretty decent cook would step in and would come to my rescue. So this recipe is one of her rescue dishes.

IMG_9460

I was so impressed with the recipe not only because it was super fast and easy to make but also because obviously it was delicious and looked ‘not really a traditional Indian dish’. So that coming from my traditional Indian mom-in-law was amazing.
Although I gave it a little spin of mine after cooking it several times but it still is my mom-in-law’s recipe and still comes to my rescue just like her!

IMG_9508

Ingredients: ( you can change the measurements according to the no. of servings you want, this one serves three)

3 large eggs
2 1/2 cups green peas
1/2 cup chopped onion
1 tbsp olive oil
1 tbsp coriander powder
1-2 thai green chilli
1 tsp curry powder ( optional)
salt to taste

Method:

Preheat the oven upto 350 deg. F

Heat oil in a pan and saute chopped onion and minced green chillis. Then add coriander powder and curry powder and at the same time the green peas. Mix them all together ad cook till they’re tender ( I usually use frozen peas so they merely seconds to cook).
Then move it all into a baking dish. Make a little depression in the bed of peas with the help of a spoon, as many as eggs you are using. Now break the eggs into those depressions.Make sure they are just little depressions and not holes so that the egg yolk just sits on it. Cover the baking dish with aluminum foil and poke a few holes on the foil so the steam can escape out.
Place it into the oven for 25-30 mins. Check it once after 20 mins just in case you need your eggs a little softer than I do.
Serve with your choice of bread.

IMG_9525

Dal Makhani.. Lentils at its perfection!

IMG_9478

You know how some things or some food always remind you of someone. Sometimes because of the story related to it or sometimes probably because of the person’s love for it. Well! whenever I have to make urad ki daal ( black lentils) it never fails to remind me of my father-in -law. He loves urad daal so much that my mom-in-law even jokingly says that ” He met urad before he met me, so I can’t complain”.

You should listen to him when he talks about it and tells you how his childhood is connected to that daal. How he would come back from school and as soon as he would step on the street heading to his home he would know that mother has a special treat for him today. His mom would make daal in those old mud pots and it would be sitting on the choola ( traditional Indian stove made of mud) simmering for hours before it reaches that absolute perfection. Every-time he talks about that childhood experience of his you can actually see those feeling in his eyes, and then he would sigh and say ” you can’t get that taste in today’s cooking!”.

Its so strange how something as little as a simple daal (lentil) can bring back with it so many memories. Probably this is one of the reasons why I’m always scared to make that daal(lentil) when he’s coming for dinner. So today since he was not here I thought of making this preparation made out of urad ki daal Dal Makhani. 
Whenever I do so I always try to create a taste questioning if Papa would like it, so giving it a try one more time.

IMG_9487

Facts: Dal makhani is a treasured staple food, originally from Punjab in North India. This dish is a type of daal(boiled lentils or other dried legume/pulse) eaten in India (in the states of Punjab, Haryana, Delhi, Uttar Pradesh and the Bhojpuri area of Bihar) and Pakistan. Its high in protein–an important attribute in primarily vegetarian cultures.


Ingredients:
2 cups Urad dal
3/4 cup red kidney beans
1 cup chopped onion
3-4 cloves chopped garlic
1 inch ginger
1 tbsp tomato paste/ 1 cup chopped tomato
2 tbsp coriander powder
1tsp turmeric powder
1 1/2 tsp cayenne pepper
8-10 no. peppercorn
4-5 no. cloves
1-2 no. bay leaves
2 tsp curry powder
2 tbsp olive oil or ghee
1/2 cup heavy cream
2-3 tbsp shaken buttermilk

Method:
Soak the red kidney beans in water overnight or  else atleast for 6-8 hours

IMG_9444

Wash the lentils thoroughly and put it in a pressure cooker. Add water to it about an inch above the level of lentils or maybe around 6 cups. Add turmeric, salt, peppercorn and cloves into it. Turn heat on and boil it on medium heat until they are well cooked.
In a thick bottom pan heat oil. Throw in bay leaves and then chopped onion. Saute onions until its translucent then make a paste of ginger garlic and add it to the onions. Fry it until everything looks golden in color and then add chopped tomato, cayenne pepper and coriander powder into it. Fry until tomato is almost dissolved and then add curry powder and after a minute add heavy cream to it.
When lid of the pressure cooker is ready to be opened add buttermilk into it. Stir well so that lentils are completely mixed into each other and then add the onion masala that has been prepared.
Garnish it with coriander leaves and if you want to take it up a notch just add a dollop of butter into it.
Serve hot with tandoori roti or plain basmati rice.

IMG_9489

“Come join Soup-a-Palooza at TidyMom and Dine and Dish sponsored by Bush’s Beans, Hip Hostess, Pillsbury and Westminster Crackers”

Oatmeal Cookies..

Oatmeal3

You know how there are some days when you just feel a little low and want something that can lift u up and take away from everything. I was recently having one of those days. I really am not sure why but I was feeling so down and gloomy that even I got bored hanging out with myself!
Now everyone has there own way of rejuvenating themselves.. Some people go to clubs, hang out with friends, watch movies, or some like shopping and so on.. Well! for me it would be running and baking. Of-course not both at the same time! So that’s what I did. I went to the gym, jumped on treadmill and ran a couple miles, came back home and did some baking.. Yes I did shower before that!

Oatmeal4

I found some nuts and oatmeal sitting in my pantry so I took them out and baked some cookies. Oatmeal Cookies with nuts and raisins.
Cookies were the first thing I ever tried to bake when I started baking & cookies were the first thing which never were on my side. They would never come out perfect. Sometimes it would be too hard, then sometimes too soft. Not to mention how many times they would be burnt to death. But slowly and steadily I came where they would come out the way they were supposed to come.

Oatmeal6

That taught me one lesson about baking, specially cakes and cookies. Stick to the ratio! If you try to mess with the measurements then the outcome would never be the one you want.

Oatmeal0

So here’s my recipe of oatmeal cookies.

Ingredients:
3 cups 1 minute oatmeal
1 1/2 cups flour
1/2 cup pecans
1/2 cups sliced almond
1/2 raisins
1 cup brown sugar
1/2 cup granulated sugar
1 1/2 cups butter ( Oh! yeah..cookies need butter..)
2 eggs at room temperature
2 tsp vanilla extract
1 tsp baking powder
1/2 tsp ground cinnamon
1 tsp salt

Method:
First and foremost heat the oven upto 350 deg. F
Nuts usually taste far better if baked a little before eating so we’ll do that first. We’ll place the nuts ( pecan & almond) into the oven for a few minutes, probably 4-5 mins.
Sift all the dry ingredients together  except the oatmeal, raisins and the toasted nuts. Set it aside.
Now pull out the biggest bowl that you have because we have to mix a lot of things together and you would need one. So in your bowl beat the butter, brown sugar, and granulated sugar together on medium-high speed until light and fluffy. With the mixer on low, add the eggs, one at a time, and the vanilla.
Mixer still on a low start adding the dry ingredients into the wet, slowly, little by little. If you add them together all at once it would leave lumps behind which we don’t want.
Then add toasted nuts, raisins and oatmeal into it.
I made more than 40 cookies out of the mixture so you would need two-three cookie sheets to bake them altogether otherwise you can also wrap the remaining dough into plastic wrap and put it in the refrigerator to save for future use.
Line the sheet pans with parchment paper and use a big spoon or best is using an ice cream scoop to drop equal quantity of dough to generate same size cookies. Put them about an inch apart so that they don’t stick to each other when the butter melts on heating and the cookies expand.
Bake them for about 15 mins  until they are lightly brown. Them take them out of the oven and cool on a cooling rack before serving.

Oatmeal2

Berrylicious Pudding..

IMG_9376

Remember I told you about my trip to the farmer’s market last Saturday and had promised that I’ll be back with a wonderful recipe which has loads n loads of berries in it. So here I am.

Berries4

When I found these fresh berries in the market the other day the first thing that came into my mind was “let’s make a pudding out of it”.

BerriesCollage1

Then to my luck I found this wonderful baker the same day who had some beautiful brioche. Hence came this pudding into life which I call Berrylicious Pudding. When you eat it you’ll know why I named it so.

BerriesCollage2

So here’s the recipe of super easy and super delicious Berrylicious Pudding.

Ingredients:
1 pint raspberries
1 pint blackberries ( divide it into two parts)
1 pound strawberries
3/4 cup sugar
1 Loaf of brioche.
Whipped cream for topping. I used store bought ready to use whipped cream you can even make one yourself. I was kinda in rush!

Method:
Cut the strawberries into small pieces. Heat a sauce pan. Throw in the strawberries, add about 1/2 cup water and 3/4cups of sugar into it. Bring it to boil or until strawberries are a bit tender.
Now add a pint of raspberries and half pint of blackberries into it. Cover the lid and let it simmer until the berries are tender and mixed into each other.
Turn off the heat and then add the remaining blackberries that you had set aside. These will give the pudding a little bite as they are not dissolves with the rest of the berries.
Then slice the bread and cut corners.
Take a tall baking dish or a bowl, about 5-6 inch tall. Pour in a ladle of sauce first and then place a layer of bread on it. Basically in the end this layered pudding will be turned upside down so the sauce in the bottom will ultimately come at the top so try to put some berries so that they look pretty. Then pour little more sauce over the layer of bread and keep repeating the process. You need to layer it just like tiramisu.
Cover it with a plastic wrap making sure the wrap is touching the top surface of the pudding. Now take a plate a little smaller than the circumference of the bowl and apply a little pressure to it. Put something heavy on top of it, I used a can of coconut milk.
Put it in the refrigerator for at-least 6-8 hours.
Before serving remove all the weights and wrap from the pudding. Take a big plate and flip the pudding over.

IMG_9374

When serving in individual plates top it with whipped cream and some fresh berries if you want. I just couldn’t take a picture of the dish after it was being plated, that’s how fast it all disappeared. But hopefully will makeup for that by making it all again specially to take a picture and will get lucky to enjoy it again. Hopefully!

Saturday afternoon at the Farmers Market

2

Spring is here. How I love this time of the year! No more snow for months.. Blooming buds all around.. And sun has really been kind lately. So you might understand how nice it must be to step out of the house on a sunny afternoon & I can’t even begin to tell you how much my 7 month old loves to go out, meet people, see all around and admire everything in her own language.

IMG_9358

So this Saturday we decided to make a trip to the farmer’s market, so that baby can have all the fun she wants and mommy can have her share of fun too.If you love cooking and specially with fresh food then you know exactly what a farmer’s market means.

IMG_9340

I absolutely have a ball in between all that hustle and crowd. You can find fresh produce, meet the farmers who actually spent a good amount of their life raising them with their hands, discover some stuff, learn something new.. Its all fun!

IMG_9353

Did I tell you that I found some of the most gorgeous strawberries there? The moment I laid my eyes on those berries I knew exactly what I wanted to make out of them. Will be posting that soon.

FarmersMarketCollage

Also met a local baker who makes some of the most beautiful brioche and yes, I bought a couple. He invited me to his baking classes that he gives every weekend. So I guess you’ll find some bread recipes here too, hopefully one day.