4 Healthy Kids Snacks and a Lunchbots Giveaway!

UPDATE: Congratulations Lara and congratulations Amishi Anand! You both have won an amazing stainless steel lunchbox by LunchBots. Please send us your postal addresses at support@indiansimmer.com so that we can ship your prizes your way.

Some mornings I’d be up before the blair of the alarm, hopelessly going through my refrigerator, in my mind, trying to remember what ingredients are available for me. Then some others as much as my heart would plead that very alarm to give me another 5 minutes, the brain would be restless because, “gosh, what do I cook today?”.

Mornings on it selves are crazy for “not a morning” person like me who tries to get two kids up and ready for soon while trying to snap out of a sleep, and a bring to the mix cooking breakfast and lunch, then you have lost me! I have spent so many mornings, embarrassed, handing lunch money to the kids just because I was not able to get their lunchbox ready on time. Some days I’d wake up late, somedays I was dumbfounded by the dearth of ingredients in the fridge and somedays time just go ahead of me.

Then one day an angel whispered into my ear…… through the phone with my mum speaking from the other side. Planning Planning Planning! Planning is a mothers best friend. Well so is wine and TV times, but lets concentrate on the good things for now! PLANNING. Which I am still working on, but I can say this confidently specially if you are not around me in the mornings, that I have figured this lunchbox things. And yes, planning has taken me a long way. I’ve just started taking 10 minutes out of my schedule on a Friday and started listing out 5 things that I can cook for their lunchbox, Monday to Friday. Quick fix snacks is another thing that has made my life easier. I try to make them during the weekend or sometimes during the weekdays when I can find time and I store them for when they are hungry after school or need to pack a snack for an activity or for school.

When I thought, I got a hang of this thing, I started sharing what I packed #inherlunchbox on instagram I loved your response and your questions. One of the most common questions was about the stainless steel lunchbox I use for my kids. I use LunchBots for packing my kids’ lunch. Have been using it for years and I still love it . SO, its so exciting to tell you that I am partnering with LunchBots for this post where I share 4 of my favorite kids snack recipes that I always pack in their LunchBots AND since you’ve always been so curious about this brand of lunchbox, LunchBots is giving you a chance to win one…. n wait, TWO of their latest lunchboxes with matching lunchbags!

All you have to do is drop a comment below in the comment section and tell us about your lunchbox experience. Or share a recipe you’d like to share with us. AND/OR

Like @prernasingh and/or @indiansimmer on instagram.

Like us on Facebook.

Follow us on twitter.

Subscribe on Youtube.
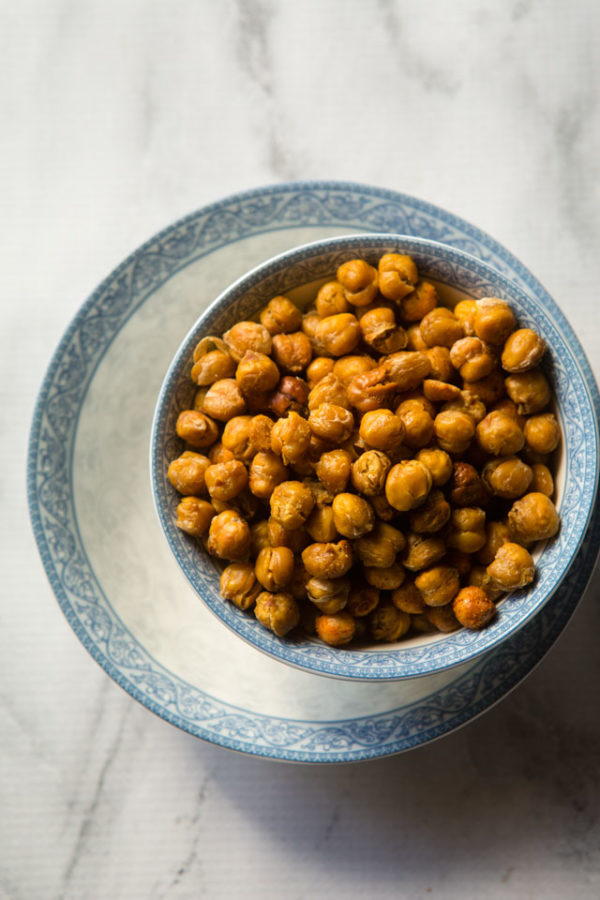
Crunchy Chickpeas:

Crunchy Chickpeas

Ingredients:

1 can chickpeas

1 tablespoon oil

Kosher Salt

Method:

Drain canned chickpeas in a colander and rinse throughly. Transfer to a side of a kitchen towel. Cover the chickpeas with the other end of the kitchen towel and pat it dry. Now if you pinch the chickpeas softly you will peel its skin off. Do the same for all the chickpeas.

Transfer to a baking sheet. Drizzle oil and salt to it. Mix well. Bake in the oven at 400deg. F for 40 minutes, or until they are crunchy, stirring occasionally.

Cool and store in an air tight container.

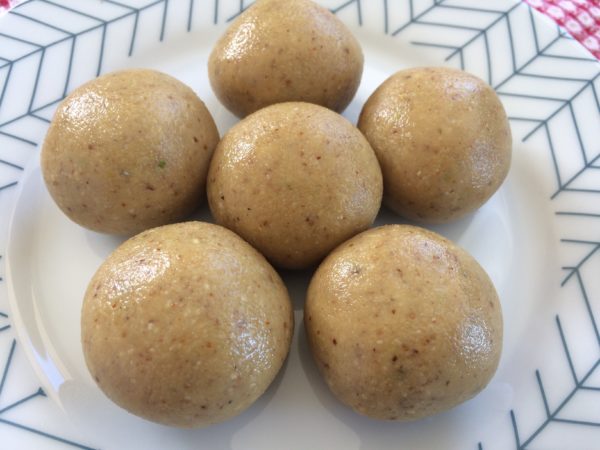
Dates and Nuts Energy Balls:

Ingredients:

2 cups medjool dates

1 cup shredded coconut

¼ cup almonds

¼ cup walnuts

¼ cup pistachio

Method:

Add everything to the food processor. Grind until combined.

Take 1 tablespoon at a time and make balls. Store in an airtight container.

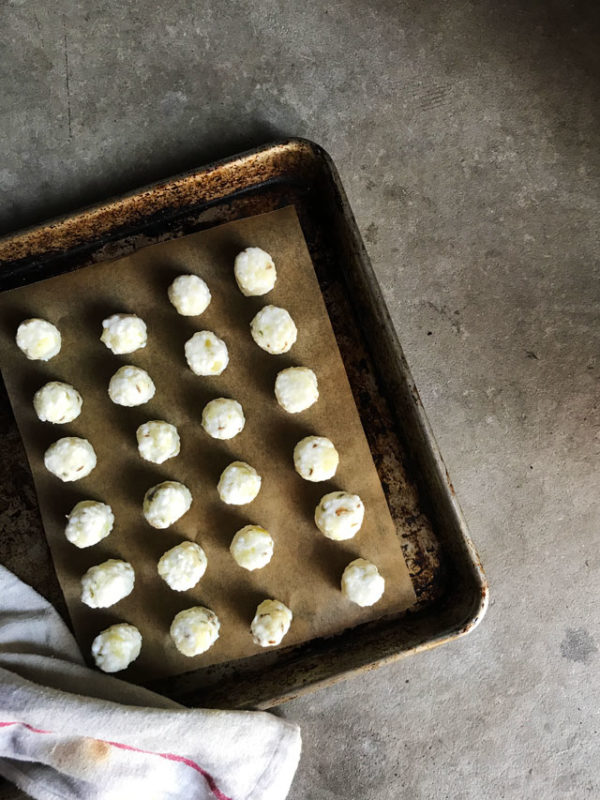
Crunchy Salted Makhana:

Makhana

Ingredients:

2 cups makhana

1 tablespoon ghee

Salt to taste

Method:

Heat ghee in a wok. Toss makhana for 5-8 minutes on medium high heat until crispy.

Sprinkle salt.

Let it cool down and store in airtight container.

Easy Granola Bars:

Granola Bar

Ingredients:

2 cups old fashioned oats

1/2 cup almonds (coarsely chopped)

1/4 cup butter

1/4 cup brown sugar

1/4 cup honey

1/2 teaspoon cinnamon powder

1/4 cup dried cranberries

1/2 cup mini chocolate chips

1/4 tsp sea salt

Method:

Mix oats and almond together. Spread on a baking sheet. Toast in the oven at 350 deg. F for 8-10 minutes, stirring once. Pull out of the oven. Let it cool down. Transfer to a medium sized bowl.

In thick bottom pan, melt butter and let it cook, stirring occasionally until you see bits of milk particles browning in the bottom on the pan.

Stir in brown sugar, honey and cinnamon powder.

Transfer the mixture to the bowl with oats. Stir well. Throw in cranberries, chocolate chips and sea salt. Mix everything well together.

Line an 8×8 inch pan with a parchment paper. Transfer the granola mixture to the pan. With the back of a spatula or damp hand, press the mixture into the pan to make the granola stick together. Transfer to the refrigerator for 1 hr.

Pull the pan out of the refrigerator. Remove the block of granola bar out of teh fridge and cut into equal 12 parts. Wrap with parchment paper and store in cool dry place.

US residents, enter your name in the comments section for a change to win two amazing LunchBots lunchboxes along with matching lunchbags! Also go and like us on Instagram, Twitter and/or Facebook or subscribe on youtube for more than one chance of a win. 

Winners will be announced in two weeks, 11:59pm on Monday, Dec. 18th.
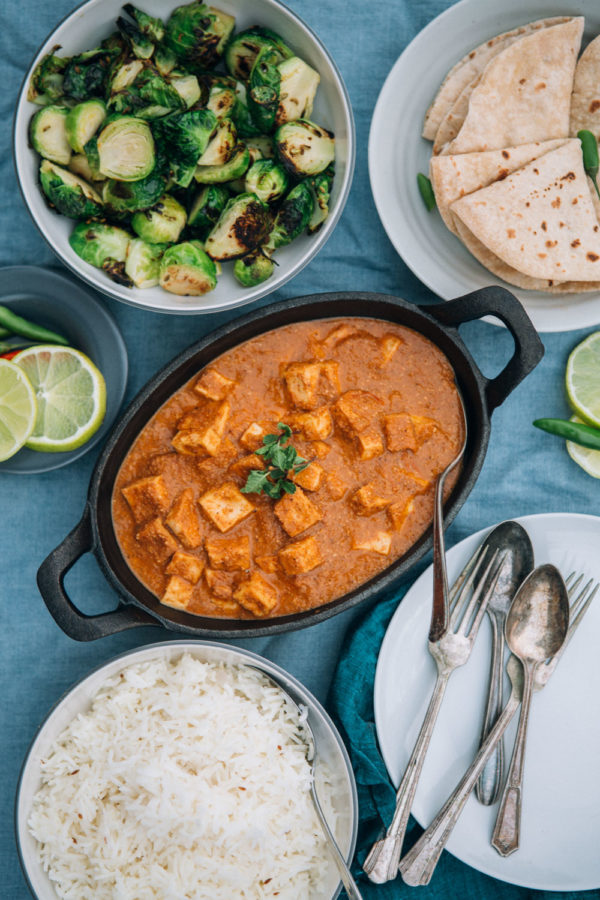
 

Healthy(er) Palak Paneer

I have not said it out loud (at least here) yet, but I am gonna say it now. I have pledged to work on a healthier and fitter me! I do not know when being a mom, a “working mom” (as if there ever is another kind!), taking care of the home and family came in the way of taking care of myself, but it did. I had stopped caring about what I am eating as long as the kids ate healthy and how fit I was as long as the kids got to have their after school activities and play time, but I did. Before I had my first born I was the kind of person who was in charge of herself. But I did not realize I took the back seat, until a conversation I had with a dear friend a couple months back. She was clearing her conscience and I realized the person she was talking about could very well be me! So we promised each other and ourselves that day, that we will take that control back in our hands. As much as we love our kids and family more than anything in the world, we cannot give them our 100% until we give ourselves a 100%.

Kale Palak PaneerSo we made a few changes, bigger one being more aware. More aware of what goes in our body, more aware of what goes in the food that we eat, more aware of what our body likes both when it comes to eating and also when it comes to working out. A few minutes away from our crazy day, just to sit in a corner for a breather and THINK! Something we do not always get time to do. To my surprise and contrary to my previous beliefs, I did have time to do all that. Time to eat better, time for a workout, time to read or time to just think. As much as I’d love to say that this is all I need to sort my life out, but I cannot. Its still far from it but I feel better, fitter, happier and calmer and as a result so does my family.

To achieve this I did not have to give up much except for processed sugar that was not adding any value to my health and processed carbs. Added more greens to my meals and more whole grains instead of polished and processed grains and of course added exercise to my routine. That’s it! I’ve lost 15 lbs in the last two months and I am excited about it.

SO, as a shout out to a healthy and fit lifestyle I am sharing this recent family favorite of ours. A Healthy(er) Palak Paneer. Staying true to the traditional palak paneer I have just tried to add more variety and quantity of greens to this dish and got rid of the use of cream to make you feel lighter even after a belly full of this comforting dish, that should be perfect for the chilly weather we are going to have soon.

Palak Kale PaneerIngredients: Serves 6-8

2 tablespoon oil

2-3 cloves

2 black cardamom

1/2 inch cinnamon

1 teaspoon fennel seeds

1/2 teaspoon cumin seeds

3/4 red onion (chopped)

3-4 garlic cloves (minced)

1 1/2 inch ginger (minced)

2 tablespoon coriander powder

1 1/2 teaspoon garam masala

1 tablespoon poppy seeds

1 cup tomato (chopped)

2 cup spinach (coarsely chopped)

2 cup kale (any variety is fine) (coarsely chopped)

2 cup baby chard (coarsely chopped)

Salt to taste

14 oz paneer (cut into cubes)

1 1/2 cups water (or more if you like the curry loose. Your choice.)

Method:

Heat oil in a medium sized, heavy bottom pan. Coarsely crush the whole masalas (cloves, fennel, cumin, cinnamon, black cardamom). Add to the heated oil.

As the masala sputters add onion, garlic, and ginger. Cook on medium heat for 8-10 minutes until onion softens.

Add coriander powder, garam masala, tomato and poppy seeds. Cook for 5-8 minutes or until the tomato is cooked and everything comes together to form a loose paste.

Add salt. Mix well and cook for another minute.

Add the greens. Stir well to mix all the masala well to the greens. Cover and cook on medium for 5 minutes. Uncover, continue cooking while stirring occasionally until the greens are reduced to quarter its size and there is no liquid separating from the greens.

Stir in garam masala. Turn off the heat and allow it to cool for 5 minutes.

Transfer the cooked greens to a blender or food processor. Blend into a paste. You can add up to 1 1/2 cups of water if you need help with running the blender blades smoothly.

Transfer the green paste back to the pan. Add rest of the water to the pan. Stir in paneer cubes. Let the curry simmer for 5-8 minutes. Turn off the heat. Serve hot with your choice of naan or roti and rice. Enjoy!

Malai Laddu

Malai Laddu

Its that time of the year again! Time to wipe the dust off the box of festive decoratives, tucked in the back of the storage. Time to pull out the stash of sarees and salwar kameez you’ve been collecting over the years, to decide which ones gonna make it to the grand festive parties you look forward to all year long. Time to go back to grandma’s and mummy’s recipes being passed down through generations and then cook them with your little ones. Time for laughter, fireworks, food and friends. Or more like food with friends!

Speaking of food with friends, I am sharing some with my virtual friends from the blog world. A few of us are getting together to have a “virtual” diwali potluck. Everyone’s bringing their favorite dishes to the table with a common goal to appease you and celebrate the festival of lights with other AND with you! There’s everything from Paal Kozhukattai to Prawn Pulao, Mutton pantheras to Balushahi…. and much much more. All droolworthy, real guilty pleasure, pure celebratory food! I for one cannot wait to dig in. Sharing all the recipe links at the end of this post for you to drool along with me. And if you have a diwali recipe you would like to bring to our potluck on instagram, just add the #diwalipotluck.

Malai Laddu

I am bringing Malai Laddu to the table of this virtual potluck. Something I grew up eating. Khoye ke pede and Malai Laddu were two of my Dadi’s (grandmum) favorite sweets. So these were the two mithai that were made in my mum’s kitchen the most. Two of the simplest of Indian mithais but also most satisfying and delicious, if made right. And boy, did my mum make the right! Whether it was the low simmering and stirring of fresh cow’s milk to thicken it to a granular consistency to make khoya for the peda or kneading of freshly made paneer to just the right softness to make these Malai Laddus. Mummy knows how to make simple things, properly, for them to taste like perfection.

Malai Laddu
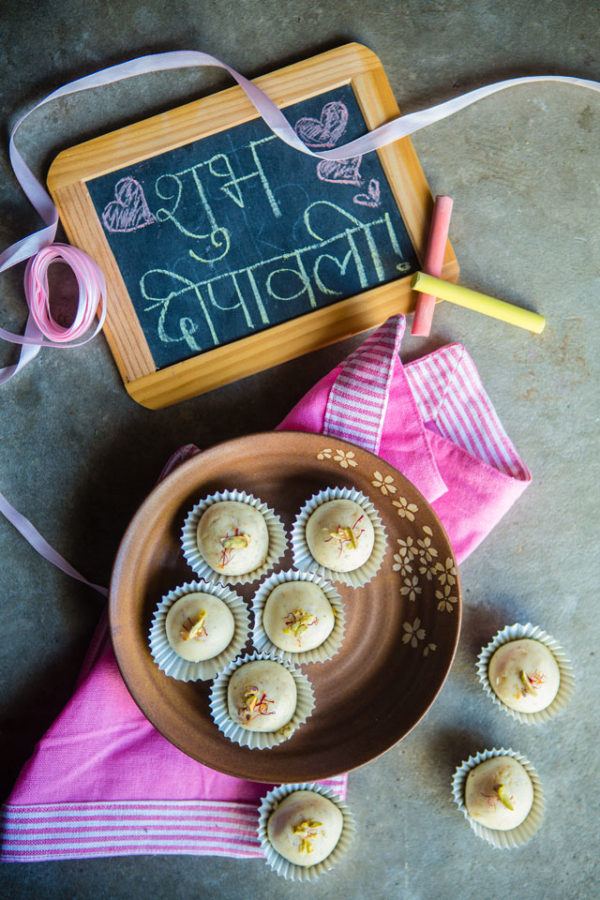
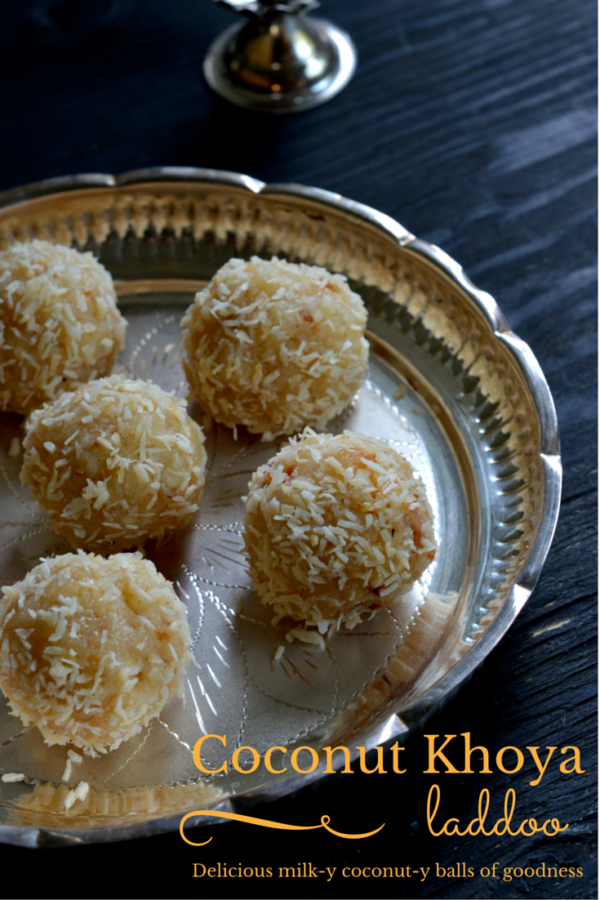
For her Malai Laddu mummy makes fresh paneer in which she adds fresh cream and sugar mixture and then cooks then together. Although I am proud to say that I made my own fresh paneer but I cheated a little bit and added condensed milk instead making the recipe quicker. And let me just add that i tasted pretty darn close to mummy’s malai laddu. That in my book is a winning recipe.

Ingredients: Makes 6-8 laddus

1 quart milk (946ml) can just use a litre

1 tablespoon white vinegar

1/3 cup sweetened condensed milk

2 tablespoon milk

1/4 teaspoon rosewater

1/2 teaspoon cardamom powder

Few strands of saffron

8-10 pistachios (coarsely chopped)

Method:

In a medium saucepan bring milk to a boil. Turn the heat down to low and add vinegar slowly, stirring continuously. The vinegar will make the milk curdle. As the milk curdles and separates from whey, bring the saucepan away from heat.

Place a cheese cloth over a medium sized bowl and pour the curdled cheese through it. The whey will strain through but the cheese will collect in the cheese cloth. Bring sides of the cheesecloth together and squeeze excess whey out of the cheese. Beware, the liquid and cheese will be hot.

Bring the cheese and condensed milk in a blender. Add milk for the blades to run. Blender into a smooth mixture.

Transfer to a heavy bottom pan and cook the mixture slowly, on a medium low heat until the liquid thickens and the mixture takes shape of a smooth, loose dough, 8-10 minutes.

Turn off the heat. Add rosewater and cardamom powder. Mix well. Allow it to cool down. enough for you to be able to handle mixture with bare hands. But try not to leave for more than 8-10 minutes or the sugar will make the mixture hard to handle.

Divide the mixture to 6-8 portions. Grease your palms with 1-2 drops of ghee and roll the portions into smooth balls. Place a strand or two of saffron on top and a little bit of pistachio for garnish.

Share with friends and family….. Happy Diwali!

Here’s what my other friends brought to our virtual Diwali Potluck:

Karachi Halwa by Somedutta

Mutton Pantheras by Maumita

Mini Gulab Jamun by Rumila

Ilish Biryani by Deepsari

Ras Malai by Kankana

Prawn Pulao by Chandrima

Lilva Kachori by Binjal

Mysore Pak by Radhika

Balushahi by Himanshu

Paal Kozukatai by Vijitha


Kanya Pooja Meal

Navratri Thali

Today is an auspicious day for Hindus. Navami, the ninth day and last day of Navratri. Navratri is this nine day long celebration of all the various forms of Maa Durga and today it comes to its climax. It is believed that Lord Rama, the most virtuous hero in the Hindu mythology, needed all the power he can to defeat Ravana, the abductor of Rama’s wife, Sita. He wanted to please Maa Durga, the goddess who bears all the strength, patience and power. Everything Rama needed to kill Ravana and bring his wife back. So he worshipped Durga and all her nine forms, for nine days and at the end of the ninth day he was given the Shakti (power) he needed and went all kill Ravana on the day of Vijayadashami or Dusshera.

The last two days of these nine day celebration, Ashtami (eighth day) and Navami (ninth day) are considered very special in Hindu religion for these are also the two days when we do “Kanya Pooja”. I wrote a little post about Kanya Pooja a while back that might give you a little background. But basically to celebrate this auspicious day we prepare a grand meal (with no onion, garlic, meat or table salt) and serve it to the “Kanyas” the little forms of Durga. It is said that one who has the privilege of worshipping these little girls in their home, prosperity comes to their home.

And since I am one of the blessed ones with two precious little devi’s in my home I try to host a Kanya Pooja at my home every year. I did it this year too. Several little girls (and boys, can’t leave them behind!) came over. We washed their feet, did a few small rituals and then served them a special meal. Most hindu families do not cook with onion, garlic, meat or table salt during Navratri and the food that is served to the kids should not have any of those. I followed those rules and prepared this meal.

Kanya Pooja Meal

So these are the dishes that made it to the plate: Sookhe Kaale Chane (dry bengal gram), Chole, Tamatar Aloo, Boondi Raita, Kheer & a simple salad. So let’s start from the start, shall we?

Recipe for Sookhe Kaale Chane: Serves 3-4

Ingredients:

1 1/2 cups dry bengal gram (washed and soaked for 6 hrs)

1 1/2 teaspoon  canola oil

1/2 teaspoon cumin seeds

1 tablespoon coriander powder

2 tablespoon ginger paste

Salt (Sendha Namak or Rock Salt for pooja)

1 1/2 teaspoon Amchoor (drt mango powder)

1 teaspoon red chili powder (adjust as per taste)

Method:

Pressure cook chana (or cook it in a pot) with a little salt until they are cooked through. Inspect by pressing between the thumb and index finger. Should be able to smash. Strain excess water. Set aside.

Heat oil in a pan. Add cumin seeds. As they sputter add coriander powder and salt (keep in mind there was some salt in the chana too so add accordingly!). Quick stir. Add ginger paste. Turn the heat to low and cook ginger paste for about 20-25 seconds. Then add the strained chana. Give it a nice stir coating chana with masala. Cover and simmer for 8-10 on medium heat, stir occasionally just to make sure nothing sticks to the bottom.

Stir in amchur and red chili powder. Cook off any extra water content. In teh end the dish should be dry. Turn off the heat.

Recipe for Vrat ke Chole: Serves 3-4

Ingredients:

2 cups chickpeas (washed, soaked overnight and cooked with salt OR you can use canned too)

1 tablespoon canola oil

1 teaspoon cumin seeds

1 teaspoon peppercorn

1 inch cinnamon stick

2 green cardamom pods

1 tablespoon coriander powder

1/2 teaspoon turmeric powder

1/2 teaspoon red chili powder

1 thai green chili (chopped)

3/4 cup tomato (chopped)

Salt (Sendha Namak or Rock Salt for pooja)

2 tablespoon cilantro (chopped)

Method:

Bring all the dry masala in a spice grinder or mortar pestle and coarsely grind it.

Heat oil in a pan. Add ground masala followed by turmeric, both types of chilis, coriander and salt. Give it a quick stir. As they sizzle and perfume, add tomato.

Cook tomato over medium heat until it melts into a loose paste, 8-10 minutes. Crush bigger pieces with the back of the spoon. Once the oil separates, add cooked chickpeas. Stir well. Add 1 cup water. Reduce the heat to medium low, cover with a lid and let it simmer for 5-8 minutes.

Turn the heat off. Garnish with cilantro. Serve hot.

Tamatar Aloo: Serves 3-4

2-3 medium sized boiled potatoes (mashed into big chunks)

1 cup tomato (chopped)

1/2 teaspoon turmeric

1/2 cup steamed peas (optional)

1 pinch asafetida

1-2 thai green chili (minced)

1/4 teaspoon mustard seeds

1/4 teaspoon cumin seeds

1 tablespoon oil

Salt (Sendha Namak or Rock Salt for pooja)

1/4 cup cilantro (chopped)

Heat oil in a pan. Add asafetida. As it sizzles, add mustard and cumin seeds. As they sputter add turmeric, chili and salt. Give it a quick stir. Add tomato. Turn the heat to medium low and cook the tomatoes until they melt to form a loose paste, 8-10 minutes.

Stir in potatoes and peas (if using them). Mix it well to the loose tomato paste. Add approx. 1 1/2 cups of water. Stir well. Bring it to a nice rolling boil for 2-3 minutes. Turn the heat off. Cover and let it rest for 5-10 before garnishing with cilantro and serving with the meal.

Recipe for Boondi Raita: Serves 3-4

1 cup plain dry boondi (I used store bought. You can use this)

1 cup plain yogurt

1/2 teaspoon rock salt

1/2 teaspoon sugar

1/2 teaspoon roasted cumin powder

1/4 teaspoon red chili powder

1/2-1 cup water (based on your preference)

Cilantro and (minced) thai green chili (for garnish, optional)

Bring yogurt, salt, sugar, cumin powder and red chili together in a bowl. Stir everything together. Add water to thin it out. (Keep in mind boondi will be soaking up water here add water accordingly. Although you can always go back and add more water if you think boondi soaked too much water for your liking)

Add boondi. Mix it well and let it sit for 5 minutes for the boondi to soften. Garnish with cilantro and green chili OR you can omit the garnish if you like.

For the Kheer I used this recipe here

AND for Poori I used this recipe here

Hope this post helps you along your way through cooking up a delicious Kanya Pooja meal and we wish you a Very Happy and Prosperous Dussehra!

The Pooja photos (ones without food) were taken by my talented friend Kankana of Playful Cooking. Check out her portfolio. She’s uber talented!

30 Navratri Recipes

  1. Sabudana Vada Tots:

Sabudana Vada Tots

Who doesn’t know about popular Sabudana Vada. A super simple recipe with just a few basic ingredients make for a quick and delicious vrat food. We just gave it a little makeover to make it more appealing for the little ones too.

Malai Kofta

Creamy No Onion-No Garlic Malai Kofta Curry

This Paneer Malai Kofta although tastes just like the one you enjoy at your favorite Indian restaurant, uses no onion or garlic making it suitable for Navratri.

Kache Kele Ki Sabji:

You can make Kacche Kele Ki Sabzi for the occasions like Navratri or Diwali when onion and garlic are not used in the cooking. It is a simple dry preparation of raw banana and the best part is, it is gluten free too.

Dry Chole Recipe:

Dry Chole Recipe

This Dry Chole chana is the simple recipe without onion and garlic. It has some taste of Ginger paste and some dry spices. You can enjoy this Dry Chole with Puri.

Dahi Ke Aloo:

Dahi Ke Aloo

This is something very simple, goes well with the pooja meal because it doesn’t ask for strong spices, onion or garlic and as my husband says, its very carby. So perfect for a meal after a day of fasting.

Quick Microwave Potato Fry:

Although I garnished the potatoes here with onion, this recipe doesn’t ask for any. Just tossing the potatoes with some spices and oil, throw them in the microwave and they are good to go. You do not have to skip your navratri meal even o a busy day.

Sabudana Waffles:

Up, your sabudana game a bit with these sabudana waffles. Although the recipe asks for garlic (and ginger) but you can totally omit it and go for a “navratri version” of it without much change to the crispiness of the waffles.


Sabudana Khichdi:

When you talk of vrat food, Sabudana khichdi is teh first thing that comes to mind so we had to include it here.

Sabudana Kheer:

Sweetened with date palm jaggery this tapioca pearls pudding is a creamy, luscious, healthy (& gluten free) bowl of comforting dessert for these Navratri days.

Arbi and Sabudana Thalipeeth:

Thalipeeth made from Arbi and Sabudana. A flourless recipe.This is one of the recipes that can be enjoyed even during Navratri. Quick to make and yummy to eat. It is filling too.

Sabudana Vada:

Sabudana Vada is another popular vrat recipe where this vrat staple, sabudana or tapioca pearls are soaked to puff and soften and then mixed with boiled potato and a few basic spices to make vadas. Can be served with a simple date chutney or a drizzle of spiced yogurt and cilantro.

Apple Halwa:

Halwa a popular Indian dessert, can be made in several ways. This apple halwa here is a take on the traditional gajar halwa using almost the same ingredients and cooking style. You can try fruits like pineapple, or raw banana or even any kind of squash too.

Lauki ka Halwa:

Bottle Gourd, or Dudhi or Lauki is another popular squash that is used to make halwa. You can very well make it for Navratri.

Gajar Halwa:

You speak of halwa in Indian festivals and not talk about carrot halwa or as we lovingly call it Gajar Ka Halwa, that would be so wrong. So here’s the recipe for our beloved Gajar Halwa.

Carrot Halwa Trifle:

These mini versions of carrot halwa trifle is a fun twist to our traditional carrot halwa making them a great contender for your next Navratri party.

Doodh Ka Sheera:

Doodh Ka Sheera, is not very far from a paneer ki kheer where fresh or store bought paneer is cooked in milk. Only here the milk is first slow cooked to be reduced and then a coagulant, lemon, lime juice or vinegar is used to curdle the milk. The real magic happens right after that. Unlike the making of paneer where you get rid of the whey, some sugar is added to the whey instead and cooked with the paneer which by now turns into soft, spongy cheese balls. In the end you get a dessert which looks and tastes very much like rasgulla and paneer ki kheer would make babies. That does sound like a pretty sweet baby, doesn’t it?

Bhappa Doi:

A popular bengali dessert, Bhappa Doi is a dish where sweetened condensed milk and yogurt are mixed together and then steamed to make this melt in your mouth cheesecake.

Bhappa Doi with POM seeds and nuts:

This yogurt pudding is inspired by bhapa doi, a traditional Bengali dessert. Bengali cuisine is famous for their delectable desserts, most of which are made with a minimal number of ingredients, but incredible technique.
You can make your own bhapa doi easily at home by using a couple of simple ingredients like Greek yogurt and condensed milk. Luscious and delectable, this silky pudding has been jazzed up with a quick pomegranate coulis, crushed nuts and rose petals. Perfect for entertaining or for days when you simply feel like it!

Coconut Khoya Laddu:

Deliciously decadent and melt-in-your mouth kind of fudge is this Coconut Khoya Laddoo. Impress your guests this Navratri by making this really quick and easy laddoo.

Cardamom Peda:

These quick to make cardamom peda are a delicious option when you have to whip up something “traditional” and festive last minute. Just microwave some dry milk powder and condensed milk, throw in some nuts and cardamom and you are good to go. These are so decadant, no one can even tell they took minutes to make.

Paneer Badam Kheer: 

Paneer Badam Kheer is a rich, delicious Indian milk pudding with the goodness of paneer (cottage cheese) and almonds (badam).

Pumpkin Pudding:

Our recipe contributor Alka says, “My son is a fussy vegetable eater and this one is never been on his favourite list. But I had found a way to make him fall in love with this humble vegetable when he found the house filled with the fragrance of festivity with this sweet and gooey dessert called Pumpkin Halwa. This one dessert I am sure is going to change your perception of Pumpkin, when you look into the color and texture of this dessert.”

Rabri:

Creamy milk reduced to a thick pudding of sorts that is sweetened with sugar and made fragrant with saffron and cardamom, one spoon of this rabri is enough to make you forget about all the woes in this world!

Sabudana Jalebi:

Jalebi is a traditional sweet dish made on every festival and special occasions . If you are a true jalebi fan, here is a quick and tasty version that can be prepared without long hours of fermentation and made from the Tapioca pearls or Sabudana .

Shrikhand Tart:

Shrikhand, creamy sweet hung curd, mildly flavored with crushed cardamom and saffron strands is a magical transformation of simple curd into a sweet delicacy befitting for GODs. That’s why “Shrikhand” is supposed to mean “Ambrosia of the Gods”. This traditional Indian dessert uses Low fat, rich and creamy Greek yogurt and involves no cooking and is a standard feature of many households especially in Gujrat and Maharastra. Shrikhand is generally flavored with saffron, cardamom or diced fruits and served with masala puri or as a standalone dessert.

Kheer Komola:

This is an amazing bengali dessert marrying all the richness and goodness of a traditional kheer to the tang and punch of citrus which in this case is orange. Oranges like valencia, malta or clementines work best for this dessert.

Papaya Delight:

Papaya is fortified with powerful antioxidants , contains dietary fiber, copper, folate, pantothenic acid, magnesium, vitamin A, vitamin C, riboflavin, and thiamin. The possibility with cooking with Papaya is versatile. You can make salads, fruit pies, smoothies, juice or even a salsa out of it. Because of it’s numerous health benefits, papaya is one of the best fruits and perfect for vrat boosting your energy during these auspicious Navratri days.

Protein Rich Energy Balls:

A very quick sweet made by grinding roasted peanuts and mixed dry nuts such as almonds, walnuts, cashew nuts and pistachio. It is often made during “Shravan” month when people observe fast but can very well be used for any other fasting days too like…. you guessed it, Navratri Vrat!

Mango Ginger Iced Tea:

A refreshing drink suitable even for vrat, this mango ginger iced tea is a perfect excuse to stop during the day to cool yourself down with a sip of deliciousness.

Sabudana Vada Tots

Sabudana Vada TotsThere was this big mandir (temple) bang in the middle of a very busy market, in our town. A short walk from a bustling bus station, next to a row of pan walas and juice stalls, across the street from sabzi mandi (farmers market) and at the opening of a long stuffed gully stuffed with choori walas (bangle shops). This was a mad and restless street. But the moment you enter the gates of the mandir, it was a different world. As all that clamor and commotion I walked through just 2 steps back, never happened. Even as a little kid I would notice the contrast and clinching to my mummy’s pallu (corner of the saree) would look around wonder how that happened. Never quite understood the logic of mummy’s response of “that’s the magic of a holy place” but I guess that is the magic of a holy place. Its like a safe haven where you shed all your layers behind and enter into a divine space.

Sabudana Vada TotsSabudana Vada Tots
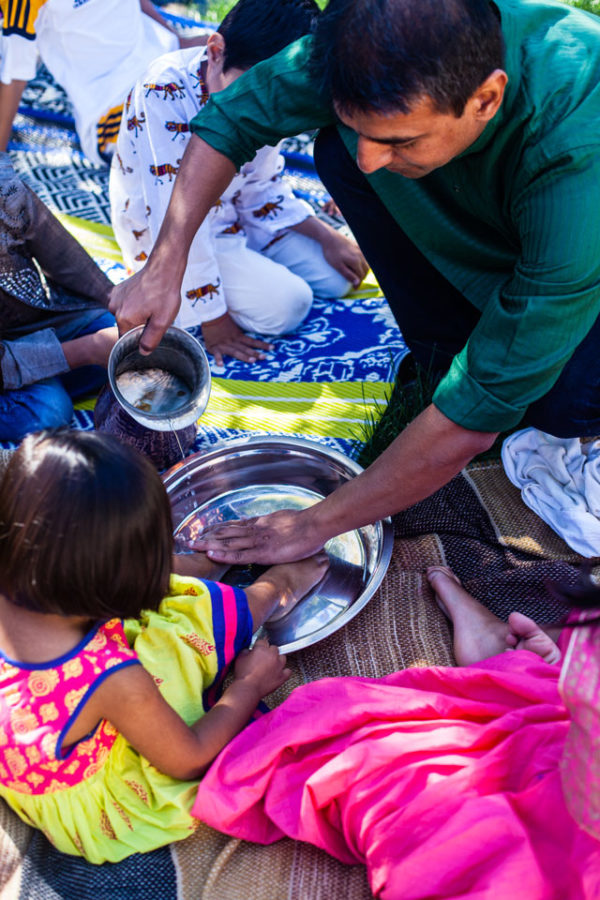
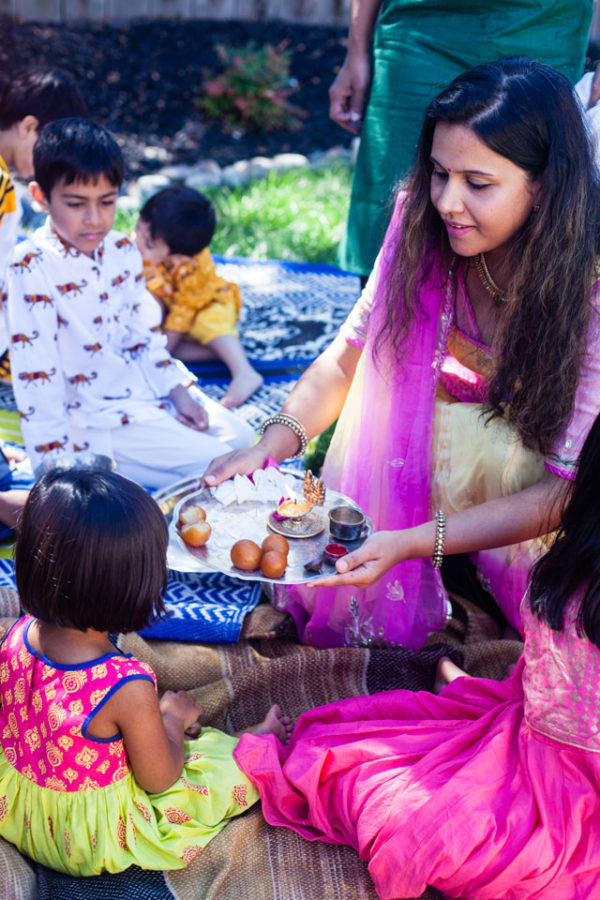
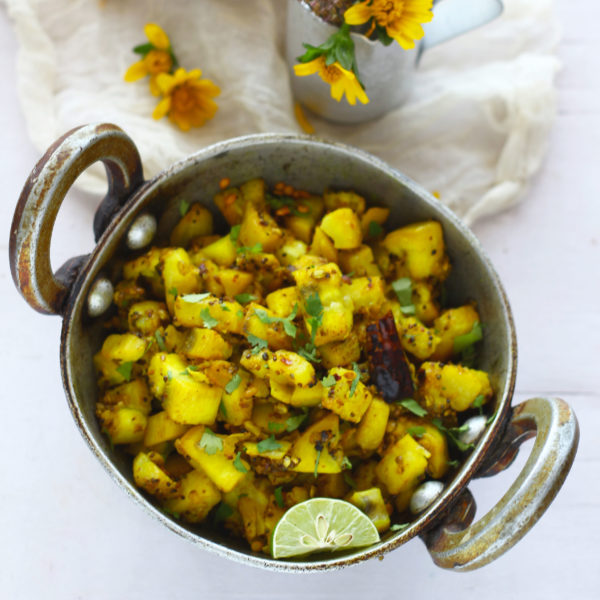
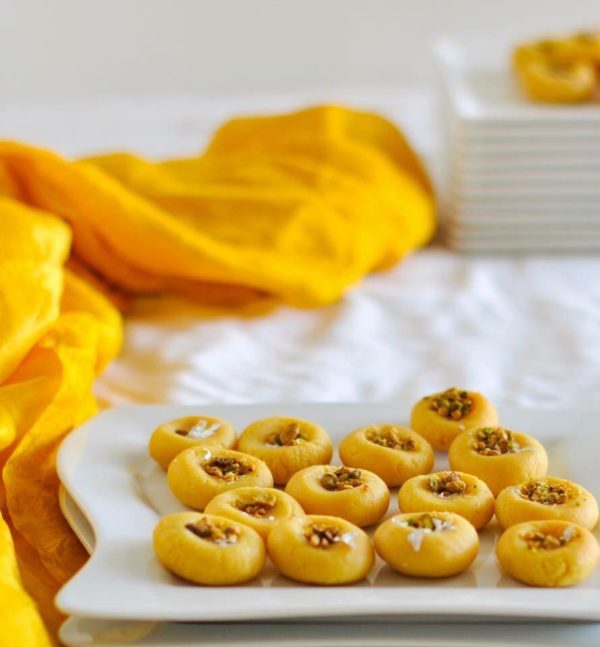
Although Navratri would come, the gates would open and all the lights, colors, aromas and madness would come pouring into the temple yards. Nine days of celebrating Maa, Durga, Shakti, her energy and her nine forms. Nine days of celebration and joy. Back then to me it purely meant nine days of food and frolic. Although that’s true for any festival but this was special because this is the only time when the fun was extended for days. Many people fast for these nine days, mummy did too, staying away from any kind of meat, many grains and even normal table salt. Did pooja several times a day, dragging my brother and I into, which I loathed then, but today I appreciate. Because now I know a thing or two about those rituals and now I can drag my kids into it. You know to, “expose them to our culture”! To my surprise, they enjoy it and even ask questions.

Sabudana Vada Tots
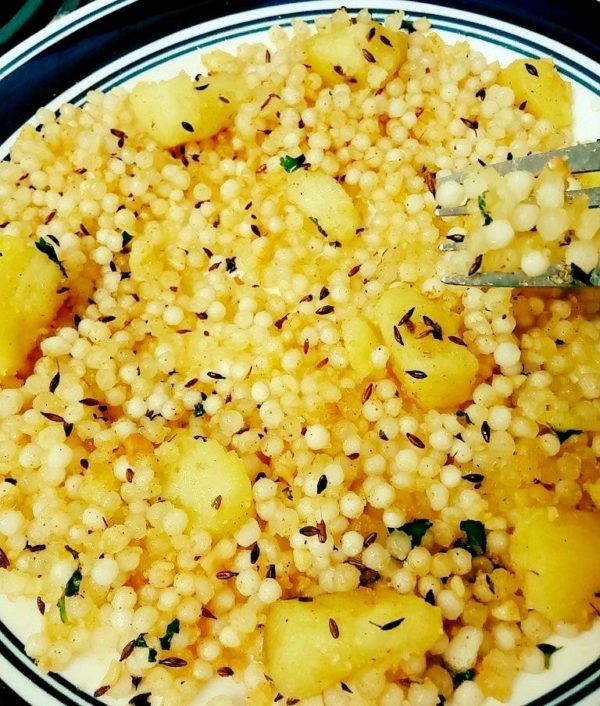
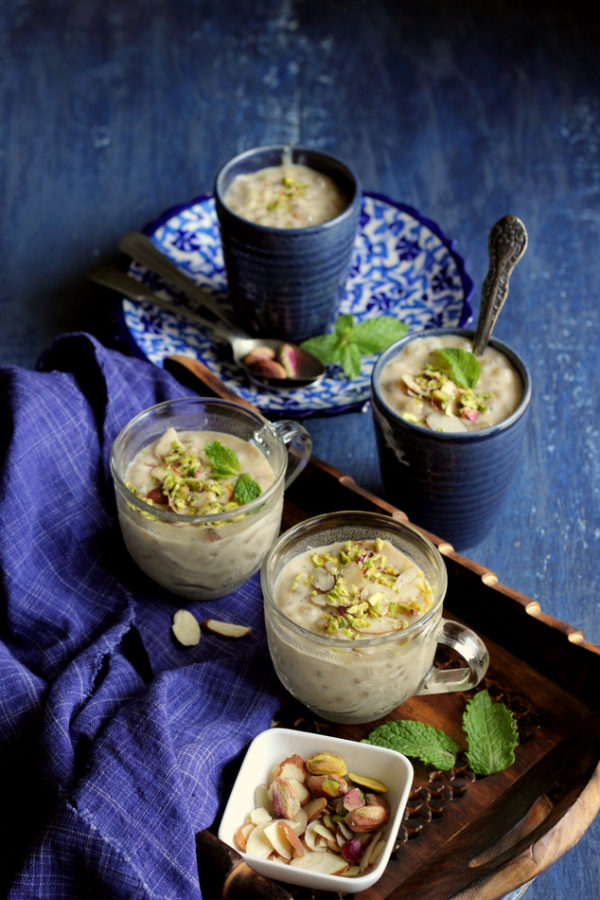
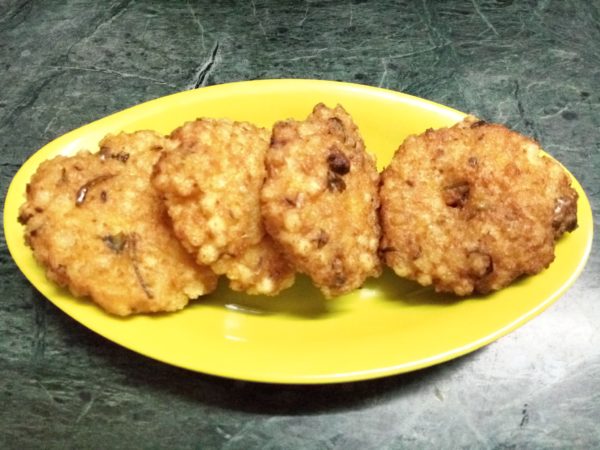
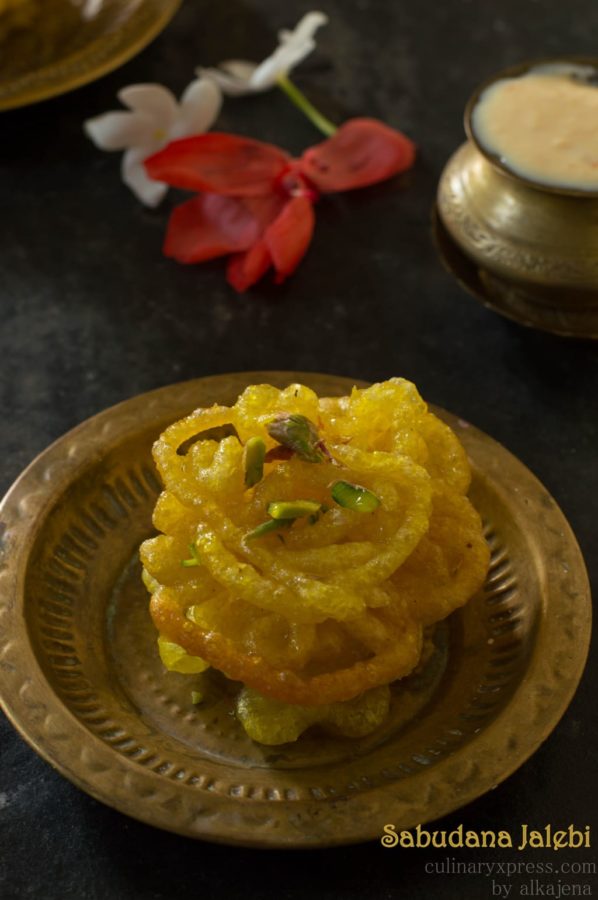
Its that time of the year again. The time for celebration, the time for frolic and most importantly the time for food. During these fasting nine days, Sabudana or tapioca pearls is one of the things mummy cooks with a lot. She’d make pudding with them, tossed them with potatoes and peanuts to make khichadi, make jalebi with it and my favorite- sabudana vadas. Light and crispy cakes, dunked in some spiced chilled yogurt and garnished with mint or cilantro. Pure delight. I just make mine a little smaller giving them shapes of tater tots for my American kids, selling tots to whom is easier than selling vadas. So please follow the recipe for Sabudana Vada Tots and please accept our warm wishes for a Happy Navratri!

Ingredients:

1 cup Sabudana

1 boiled potato (mashed)

1/2 teaspoon fennel seeds

1/2 teaspoon cumin seeds

Salt to taste (substitute with rock salt if making for vrat)

Oil for deep frying

Method:

In a medium sized bowl, soak sabudana in water. Water just above the level of sabudana. Let it soak for 2-3 hrs. Sabudana will absorb all the water and puff double in size leaving no extra water to the bottom. Press sabudana between fingers to check if its soaked.

Add rest of the ingredients to the soaked sabudana and mix it well, in kneading motion bring all the ingredients together forming a dough like consistency. One tablespoon portion size at a time, form dough into small tots. Line them on a sheet while you get the oil ready for frying.

Bring the oil to 350 deg. F and deep fry the sabudana tots, not more than 5-6 at a time. If you crowd the tots close together, they might stick to each other. Fry until golden brown. Serve with spiced yogurt and a garnish of mint or cilantro leaves.

Vegan Tofu Pasanda

Spoiler Alert: I am not vegan. Neither is my family. I mean for the past one month I have been trying to stay away from any kind of processed sugar or carbs. And I am actually proud to say that I have very successfully been able to stick to it. But that’s as far as I can go when it comes to diet control or rather a “diet cleanse”! But I have to say this book by my dear friend Richa of Vegan Richa can very well turn me into a vegan. Tofu Pasanda

OK, another confession, Vegan Richa’s Indian Kitchen although is Richa’s first cookbook and her next one is coming out soon (which I cannot wait for!) but I started cooking with it a few months back. And very soon it has become one of my favorite cookbooks. Being someone who really enjoys her meat, dairy and poultry I was skeptical whether the book will make me feel comfortable or not, as a lot of the vegan ingredients were alien to me. But Richa made the recipes and the ingredients so accessible and simple. I’ve cooked a lot from this book and most of the recipes are quicker to fix than you’d imagine. Another positive for a busy working mom like me.

Tofu Pasanda, is one of our family favorite from this cookbook. A take on a traditional Chicken Pasanda this recipe is made gluten free or even soy free if using hemp tofu. Its creamy and rich with the use of poppy seeds, coconut milk gives this dish a refreshing sweet flavor and hearty with the mixing of sunflower seeds. We make this dish almost every other week and it being simple to put together makes weeknight dinner a delight. Try it! Also check out Richa’s blog for thousands of amazing vegan recipes.

Ingredients:

Cooking oil- 2 tsp

Extra firm tofu- 14oz (cut into 3/4 inch cubes) pressed in a kitchen towel for 10 minutes, or hemp-tofu

Garam Masala- 1 tsp

Ground Cinnamon- 1/4 tsp

Red Onion (chopped)- 1 cup

Garlic (chopped)- 4 cloves

Ginger (chopped)- 1 inch knob

Cumin seeds- 1/4 tsp

Coriander seeds- 1 tsp

Fennel Seeds- 1/2 tsp

Clove- 1

Pumpkin or Sunflower seeds- 2 tbsp

White or Black Poppy seeds- 1 tsp

Tomato (chopped)- 1 cup

Coconut milk- 3/4 cup

Water- 1/2 cup

Sweet Paparika- 1/2 tsp

Cayenne- 1/4- 1/2 tsp

Salt- 3/4 tsp (or more to taste)

Sugar- 1 tsp

Method:

Heat 1 tsp of oil in a large skillet over medium heat. Add the cubed tofu, garam masala, and cinnamon and cook until lightly golden on some edges, about 4 minutes. Set aside.

Heat 1 tsp of oil in a large skillet over medium heat. Add the onion and cook until translucent, about 6 minutes. Add the garlic, ginger, cumin, coriander, fennel seeds, clove, pumpkin seeds, and poppy seeds. Cook for 2 minutes. Add tomato and cook until saucy, about 5 minutes. Stir occasionally. Mash the larger tomato pieces.

Cool the mixture slightly and transfer to a blender. Add the coconut milk and blend into a smooth puree. Add the puree to the skillet with tofu. Add water, paparika, cayenne, salt, and sugar. MIx well. Cover and cook over medium low heat until the sauce thickens and tofu picks up the color of the sauce, about 25 minutes. Stir occasionally. Taste and adjust teh salt and spices, if needed. The sauce needs t be cooked well to cook the poppy seeds which are somewhat grassy tasting when raw. Cook longer until the sauce tastes flavorful and creamy without any grassy aftertaste.


Bhuna Gosht

I might have told you about this place before, a small Pakistani restaurant near our house, that we frequent. A trip to this place at least once a week is a must in our household. We get jitters if for some reason we unable to make it there for more than a few days and those jitters can only be subsided with a visit there. Deep complex curries with layers and layers of flavors, falling off the bone meat preparations, juicy and delicious tandoori chicken with simple yet full of punch dips. Ah, you will know the meaning to all this only once you taste them all! And the hustle at the place with long line of people waiting to order and then impatiently waiting for their food to show up, just takes me back home to the dhaba, road side restaurants in India. And what I like best about this place is that even after running in America for more than a few decades, it still hasn’t adulterated the use of spices and oil here.

One of Abhishek’s favorite dish from this place is their bhuna gosht. A beloved Pakistani/Indian preparation using mainly whole spices instead of garam masala powder, slow cooking the meat which in this case is typically goat or lamb. You also add yogurt to give it a tang and cut through the spices and finish it off with a little milk that adds to the richness of the dish. A mildly spiced dish that can brighten up any dinner table. I made some for Eid this year and was a great hit.

Ingredients:

2.5lbs Lamb or Mutton pieces

1.5 tbsp meat Tenderizer

1/2 cup vegetable oil (or mustard if you like the flavor)

3/4 cup red Onion (thinly sliced)

1/2 cup red Onion (coarsely ground)

3 tbsp ginger garlic paste

2 thai green chili

1.5 tsp cumin seeds

3 black caradamom

1 cinnamon stick

2 bay leaves

3-4 cloves

1.5 cups tomato (diced)

2 tbsp coriander powder

1.2 tsp red chili

1 tsp turmeric

salt to taste

1 cup yogurt

1/2 cup water (optional)

1/2 cup milk

1/2 cilantro (chopped) for garnish

Method:

Mix meat tenderizer to the meat. Set aside to rest for 15 minutes.

Heat oil in a thick bottom pan. Add ginger garlic paste. Saute for 5 seconds then add sliced onion. Sprinkle 1/2 tsp salt and cook the onion until translucent, 5 minutes. Then add onion paste and cook the mixture until the paste is golden brown, 8-10 minutes.

Add chili, cumin seeds, black cardamom, cinnamon, bay leaves and cloves. Stir and add tomato followed by coriander, turmeric and red chili. Mix well and cook until the tomato melts, 5 minutes.

Add lamb to the masala paste and cook for until dry, 10-15 minutes. Now add salt. Cook for another 10 minutes.

Stir in yogurt. Cover and cook until the meat is cooked, approx. 20-25 minutes. Somewhere in the middle add a little water if you want the curry thin otherwise you can skip this step.

Once the meat is cooked, stir in milk and finish off cooking. Garnish with cilantro and serve with steamed rice and naan.

4 Fun Dosa Recipes

Idly and Dosa are two favorites in my household. Nine out of ten times you will find idly and dosa batter stored in my refrigerator. Its easy to whip up a healthy and filling meal, or snack, if you have the batter handy. Also makes for a good lunchbox food and the kids love it too, which is a great plus!

Paratha is another one! But as much as we can’t get enough of these, you tend to get bored of the same ways. Specially the kids. They want variety, they value the looks of it and several other criteria, like the hand shouldn’t get dirty, shouldn’t be too spicy and should be easy to hold and walk around when eating lunch and playing with legos go hand in hand! So I started experimenting with our good old dosa batter and came up with a few recipes which are approved my the kids and “kids at heart” alike. Sharing four of our family favorites today.

All these recipes are pretty simple and intuitive from the video itself. No exact measurements necessary. Feel free to play around. Although all of them have one thing in common, the dosa batter. I have a detailed post on how I make my dosa batter. I make my batter once a week. Ferment it and then store it in an air tight container in the refrigerator. Use it as and when required. Its good for a week.

EggDosa
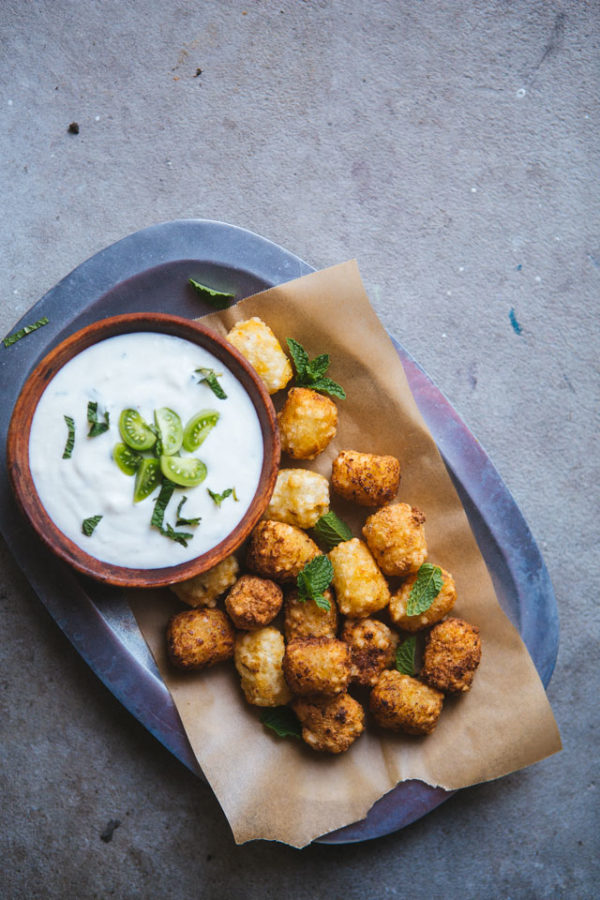
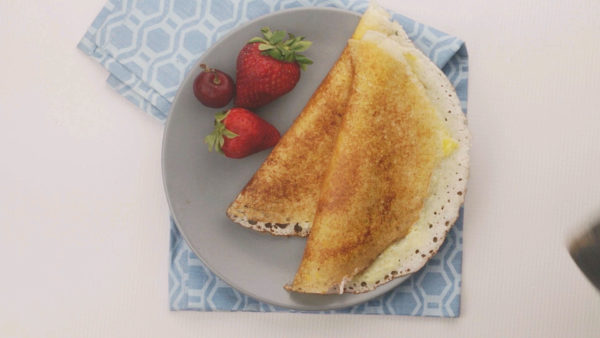
Egg Dosa: Make 2-3 dosas

Ingredients:

1 cup dosa batter

2 eggs

Salt and Pepper

Method:

Heat a thick bottom griddle or tava. Mix egg with salt and pepper. Set aside.

Wipe the griddle clean and lightly grease it. Pour dosa batter as you normally would to make a dosa. (follow the instructions to make dosa here or refer the video above).

Once the batter on the surface is not wet, drizzle a little oil. Pour beaten egg. Spread on the surface of dosa. Cook until the surface is opaque. Flip dosa. Be careful not to break it. Cook the other side for barely 2 seconds. Take off the griddle.

Serve hot with chutney, onion and ketchup rolled in, some kind of cooked meat or just as it is.

Nutella DosaNutella Dosa: makes 2-3 dosa

Ingredients:

1 cup dosa batter (instructions here)

1 tablespoon Nutella

Method:

Make dosa crepes following the instructions above or referring here.

Spread approx. 1 teaspoon (or more if your like) nutella on the dosa. Fold or roll it up and serve with a side of chilled milk or shake.

Spring Onion DosaCheese and Spring Onion Dosa: Makes 2-3 dosa

Ingredients:

1 cup dosa batter (instructions here)

1/3 cup mozzarella cheese (grated)

1/4 cup spring onion (chopped)

Crushed black pepper

Method:

Heat a thick bottom griddle or tava on a medium high heat.

Wipe the griddle clean and lightly grease it. Pour dosa batter as you normally would to make a dosa. (follow the instructions to make dosa here or refer the video above).

Once the batter on the surface is not wet, drizzle a little oil. Now sprinkle cheese, spring onion and crushed black pepper as per your liking, on the dosa to cover the surface, leaving the boundary.

Cook for 30 seconds or until the cheese begins to melt. Fold or roll the dosa. Serve hot.

Beetroot DosaBeetroot and Feta Cheese Dosa: Makes 2-3 dosa

Ingredients:

1 cup dosa batter (instructions here)

1 tablespoon beetroot pulp or puree

2-3 tablespoon feta cheese (I used mediterranean herbed feta for extra flavor)

Method:

In a bowl mix dosa batter and beetroot puree/pulp together.

Heat a thick bottom griddle or tava on a medium high heat.

Wipe the griddle clean and lightly grease it. Pour dosa batter as you normally would to make a dosa. (follow the instructions to make dosa here or refer the video above).

Once the batter on the surface is not wet, drizzle a little oil. Now sprinkle about 1 tablespoon cheese. Cook for 30 seconds or until the cheese softens a bit. Fold or roll the dosa. Serve hot.

Bhindi Fry

Ingredients:

2 tablespoon cooking oil

1/2 fenugreek seeds

1 whole red chili (broken to 2-3 pieces)

2 garlic cloves (sliced or chopped)

4 cups Indian Okra (washed and cut)

Salt to taste

1 teaspoon turmeric

2 teaspoon coriander powder

1 teaspoon amchur (dry mango powder)

Method:

Heat oil in a thick bottom pan. Add garlic, fenugreek seeds and chilli. As the garlic begins to brown add okra. Sautee on medium high for 3-5 minutes until the skin begins to brown.

Stir in turmeric. Turn the heat to medium, cover and cook for 8-10 minutes until the the okra begins to soften.

Uncover. Add salt. Sautee for 3-5 minutes until the okra is cooked.

Sprinkle coriander powder and amchur powder. Stir to mix well. Turn off the heat and serve hot as a side.

Whole Wheat Pizza Recipe

It is probably not a secret that I spend a lot of time in the kitchen. And ever since they were little, both my kids have hung around with me in the kitchen. Initially banging pots and pans then slowly setting up their own kitchenette by me on the floor and then eventually stirring and chopping and cleaning for me. Both of them love it there and so cooking as a family is one of our favorite things to do. The butterfly, as she is growing older is learning to cook dishes by herself although the little monkey is still too little to follow instructions very well. So when cooking with both of them it sometimes get tricky and needless to say, messy!
Pizza Dough Recipe

After a lot of such “tricky-messy” experiences I now have a few recipes that I know is both fun and fulfilling for the kiddos. Homemade Pizza from scratch is one such dish. Its fun for the kids to make with all the flouring, pulling and rolling involved at the same its pizza, and which kid doesn’t like a pizza?!Pizza Dough Recipe

So last weekend we had one of our “pizza making parties” and this time it was mostly the little ones who did all the hard work. Well, to be totally fair, it was the butterfly who took the lead but the little monkey was there 100% with all her solicited AND unsolicited help! It was a good opportunity to also test out this great avocado oil Calpure sent my way, to give it a try. I liked the oil. It was slightly thicker than the extra virgin olive oil I use and also darker in color but I like the consistency and smell. Apart from the other benefits of avocado, this oil has a high smoke point so I figured it should be great for a recipe like pizza.

Alright back to the pizza. Although this particular recipe uses whole wheat flour and all purpose flour in 1:1 ratio, you can also use just whole wheat flour. After trying both or rather also one with just all purpose flour, I felt finding the mid ground between the two flours creates the best pizza crust for me.

Ingredients:

1 1/2 cups whole wheat flour

1 1/2 cups all purpose flour

1 1/4 cup lukewarm water (approx. 110-115 deg. F)

1 tablespoon active dry yeast

1 1/2 teaspoon sugar

1 tablespoon olive oil (plus 1 teaspoon for oiling the bowl) (I used Calpure Avocado oil)

1 teaspoon salt

Method:

Pizza Dough Recipe
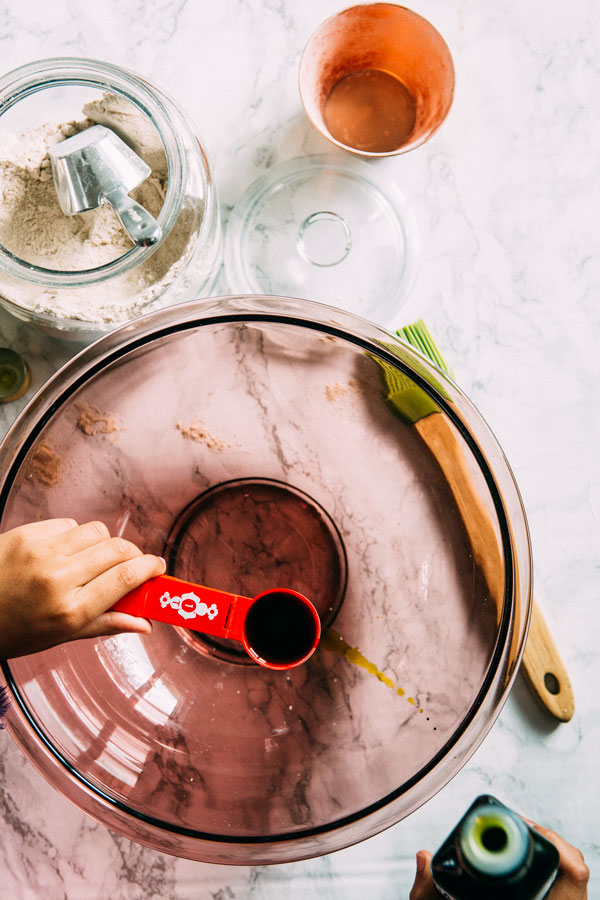
In a cylindrical jar or mug mix together sugar and water. Stir in yeast until the water turns milky and the yeast dissolves. Cover for 5-10 minutes.

The process is called proofing and froth will form on top. (If yeast doesn’t dissolve and no froth is formed that means your yeast it dead. Start again with active yeast.)

Pizza Dough Recipe
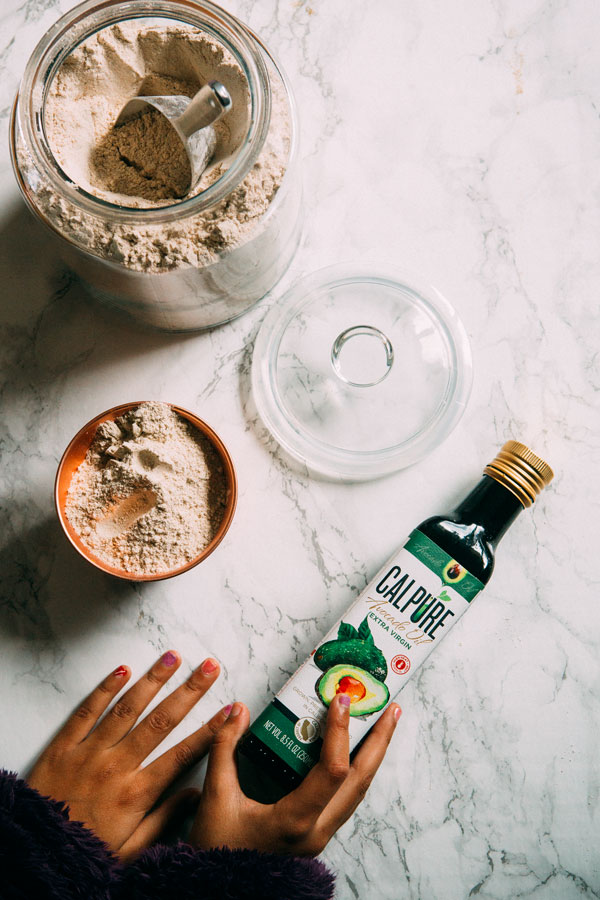
In a large mixing bowl mix together flour, salt and olive oil. Add the yeast mixture and with the pedal attachment of your stand mixer or using your hand, knead until the dough comes together. Sprinkle more water if you think the dough is hard. Knead for 8-10 minutes until you get a soft and smooth dough and it separates from the walls of the mixing bowl. We want to knead the dough for a good 8-10 minutes because this kneading will develop gluten in your flour which means more strength and elasticity of the dough. 

Pizza Dough RecipePizza Dough Recipe
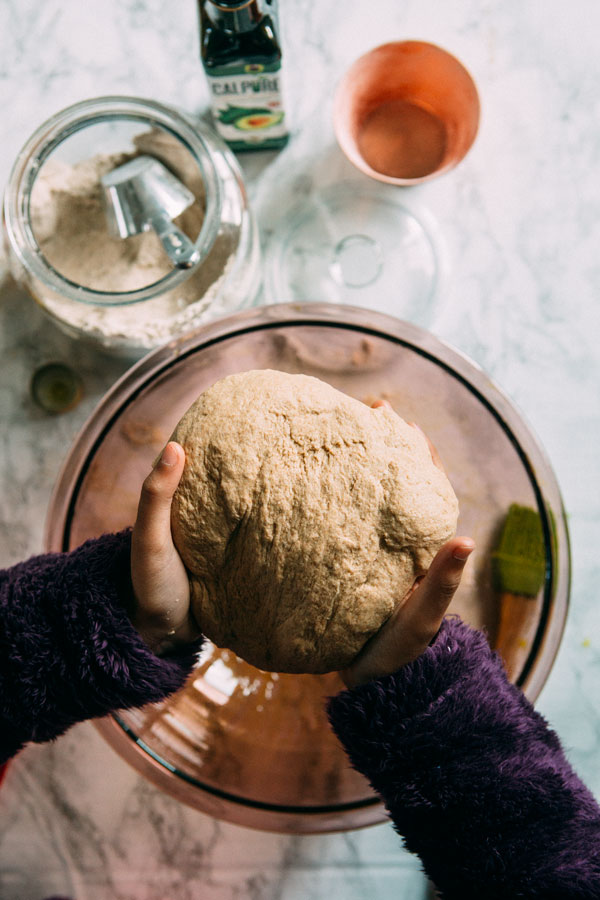
Oil a large bowl at least thrice the size of dough. Shape the dough into a big ball and drop in the oiled bowl and then turn it to make sure all sides of the dough are oiled. Cover the bowl with a damp cloth or plastic wrap. Let the dough rise in a warm, dark place (I prefer my oven in turned off position), for 1 1/2- 2 hours.

Pizza Dough RecipePizza Dough Recipe

Pizza Dough Recipe

Once the dough doubles in size, uncover and gently fold 2-3 times. Do not punch it down to deflate. Punching the pizza dough too much will deflate the air pockets and that means the crust wouldn’t be very light.

Dust the work station and divide the dough into four parts. Lightly knead the dough again to form smaller balls. Dust a baking sheet. Transfer the dough balls and let it sit again for 45 minutes for a second rise OR at this point you can also wrap the dough in a plastic wrap and refrigerate for future use.Pizza Dough RecipeAfter the second rise, transfer the dough to a floured surface and roll it down to 12- 15 inch flat circle. Be very gentle with the dough and use your fingertips and hands to stretch the dough into a disk.

Pizza Dough RecipeTransfer to a pizza pan lined with cornmeal. Add toppings of your choice. and cook it in an oven preheated to 475 deg. F for about 15-20  minutes or until the crust is brown.

Some fun pizza recipes for you:

Mushroom, Feta and Cilantro Naan Pizza

The Spice Road Pizza

Feta Pesto Veggie Delight Pizza

Homemade Pizza Recipe

Skinny Pizza

Baigan Bharta Pizza

Blue Cheese, Balsamic and Cherry Tomato Pizza

Spinach Ricotta Pizza

Caramelized Onion, Bacon and Spinach Pizza

Masala Sandwich Rollups

Masala Bread RollupsWaking up the sound of a screaming alarm is a norm. Sometimes when its still dark out and sometimes to a gleaming sun sifting through my sheer bedroom curtains. Sliding into my slippers hat are although quiet but never cease to squeak in those wee hours. I try to tip toe out the door of my quiet bedroom to a quieter and brighter part of the house, making sure I do not wake up anyone. Some days I succeed, some days I do not. The days I don’t are mad ones. The moment I step out of the bed, the little monkey catches a whiff and turns in her crib, followed by cry for “mumma…” with both hands raised up in the air. I pick her up, we cuddle and kiss, hugging each other tight we walk out of the room.

As much as I love this precious cuddle time with this cutest, soft cuddle bear god has given me, in the back of my head I’m slowly getting into the panic mode. Mornings with two lunch boxes to fix, four breakfasts to serve, two kids to get up and ready and three bags to pack are as it is too much to squeeze in an hour long period. Now these curveballs thrown in the form of lazy cuddles and slurpy kisses, even though from a puppy faced, angel eyed 2 year old, is too much to handle for a poor mommy who barely ever has things “under control”!

So after too many of such curveballs I’ve learnt to plan and prep. This recipe is the birth child of one such planning. You can prep this recipe to the point that all you have to do in the morning is pop a sheet of these Masala Sandwich Rollups into the oven and spend 15 minutes purely cuddling and kissing your cuddly bear! These rollups serve as both breakfast and lunchbox dish, so there… you get another 15 minutes just to cuddle! You can get creative and play around with the filling. Add any kind of meat or veggies of your choice. Can also serve these Masala Sandwich Rollups as after school snack or as a party appetizer.

Ingredients: Makes 16-18

1 loaf traditional sandwich bread (can use white or multigrain)

1 tablespoon cooking oil + extra for brushing

1/4 teaspoon mustard seeds

1/4 teaspoon fennel seeds

1 cup carrots (chopped)

1 cup green peas (steamed)

1 cup potatoes (boiled and diced)

1/2 teaspoon turmeric

1 teaspoon cayenne

1 teaspoon chaat masala

1/2 cup cilantro (chopped)

water for brushing

Method:

Heat oil in a thick bottom pan. Add mustard and fennel seeds. As they sputter add carrots.

Sautee and cook on medium low heat for 5-8 minutes until the carrots soften. As the carrots soften, add steamed peas and potatoes. Stir well.

Add, turmeric, cayenne, chaat masala, salt and cilantro. Mix everything well together. Using a masher or back of the spoon, roughly mash the vegetable mixture. Transfer in a bowl. Set aside for later.

Cut the side crust of the bread. One slice at a time, using a rolling pin (or a glass bottle) roll the bread into flat, thin sheets. Place approx. 1 tablespoon filling on one side of the flattened bread. Lightly brush water in the remaining area of the bread and roll the bread around the filling, sealing the end like a spring roll.

Line on a baking sheet. At this point you can either cover the baking sheets with plastic wraps and refrigerate the sandwich rolls for when ready to bake OR, brush oil of the rolls and bake at 400F for 10 minutes, on middle rack, turning side midway. Bake another 5 minutes if you like your sandwiches crispier than usual.

Enjoy with a side of cilantro chutney or ketchup.