Spring Peas and Eggs

Spring is here and we did not even notice it until very recently, thanks to all the crazy rain we are getting! Not that I am complaining. Rain is good for the drought n all but still, spring is here… and we deserve to bathe in its glory. Drown is the vibrant colors of the new bloom, get lost in the sweet hum of the hummingbird, perched on a cherry blossom tree and wallow in the spring bounty of crunchy asparagus, juicy apricots and sweet carrots and green peas. We do deserve to enjoy all of the beauty of spring so rain can take a break! Well it did for over a week here and the sun showed up, warming us all up and opening up those poppies and clovers.

When in the mood of spring, surrounded by all the beautiful colors you ought to bring those colors in your kitchen too. Hence came back into my kitchen is this recipe originally by my mother in law. Spring Peas and Eggs is a perfect spring recipe. Using my favorite spring produce, sweet peas and bringing us in an easter mood with the addition of eggs, this recipe is also a favorite of mine because of its simplicity and ease. Its quick enough to be fixed in minutes on a busy weeknight and elegant enough to be paired with some homemade bread, a decent salad and a fancy wine to make for a special meal. Enjoy the recipe for these Spring Peas and Eggs or as we lovingly call it- Anda Matar!

Ingredients: (serves 4)

2 tablespoon Oil (canola or olive)

1/4 teaspoon asafetida

1/2 teaspoon cumin seeds

1/2 cup onion (chopped)

1 teaspoon (thai green chili)

1 tablespoon coriander powder

1 teaspoon Garam Masala

Salt to taste

2 cups Green Peas (steamed or frozen & thawed)

4 large eggs

1 tablespoon cilantro for garnish (optional)

Method:

Heat oil in a wide mouthed, shallow pan. Add asafetida, followed by cumin.

As the ingredients sputter add onion. Sautee for 3-5 minutes on medium low heat. Add the onion begins to turn golden add minced chili. Cook for another minute of medium high heat.

Add coriander, garam masala and salt. Stir everything well together.

Add peas. Mix well. Cover and cook on medium heat for 3-5 minutes.

Take the lid off. Mix well. Spread the peas evenly on the pan. Using the back of a spoon make 4 indentations on the peas at approx. equal distance from each other.

Turn the heat to low. Crack one egg at a time and drop in the indentations. One egg per indentation. Cover and cook on low for 5-8 minutes or until the egg white becomes opaque and yellow is firm but runny. If you want the yellow harden up then cook a couple more minutes. Turn off the heat. Garnish with cilantro and serve hot with a side of bread.

Banana Bread Fritters (Gulgula)

My brother was always the dessert person among the two of us. If mummy would let him he’d just live on mithais. I on the other hand never had a sweet tooth growing up. Aloo chaat and samosas were better loved friends of mine. Except for a few pet dishes I tried to stay away from anything sweet. Although inspite of NOT being a dessert person I still was a huge fan of Gulgule, a lightly sweet doughnut made mainly by mixing flour, a sweetener either jaggery or sugar, milk and sometimes fennel seeds. Its deep fried yet light and pillowy, light crunch on the outside and soft “doughnuty” on the inside. I loved it as a kid.

Now when I cook for my kids, its obvious to go back in time and bring back some of those favorite recipes. Sometimes the kiddos shoot some down and sometimes some become a hit with them. Gulgule or “Banana Bread Fritter” as the little one gave the name is one such recipe from my childhood which is a hit in my household even today. I pack these in their lunchbox, make them for breakfast and serve them as an after school snack. Never heard a complain! The ingredients to these fritters are very similar to that of a Banana Raisin Bread so the butterfly started calling them Banana Bread Fritters and hence the name.

Ingredients:

1 overripe banana

1 cup whole wheat flour (or durum aata)

1/4 cup raisins (any variety works)

1/4 cup sugar

1/2 teaspoon caradmom powder (crushed cardamom seeds work great)

1 cup milk (approx.)

1 teaspoon fruit salt (optional)

Oil for deep frying

Method:

Peel and mash banana. Make sure there are no lumps.

Stir in flour, raisin, sugar and cardamom. Whisk in milk. Make a smooth batter (similar to pancake batter). Cover and let it rest for 15- 20 minutes.

Stir in fruit salt.

Heat oil for deep frying. Using a spoon or small scoop, carefully drop small dollops of batter, approx. 1 tablespoon in hot oil. Do not overcrowd.

Fry on both side until the gulgula or fritter is golden brown.

Strain the fritters out of the oil and transfer into a dish lines with paper towel to get rid of extra oil.

Lightly sprinkle powdered sugar on on top and serve warm with milk or chai.

Rosemary Garlic and Pistachio Crusted Rack Of Lamb

Rosemary Garlic Crusted LambThe whole house was flipped over and turned upside down because we just couldn’t find that pink umbrella she wanted to use. With a tear on top and some evident dents, the umbrella is at least three if not four years old and belonged to her sister at one point. Well, technically it still does but just like several other things that once belonged to her sister, she had claimed authority over this umbrella too. Not because of its bright neon color or the cute handle which although tiny but bends to make a curve, just the right size to fit her soft palm in. But because it was her sister’s and like everything that belongs to “didda”, a name she gave to her older sister, this umbrella is special only because its didda’s.

Rosemary Garlic Crusted Lamb

Not in the umbrella basket, neither in the garage, nor in the closet, under the bed, couch or dinning table. With a wrinkle on her forehead and worry on the face, she had put the whole house at work. Without shedding one single tear, something you would expect from a 2 year old, she kept looking for it like a persistent spider. Kept looking and looking until she finally found it. Rushed running to her didda, with pride on her face and prized umbrella in her hand. “I found it didda, look I found it!”, she announced with glee and in hopes of admiration. Held her didda’s pinky like she always does and commanded, “lets go”. Standing at my doorstep I watched them from behind. Holding hands, jumping through the puddles, trying to cover their heads under one pink umbrella. A sight every mother craves for.

Rosemary Garlic Crusted Lamb

Rosemary Garlic Crusted Lamb

They came back home half wet and with a fistful of carelessly plucked rosemary branches, handed them to me. Parked their rain boots and the pink umbrella at the doorstep and joined me in the kitchen where we smashed a few garlics, munched on more than a few pistachios and cooked a rack of lamb before their dad rang the doorbell. With the ring of that bell they plunged from the kitchen counter and ran screaming to the door,off to tell another tale.

Rosemary Garlic Crusted Lamb

Ingredients for Rosemary Garlic and Pistachio Crusted Rack Of Lamb :  (Serves 3-4)

1 rack of lamb (approx. 1.5lbs)

4-5 rosemary sprigs (approx. 2 tablespoon rosemary leaves)

1 garlic cloves

1.4 cup shelled pistachio

Salt to taste

Pepper to taste

1 tablespoon olive oil

Method:

Coarsely grind rosemary, garlic and pistachio in a food processor or in a mortar and pestle. Add oil the mixture.

Season the lamb with Salt and pepper. Rub the herb crust on the rack of lamb. Wrap the rack of lamb with a cling wrap and let it sit the refrigerator for an hour or maximum overnight.

Wrap the rack of lamb, place it on a baking sheet, fat side up and cook it in the oven at 400 deg. F for 15-20 minutes on middle rack. Finish off by broiling for 5 minutes.

Pull the rack of lamb out of the oven and let it rest on a chopping block for 10 minutes, fat side up.

Carve the racks in between the rib bones and transfer to plates. I served them with these green beans and a warm saffron and cous cous salad.


Besan ka halwa..Mom’s recipe for Mother’s Day.

Besan Ka Halwa

First of all let me just give a nice pat on the back of all the mothers and mothers to be out there! The world would never be the same without you. Now being a mother myself I know what a difficult yet satisfying job it is to make a ‘human being’ and the credit has to go to our babies who bring out the superwoman in us. Today is the day to celebrate our awesomeness, so a Very Happy Mother’s Day to all of us!

IMG_9776

This being my first Mother’s Day today I wanted to do something special with my daughter. I wanted to make something that my 8 month old could eat. I also had fond memories of my mom cooking for me. So I put those two thoughts together and decided to make …
Besan ka halwa!

IMG_9771

With my mom it was never about fancy food or use of those rare or exclusive ingredients. She would use all the basic ingredients that you can find in the pantry anyday of the week and make something special out of it. Besan ka halwa was one of those things. A humble dessert that uses some very basic ingredients found easily in an Indian pantry but if made right, can outshine the fanciest of them. I made a few modifications to my mom’s original recipe so that my 8 month old could enjoy it with mommy but here I’m sharing the recipe just as my mom would have made. 

IMG_9804

Besan Ka Halwa
5 from 1 vote
Print Recipe

Besan Ka Halwa

A humble dessert that uses some very basic ingredients found easily in an Indian pantry but if made right, can outshine the fanciest of them.

Course Dessert
Cuisine Indian
Keyword Dessert, halwa
Prep Time 5 minutes
Cook Time 20 minutes
Total Time 25 minutes
Author Prerna Singh

Ingredients

ngredients:

  • 1 cup besan chickpea flour
  • 1/2 cup ghee clarified butter
  • 1/2 cup sugar
  • 1/4 cup nuts for garnish here I used almond and pistachios
  • 1/2 tsp cardamom powder
  • 1 1/2 cup milk

Instructions

Method:

  1. Heat ghee in a thick bottom pan or wok.
  2. Add besan to the pan. Fry until the besan starts turning golden yellow in color and give out a nutty aroma. 10-15 minutes on medium low heat.
  3. Add milk slowly and keep stirring the besan thoroughly so that it doesn't form lumps.
  4. Add sugar. Continue cooking and stirring the paste. By the this time the besan would start thickening and begin to stick to the spatula.
  5. Stir in cardamom powder, almonds and pistachio. Continue cooking and stirring until the halwa thickens, enough to start forming a loose ball. Once the halwa starts leaving the sides of the pan and begins to separate ghee, its cooked through.
  6. Garnish it with more nuts. Serve hot.

Add besan to the pan. Fry until the besan starts turning golden yellow in color and give out a nutty aroma. 10-15 minutes on medium low heat.

Add milk slowly and keep stirring the besan thoroughly so that it doesn’t form lumps.

Add sugar. Continue cooking and stirring the paste. By the this time the besan would start thickening and begin to stick to the spatula.

Stir in cardamom powder, almonds and pistachio. Continue cooking and stirring until the halwa thickens, enough to start forming a loose ball. Once the halwa starts leaving the sides of the pan and begins to separate ghee, its cooked through.

Garnish it with more nuts. Serve hot.

IMG_9807[amazon_link asins=’B0046IIPMW,B004GAVOW8,B00AJRKO8M,B0182YKU1Y,B00DE1C2V2,B0000CCY1M’ template=’ProductCarousel’ store=’indiansimme0b-20′ marketplace=’US’ link_id=’e0e76947-c849-11e8-8e51-610018be9e74′]

Edible Gifts – Za’atar Recipe

Zatar RecipeThis recipe was supposed to come last week, days before I boarded that plane, flew across the ocean and came home. Though years after leaving this country I am now not sure which country really is my home. The world we created as a little family comes to mind every time I think of one. But this place still has and will always hold that invisible string attached to us that keeps pulling us in. So at this wee hour in the morning, fighting with jet lag, the little monkey strapped to my chest in her baby carrier while I stroll the streets of this familiar neighborhood in India, I can’t stop thinking of my home. The home that has my bed, my kitchen and my family room which this year is devoid of a Christmas because we are here.

Zatar Recipe

Its that time of the year again. Christmas is right around the corner and an illuminated neighborhood and holiday songs playing at stores in the background told us so when we were there. It isn’t as decorated and “Christmasy” in India but Santa costumes hanging outside the road side shops and Christmas trees on display here and there are tickling my kids and reminding them of the countdown they need to keep track of. “Five more days Maa… now just four!” they exclaim with a brightened face.

Zatar Recipe

We had to leave for India a while before I normally pack my christmas gifts and hand them out to the loved ones. I have to be honest, amongst all the travel shopping and packing holiday gifts took a back seat and was put together in a hustle. But something handmade had to be added to the box and homemade spice rub sounded interesting. Za’atar spice mix a staple in my pantry made the cut because of its versatility and also because I am addicted to it! I rub them on meat, toss them with sautéed vegetables and stir them into dips and dressings. Butterfly’s teachers appreciated the idea, hopefully you and your friends will too. So if you are scrambling through last minute Christmas shopping maybe a jar of homemade Za’atar spice mix will make up for a good add on. Try it!

Ingredients: Inspired by this recipe

1/4 cup Sumac

2 tablespoons thyme (fresh leaves or dried)

1 tablespoon sesame seeds (roasted)

3 tablespoon Oregano (or do marjoram and oregano 50-50. I was out of marjoram so added only oregano)

1 teaspoon Kosher salt

1 1/2 teaspoon Pink Himalayan Salt (personal preference. You can just substitute with Kosher Salt or Sea Salt).

Method:

Bring all the ingredients together. Toss or stir with a spoon to blend it all together. I personally prefer coarsely grinding them with mortar and pestle.

Transfer to a clean and dry airtight container. Use as required.

Zatar can be used as spice rub on meat and vegetables. Tastes amazing when mixed with extra virgin olive oil as a dip. Can also be used to make dressings for salad.


Pumpkin Paratha

Pumpkin ParathaFamily being oceans apart, our friends are like family to us in this home away from home country. Friends we’ve known for years, many from back in the days when we used to still live in India. We got married almost around the same time, had kids around the same time and now these kids are lucky enough to grow up together and are attached to each other almost like cousins if not more. So now we fill in for family, for each other. Festivals, birthdays and graduations are celebrated together and first calls are made to each other in times of difficulties.
Pumpkin Paratha
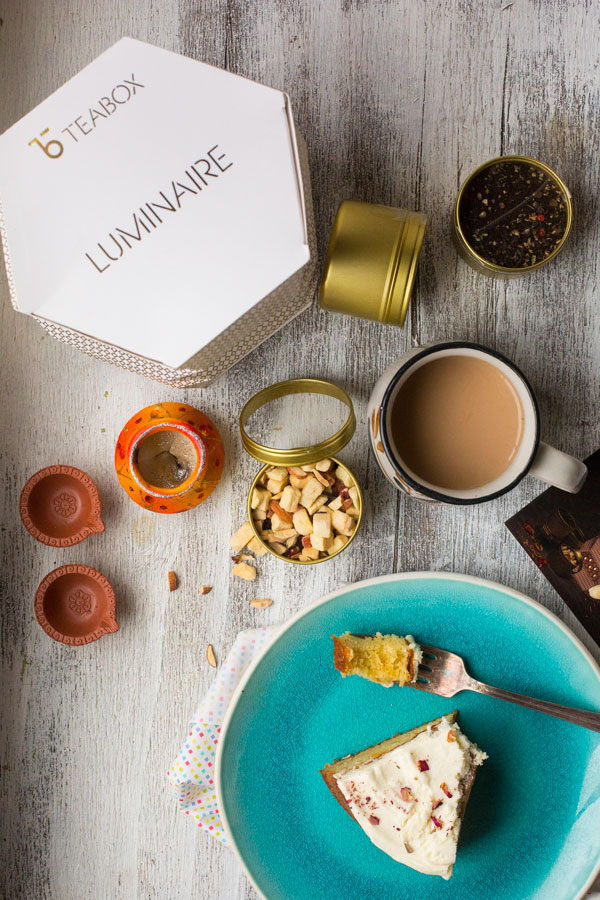
Its a ritual to gather at one person’s home for Diwali and other’s at Thanksgiving. So this year when some of them were out of town or country for Thanksgiving, it was assumed that there won’t be any Thanksgiving dinner for us. So a few days before thanksgiving when the butterfly did not notice any hustle or bustle for the big day she got confused. Came to me asking the reason why no one is using the word thanksgiving dinner yet, because clearly it was about time! And when I told her we might not be having one this time around, her response was, “That’s so weird! How can there be no thanksgiving?”. Well, that was enough to activate me and the rest of her uncle and aunts, who were still in town!
Pumpkin Paratha

And very soon pumpkins were bought, pies were made and chickens were roasted, a usual substitute to turkey on our thanksgiving dinner table. I got carried away a little bit while roasting pumpkin for the pies though. Ended up having a lot of leftover pumpkin puree. So while usually people are looking for ways to use up their leftover thanksgiving turkey, I’ve been looking for ways to use up my leftover pumpkin. A person can eat only so much pumpkin pies, you see! Hence this pumpkin paratha was a desperate effort which proved to be a delicious one. Pumpkin added a sweet and earthy flavor to the parathas and they were surprisingly super soft. A hit with the kids too. No lunchbox leftovers!

Ingredients:

1 1/2 cup packed, roasted pumpkin (follow the recipe here or can also use canned pumpkin puree)

2 cups, whole wheat durum aata

1/2 cup chopped cilantro

1 teaspoon fennel seeds

1 tsp minced thai green chili (adjust per taste)

Salt to taste

Ghee or Oil of cooking the paratha

Method:

In a large mixing bowl bring together pumpkin puree, whole wheat flour, salt, cilantro, fennel seeds and green chili. Mix it all together and knead into a smooth dough. Depending on the consistency of the pumpkin puree, you may need extra water for kneading. Follow this process to knead the dough.  Cover the dough with a damp cloth. Set aside for 10 minutes.

Knead the dough for another minute to make it smooth. Divide the dough into 8-10 parts. Roll them into balls.

Dust the rolling board with flour. Dust one dough ball liberally with flour. Roll it into a flat circular disk. Repeat the same with all the dough balls. Cover with a damp cloth.

Heat skillet on medium high. Place rolled dough onto skillet. Cook for 18-20 seconds or until dough turns darker and small bubbles break the surface. Flip. Cook for 18-20 seconds. Brush ghee/oil on surface. Flip. Cook for 15-18 seconds or until golden brown spots appear on the surface. Flip. Repeat. Remove from skillet when both sides are cooked.
Serve hot with a side of curry, chutney or raita.

How to Make Pumpkin Puree

Let me just start of by confessing that I had never tasted a pumpkin pie until recently. That too on the relentless urging of my 7 year old daughter who couldn’t get over the fact that her mother hated the very idea of one of her favorite flavors of pie. Well I did not want to break a tender heart and the puppy face looming over my head wasn’t exactly helping, so I took a bite. It wasn’t bad. Rather it was good. “See, I told you. All you gotta do is try!”, was slapped onto my face. The very sentence I use on her, was used on me. And I learnt a lesson. All you gotta do is try. Keep an open mind!How to Roast a Pumpkin

You see where I grew up, there were no pumpkin pies. Pumpkin is one of the most popular varieties of squashes in India but no one would think of putting sugar in it. It was meant to be used on savory dishes only. And then after moving to the US and being exposed to the idea was kind of an eye opener. But then I happened to look and smell pumpkin puree out of a can once and went back to my old beliefs that pumpkin is meant for savory dishes only. And then I gave birth to a very stubborn little girl who wouldn’t get off my tail until I ate that same dreaded pie. Only this particular one was made with homemade pumpkin puree and so I told myself, that’s what made the whole difference.

So I started making pumpkin pies. And trust me, homemade puree makes a huge difference. Best part, its as simple as boiling a pot of water. Well, not exactly but its still super simple. Definitely worth the effort!

How to Roast a Pumpkin

Things you need:

Pumpkin

A scoop or strong spoon

Baking sheet

Aluminum foil (optional)

Method:

Using a sharp knife cut the pumpkin from the middle parting it into two parts. Slice the stem off. Try not to cut too much into the pulp. This will help keep your pumpkin stable in the following steps.

Using a spoon or scoop, scrape out all the seeds and innards of the pumpkin. This might need a muscle but do not sweat too much over leaving the inside of the pumpkin super clean. Just try to get all the seeds out.

Now line a baking sheet with aluminum foil. This step is totally optional but its nice to have a clean baking sheet after all the messy baking is over.

Line your pumpkin, face down. Pop it into the oven at 350 deg. F for 1 hr – 1 hr 30 mins. or until the pumpkin is fork tender. I prefer not to add anything to the pumpkin while roasting but if you like you can flavor it with some cinnamon, cayenne or simply olive oil.

Once cooked through, pull the baking sheet out of the oven. Let it cool for 15- 20 minutes. Now the pumpkin will be super soft and smooth. Just scoop it all out using a spoon.

Transfer to a food processor and blend it to a puree. Store in an airtight container, in a refrigerator for 4-5 days or in a freezer for almost a month. Use it in a pie, cake, baked pasta or any recipe using a pumpkin puree.

How to make Shakkar Paara

How to make Shakkar Paare
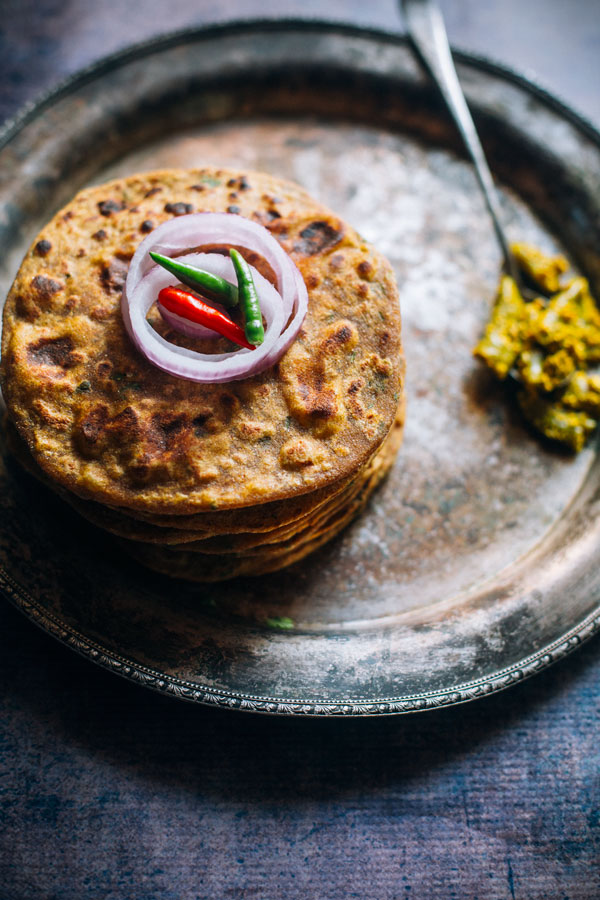
It was like there was this unsaid pact between Aunty Anwari and mummy that if it was Eid, mummy will just show up at her door a day or two before the festival to help her with all the festive cooking. Aunty Anwari would do the same for Diwali. Mummy complained Aunty doesn’t come over before Holi. But Aunty Anwari was worried Mummy would pull a prank on her, considering the role bhang (cannabis) plays in Holi . Hence Eid and Diwali were the safest bets.

Around afternoon, right after we would be done with our lunches, there would be a loud knock on the door and a holler. As if one wasn’t enough! You could see aunty marching right in and you’d know Diwali cooking is about to begin. Mummy would ask Ganga, our house help, to put up a pot for chai on the burner. My brother or I would be ordered to fetch a notepad and a pen. Both the ladies would then spend the next couple days making lists, measuring ingredients, kneading doughs, sharing recipes and secrets over several cups of chai.
How to make Shakkar Paare

There would always be this debate over whose recipe wins over whose. Arguments over the spiciness of dal filling for flaky dal samosas or what goes inside the gulab jamun, raisins or Mishri, a type of rock candy? Does coconut laddu taste better when you add khoya, thickened milk in it or  should shakkar paara be cut off of a flattned disc or rolled like a gnocchi, for it to be able to soak sugar syrup the most? For two days they fought with each other, laughed together and tasted each other’s recipe only to agree that the other person was right. Whoever won the battle of recipes, we would always be the winner because we got to eat all of that delicious food and also got to witness the true essence of festivals with these two ladies.
How to Make Shakkar Paare
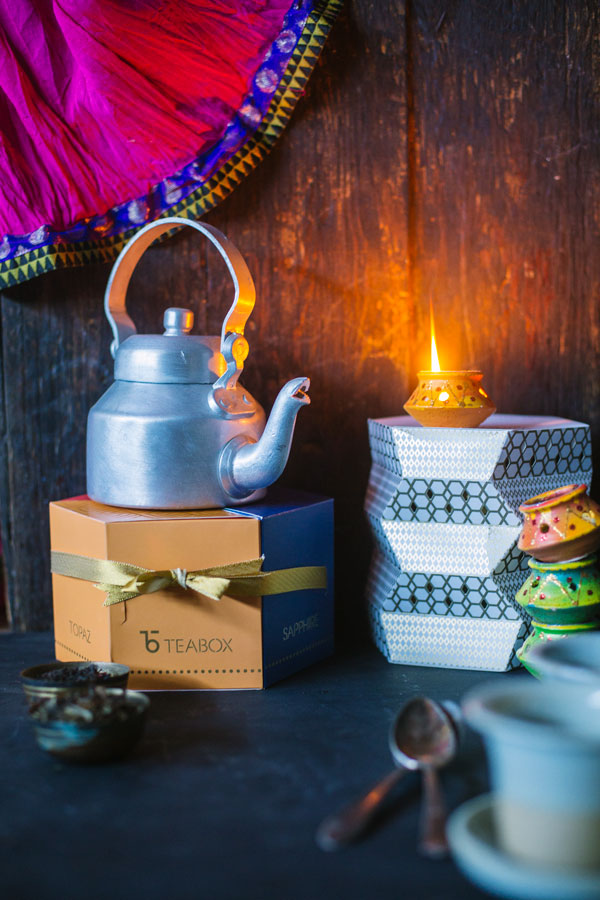
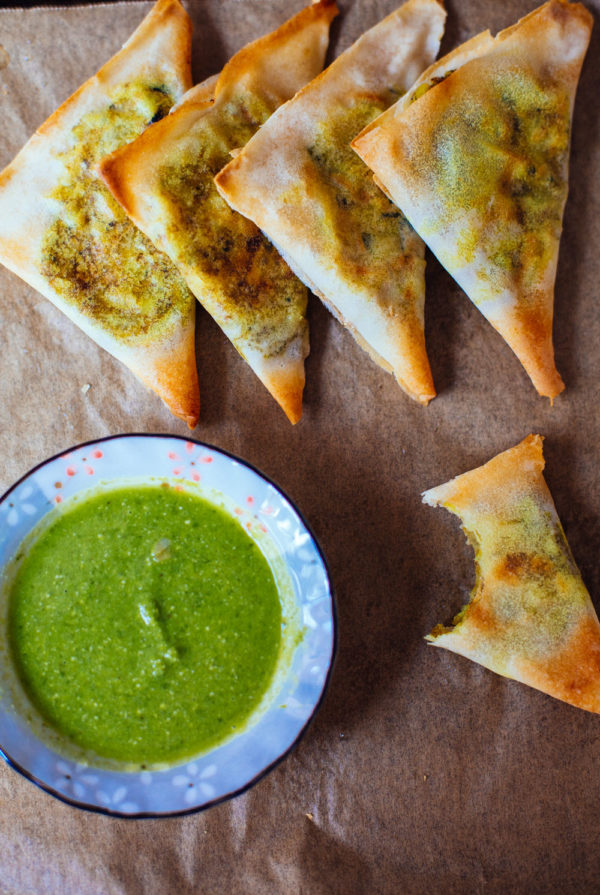
Today, two days before diwali, sitting with my little one, watching the rain pouring outside my kitchen window, here I am kneading big batches of dough, debating in my head, how spicy the lentil filling should be for the samosas and how I should shape the shakkar paara. Last Diwali Mummy’s recipe won this Diwali Aunty Anwari is winning!
How to Make Shakkar Paare

How to Make Shakkar PaareIngredients:

For Pastry:

2 cups all purpose flour

1 1/2 tablespoon ghee (room temperature)

Water (approx. 1/2 cup)

For Sugar Syrup:

1 cup sugar

1/2 water

Oil for deep frying

Method:

In a large mixing bowl, mix flour and ghee together. Take small portions of flour and ghee and rub it between your palms until the two are incorporated well together. To check pick a small portion of the flour mixture in your palm and make a tight fist. On opening the fist if the flour still holds its shape that means it is incorporated well.

How to Make Shakkar PaareAdd water to the flour in small quantities and knead it into a dough. Knead well to form a smooth, semi soft dough. Here’s a video to show how to knead a dough.

Cover the dough with a damp cloth and let it rest for 5 minutes. Then knead again for 1-2 minutes on a clean surface just to smoothen the dough.

Pinch small portions of dough, 1/2 teaspoon size, roll them into balls.

How to Make Shakkar Paare
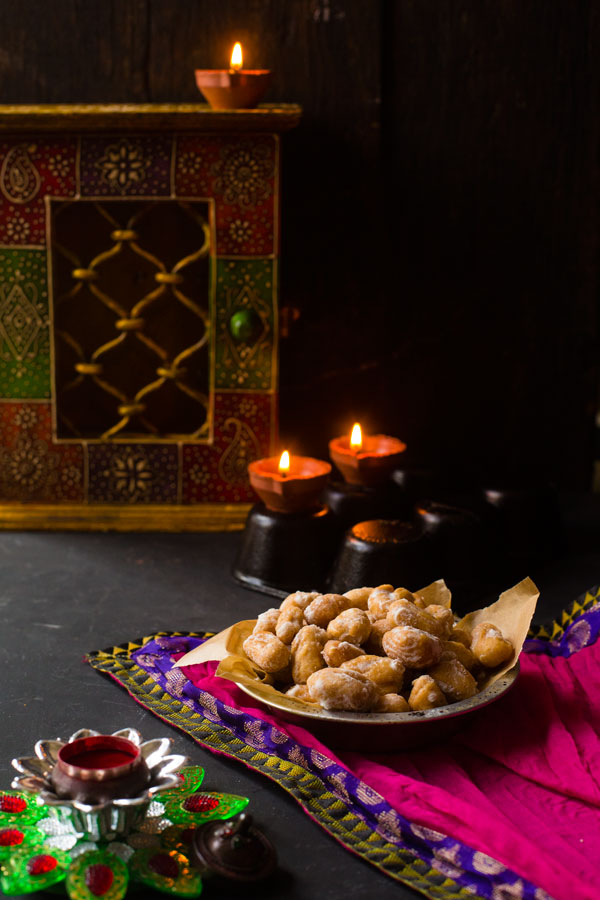
Shape paare/pastry using a gnocchi maker, back of a sieve or basket shape the paara. To do that place one dough ball on the back of the basket or gnocchi maker, press very gently with your index finger and slide your finger to the side of the paara/pastry. The pastry should get indents on the surface and a depression on the inside making it great to hold as much sugar as it can. Lay pastries on a baking sheet and cover with a damp cloth.

How to Make Shakkar Paare Heat oil for deep frying the pastries. Bring it to a temperature of 350 deg. F. Deep fry the pastries over medium heat until they turn golden brown. Pull out of the oil and transfer on paper towel lined dish to strain extra oil.

While still warm, toss paara in sugar syrup.

How to Make Shakkar Paare Making Syrup:

In a heavy bottom sauce pan bring water and sugar together. Bring the too to a boil. Turn off the heat.

How to Make Shakkar PaareMix paara/pastry and sugar syrup together in a pan or bowl. Toss everything well together coating each paara with the syrup. Repeat the process at least 3-4 times at intervals (every 8-10 minutes) until the sugar starts to crystalize.

Let shakkar paara cool down completely before transferring it to an air tight container.

A Gift of Tea For Diwali!

Teabox
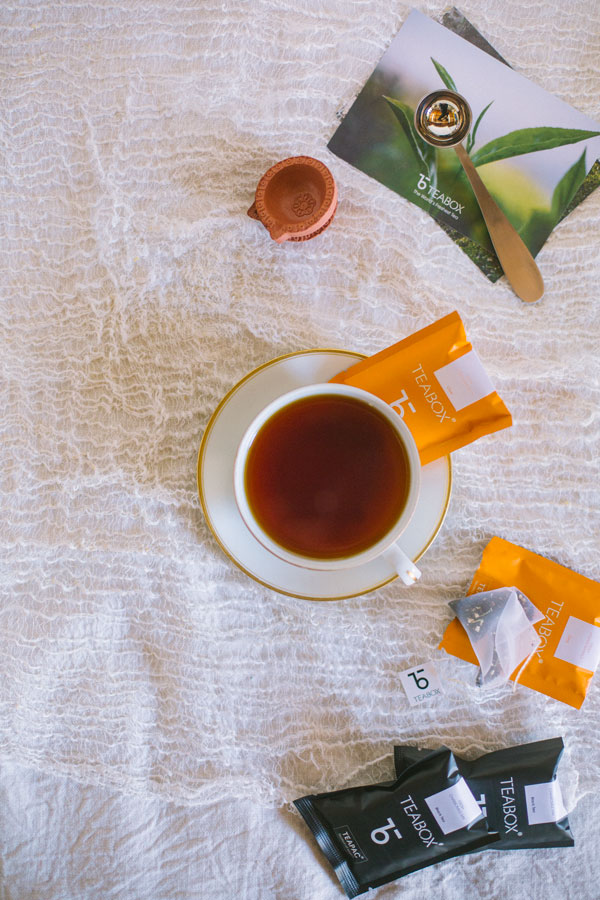
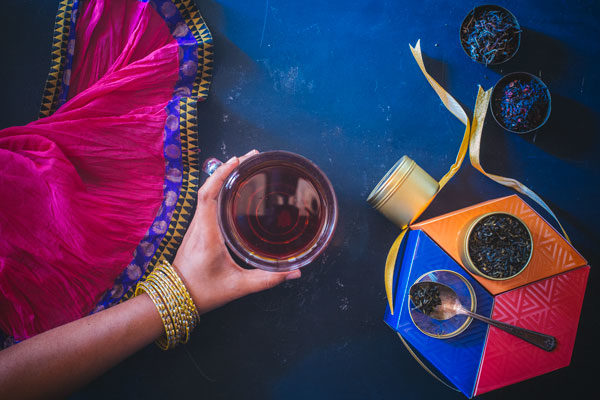
It be would tough for her to slide out from under the covers of the feather light, yet cozy Jaipuri comforter every morning. But she would do it, right at the crack of dawn everyday. While rubbing her eyes and stretching the body in all directions to shoo the drowsiness away, Mummy would tip toe out of the bedroom. It was also a bedroom for me and my little brother who at the time must be four or five for I remember myself being seven or eight. As the cover would slip and let a wave of cold air in, I’d be disturbed in my sleep and frown over mummy while peeking with one eye partially open. She’d whisper in my ears asking me to go back to sleep and walk straight into the kitchen. I’d know the first sound that would come out of her kitchen would be of the chai pot being pulled out of the dish basket. Following that sound would be an array of soft noises and aromas and we’d know mummy’s chai is ready. First sip and she’s back to life, ready to tackle the day and us, her two kids who were more than a handful!
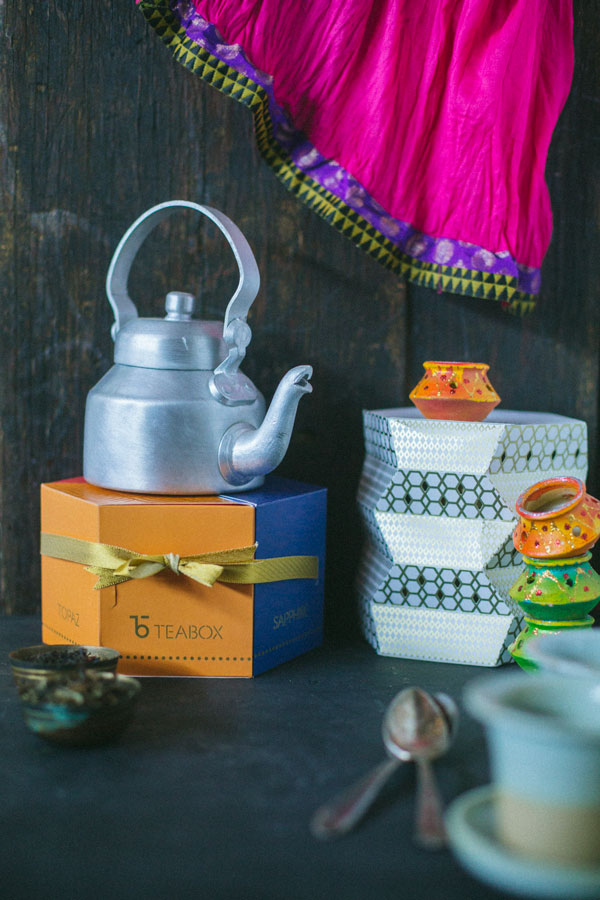
Teabox

Teabox

My mornings sound and smell pretty much the same as Mummy’s. Until the beautiful aroma of my ginger cardamom chai fills up my house, my day doesn’t begin. So its acceptable to say that chai plays a very important role in my life and its true with pretty much every Indian family I know.

Teabox

Joy, trust, anger or sorrow, love, hate or anything in between…. everything is shared over a cup of chai! The day doesn’t start without a cup of chai and it sure cannot end without one. Neither can gatherings, festivals or celebrations. Chai is a part and parcel of an Indian life.

Teabox

Building on that emotion the fine folks at Teabox crafted some of the most amazing flavors of chai. I got to know Teabox last year and since then have been enjoying their chai. Their tea possesses the aroma of freshness and feels pure. I have suggested them several times that they should be making fragrances with their chai flavors because I feel like rubbing that beautiful smell on my wrist every time I brew their tea! Teabox works directly with 150 big and small tea growers around India and Nepal. They handcraft each teabox and teapac with care and attention to detail and that shows when you try their tea.

Teabox

They have a few teabox gift packs which they have designed specially for Diwali. The Gem Collection and Luminaire are my favorites. Check them out if you are looking to gift something different to a tea lover this Diwali. They are just good people, doing a good job with an honest passion for tea.

Teabox

Disclaimer: This blogpost is sponsored by Teabox but I have been relishing their tea for over a year now so the ideas and opinions expressed here are purely mine.

Sauteed Swiss Chard with Garlic and Whole Chili


S94A8984
Ingredients:

1 bunch rainbow chard (approx. 12oz), (chopped)

2-3 garlic cloves (smashed)

2 whole dried red chili

2 tablespoon olive oil

Salt to taste

S94A8966 Method:

In a wide pan bring together garlic, chili and oil. Turn he heat oil and let the oil slowly heat up. This helps infuse the oil with garlic and chili. Garlic will begin to sizzle and then slowly turn golden in color.

Add chard. Sautee for a minute. Add salt. Mix well. Continue cooking until the greens wilt and the stems of the chard are not too crunch, 5-8 minutes. Turn the heat off. Serve hot as a side.

Wonton Samosa

Wonton SamosaIngredients: Makes 15-20

3-4 medium potatoes (boiled, peeled, diced)

2 tablespoon oil + Oil spray (or 1 tablespoon oil for brushing)

2-3 tablespoon curry leaves

1 teaspoon cumin

3/4 cup onion (chopped)

2 thai chili peppers (minced)

1 teaspoon turmeric

Salt to taste

1 cup green peas (frozen, thawed)

10 large wonton wrapper sheets

1 1/2 tablespoon wheat flour (any variety)

water

Method:

Heat 2 tablespoon oil in heavy bottom pan. Add curry leaves followed by cumin seeds. As they sputter add onion. Saute for 3-5 minutes on medium heat until the onion softens.

Add minced chili. Stir in turmeric and salt. Add green peas. If using fresh peas, cover and cook until the peas are cooked through. If using frozen and thawed, cook for a minute add the potatoes. Mix well. Lightly mash the potatoes making sure there are not big lumps.

Turn off the heat. let the potatoes cool.

Assembling the samosas:

Preheat the oven to 350deg. F.

Mix flour and water making a flowing batter like paste. Set aside.

Place one wrapper on the work station and cut it from the middle into two rectangles.

Use your finger to dab a little water along one long edge and one short edge of the rectangle. This will help the wrapper sealed in place. Lift the short edge to stick to the longer edge, ultimately making a pocket. Follow the instructions in the video to better understand the folding process. Once you have a pocket ready, fill in approx. 1- 1/2 tablespoon of filling in the pocket and seal the samosa.

Repeat the process for rest of the samosas.

Line the samosas on a lined baking sheet. Light oil brush or spray oil on the surface. Bake for 10 -15, flipping sides midway. Bake until the edges are brown and crisp.

Enjoy hot wonton samosas with some green cilantro chutney!

Recipes Perfect for Memorial Day Party

Onion Bhaji:

Onion Bhaji

When friends are around, drinks in hand and you busy chatting away, nothing can keep you a better company than some spicy, crunchy goodness called Onion Bhaji. Recipe here.

Tandoori Potatoes:

Tandoori Microwave Potato

Why should only the meat eaters have all the fun? Toss some potatoes in a spicy tandoori masala, throw them in a microwave and give the meat eaters a serious competition with these tandoori potatoes. Recipe by Rupal

Masala Papad:

masala_papad

Chips and salsa get an Indian makeover with these spicy Masala Papad. Works great with a bottle of chilled beer, Mojito or Reisling. Recipe by Kankana

Tandoori Chicken with Cucumber Raita Dip:

Tandoori Chicken

Indian BBQ is just not complete without a good batch of tandoori chicken legs. Cool it off with a cooling cucumber raita. Recipe here

Chicken Sliders with Mint Aioli:

ChickenSliders

How about a round of sliders at this Memorial Day party? These chicken sliders are just the perfect size and to give it a kick there’s a cooling spicy mint aioli hidden in there!. Recipe here

Sprouts Chaat Papdi:

Sprouts Dahi Papdi

Welcome summer with some chaat. A healthy one! Recipe here

Naan Pizza:

Naan Pizza

Turning the oven on for a pizza at a summer party might be a tough thing to do but how about putting some naans on the grill and making some Naan Pizza? Recipe here

Iced Masala Chai:

masalachai1

Summer party calls for some summer drinks. And if its an Indian inspired party then there has to be masala chai is one for or another. Recipe here

Shikanji Sorbet:

ShikanjiSorbet

Popular Indian summer drink Shikanji which is nothing but an Indian version of limeade. Simple yet so refreshing, even more so when turned into a light and cold sorbet. Recipe here

Jalebi Ice Cream Cake:

JalebiIceCreamCake

Our recipe contributor Vijitha searched the world and came back to us with all the good it had to offer- Jalebi and Ice Cream and made a cake out of it! You simply cannot say no to this. Recipe here

Spicy Red Cabbage Salad:

spicysalad
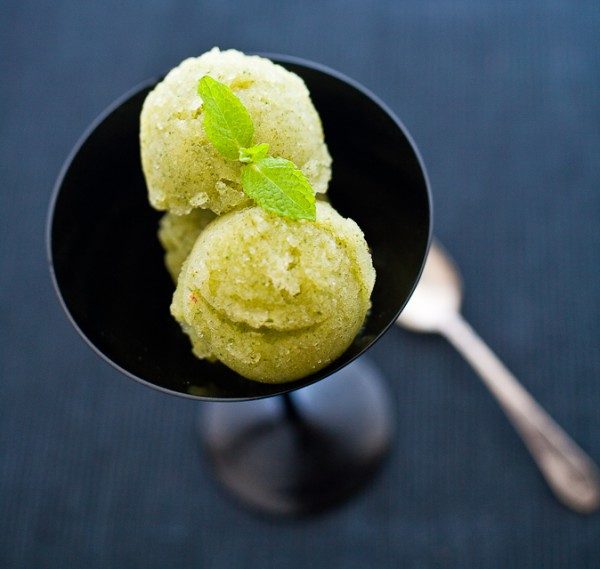
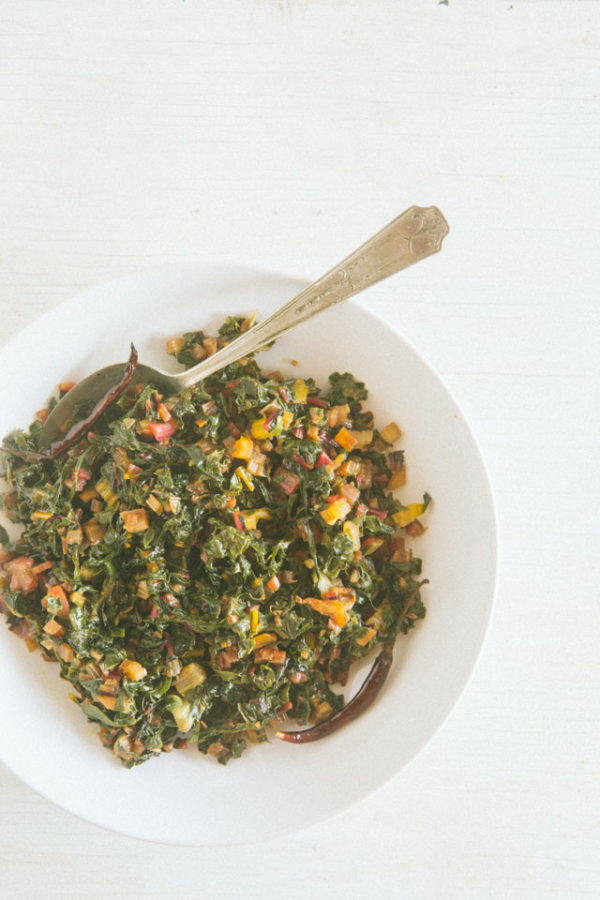
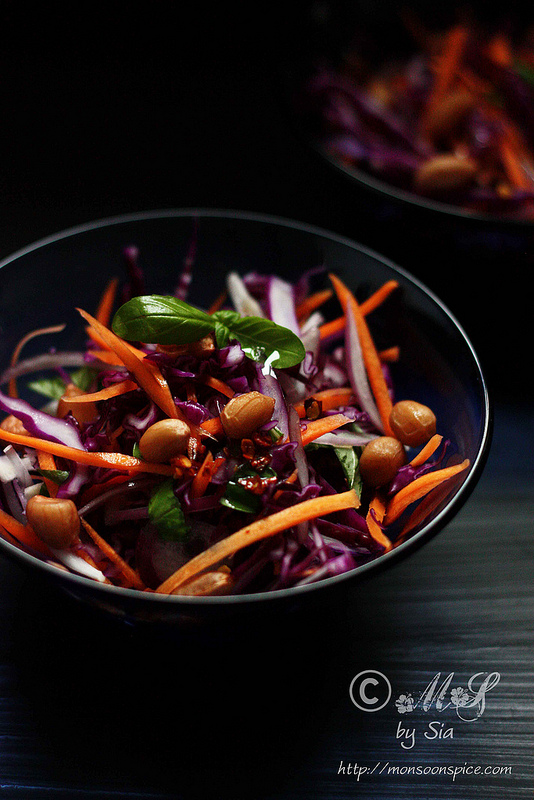
After all that ice cream we have to play the healthy card now! How about we also spice it up? Recipe by Sia

Cantaloupe and Blueberry Salad: 

CantaloupeSalad

This is a nice and refreshing salad that you would love on a hot summer brunch or you could have it for lunch. Recipe here