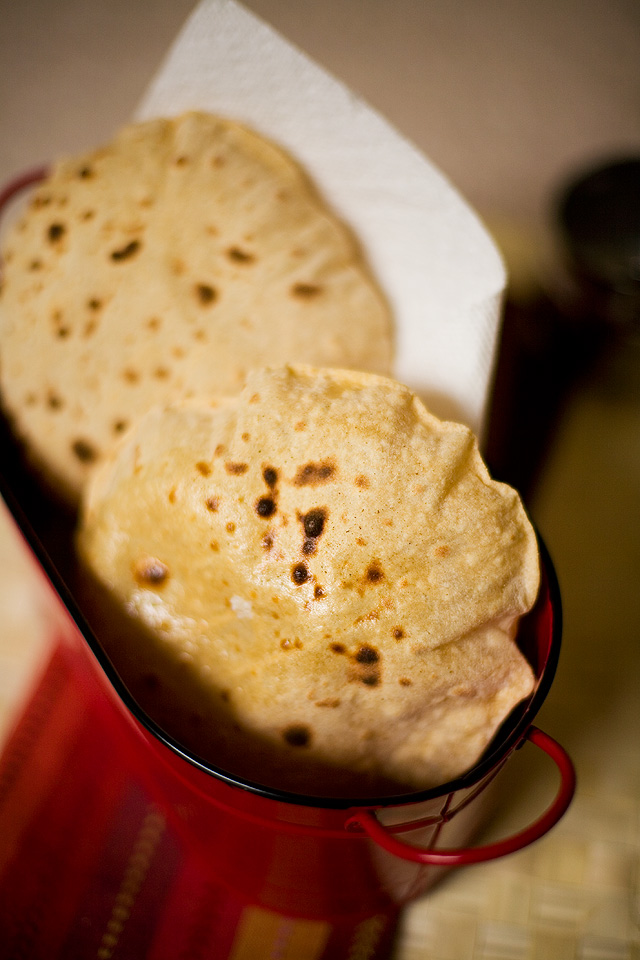
Indian food is never complete without the wonderful breads that accompany them .Some of the breads that people all around the world can easily guess as Indian are Naan, Parantha, Dosa, Tandoori roti and so on but something that is a staple in a majority of Indian homes in some form of the other is simple roti or chapatti or phulka.
I was thinking that if I’m not talking about something so basic as roti which is made in our homes almost everyday and without which our meal can not be complete then I’m definitely missing something. So today its nothing fancy, I’m here to share how we make that simple flat-bread called roti at home.
A little something about it: Breads from India are very different from traditional the western bread loaf. Its basically a flatbread which looks a lot like tortilla. There are a millions of ways to make Indian flatbread and it mostly varies from region to region. Soil in the southern part of India is very good for rice crops so breads from that part are mostly made of rice flour and northern part is fertile for wheat & gram cultivation so wheat flour is what is mostly consumed in the region.
Things Required:
3 cups flour
water
a rolling pin
a little flour for dusting
tava or flat bottom skillet
Now the basic ingredients for the dough is same as that to make any dough in the world: flour & water that’s it. Usually wheat flour is used in India which if you don’t find anywhere then will definitely get in an Indian store but in case you don’t have wheat flour handy you can use 3 parts all purpose flour mixed with 1 part of whole wheat bread flour.
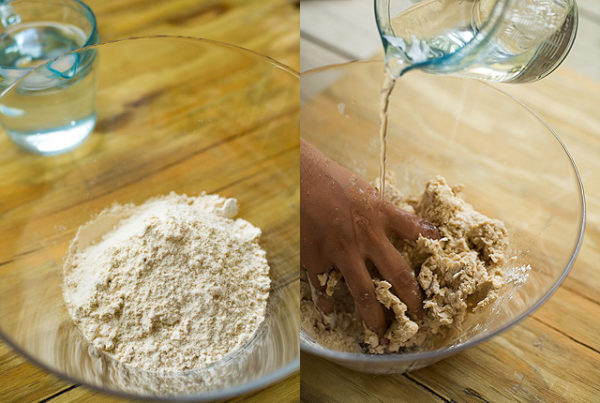
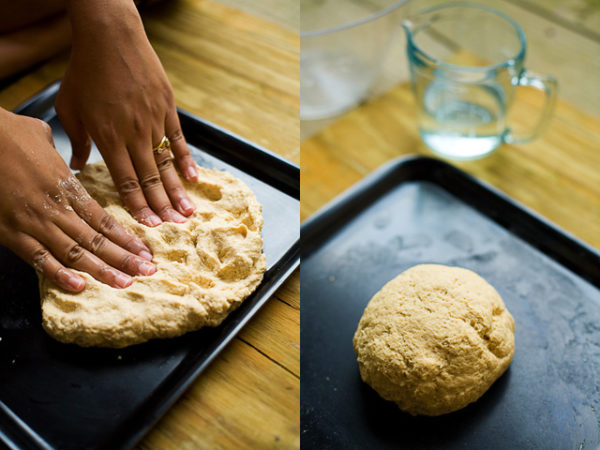
Start by adding water into the flour little by little and mix it with the flour using the other hand. Trick is to slowly add water so that you have an idea of how the flour is absorbing water.
My mom says that if u add a little bit of milk in the dough while kneading it. that makes the rotis even softer.
Whwn you feel that the dough is formed and you can hold it all together, transfer it to the counter or a flat dish and knead for about 4-5 mins. You know the dough is ready when there’s no excess moisture in it and its all absorbed by the flour. Now wrap the dough in a plastic wrap or a thin and wet kitchen towel and let it rest for about 5-10 mins. This would help it get even softer.
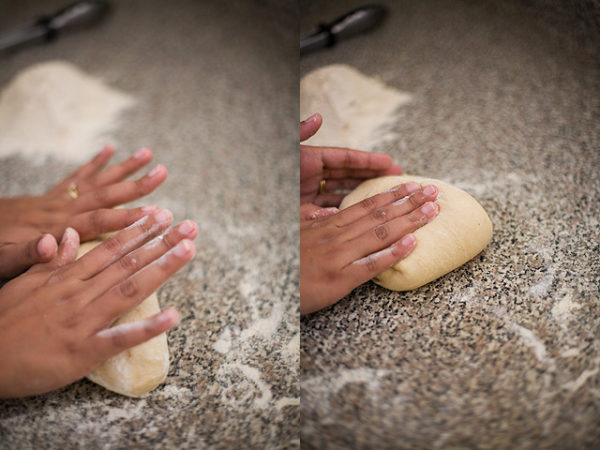
Then take the dough out on the kitchen counter and if you want you can knead it once again for just a few seconds just to make it smooth. I do it but its not necessary.
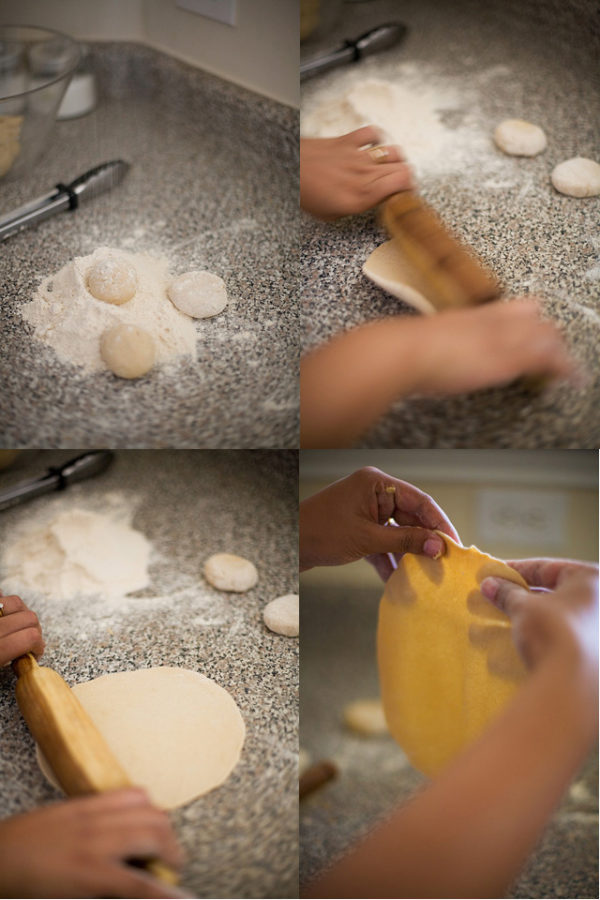
Now cut small pieces of dough into as many rotis as you want and make ball out of them. Dust the counter and start working on one ball at a time. Using a rolling pin try to flatten the balls into flat round shapes. It take a lot of practice to make that perfect round rotis so don’t try to sweat on the shape just flatten the dough and use a round lid or something and cut it into round shapes. Only the trick is to dust the dough balls atleast 2-3 times while rolling or the dough can stick to the rolling pin.
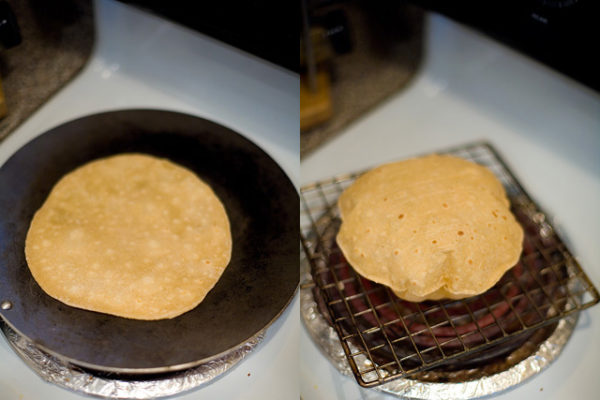
Preheat a tava ( use a simple pan or skillet if you don’t have a tava). Put a roti on the pan and cook for 15-20 secs or untill you see small bubbles on the surface and then flip it. repeat the same on this side and then transfer it to the other burner with a rack similar to a cooling rack. Roti will puff up in a few seconds and then you have to flip it again for the other side to get cooked as well. Remove from the heat and keep it wrapped in a piece of foil lined with paper towel.
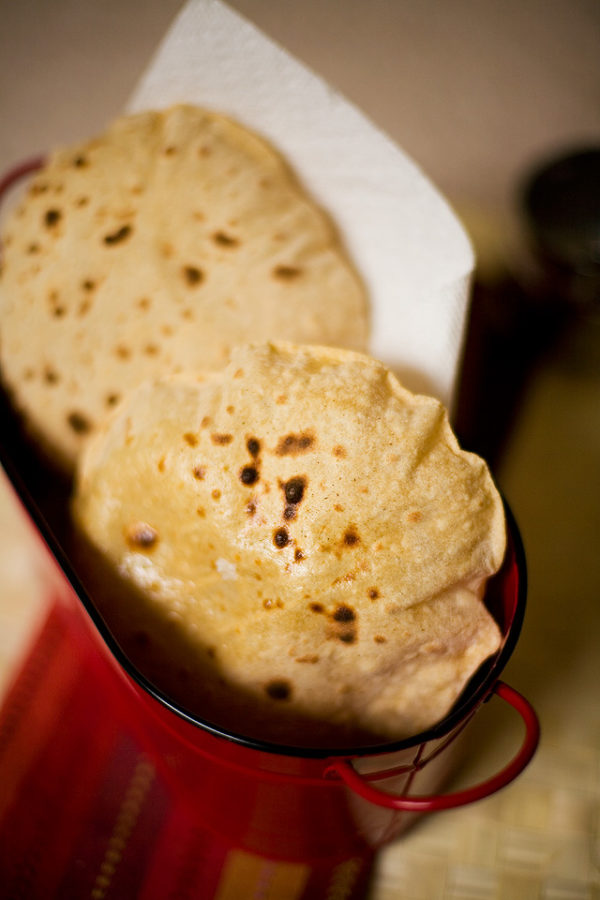
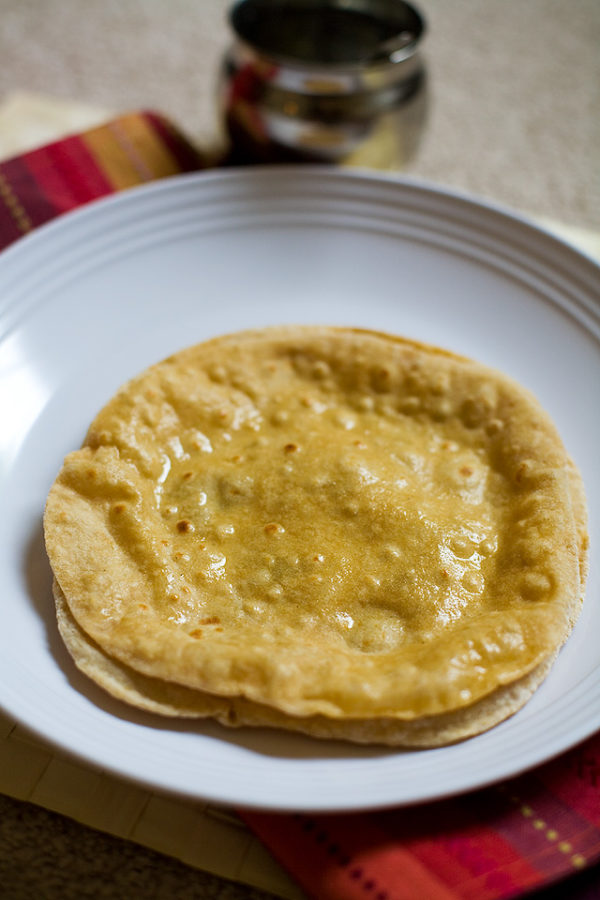
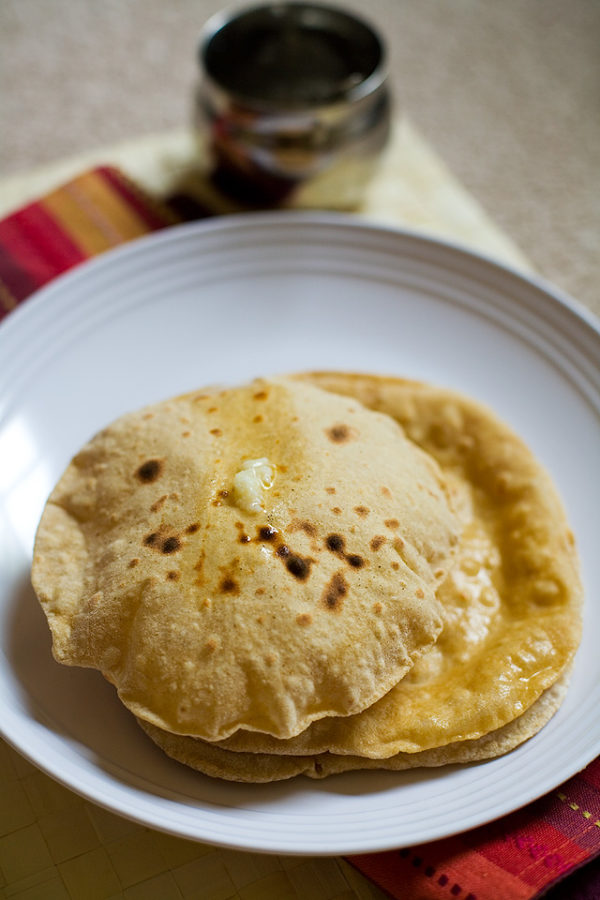
Your roti is ready to be served. Just add a dollop of ghee ( Indian clarified butter) to give it that extra taste.

Thanks for sharing
Very tasty recipe
[…] I mentioned, I learned a bunch of tips as I was reading up on this, mostly from the blogs Indian Simmer and Veg Recipes of India, and most of them focused on how you can keep the dough soft so that the […]
[…] to make sandwiches,pizzas, noodles, fried rice,frankie rolls,burgers or roll it inside chappati or roti and enjoy […]
[…] off the heat. Garnish with cilantro. Serve with a side of rice, roti or […]
[…] This list has to start with one of the most common and everyday bread in Indian cuisine, Roti, Chapati or Fulka. This is something you will see cooking in an Indian household almost everyday for lunch, dinner and sometimes also for breakfast. Mainly popular in the northern parts of India Roti is not a stranger in any other region of India as well. Recipe here. […]
[…] I was inspired to make these chapatis (or rotis if you want) by Food and Whine’s Chapatis and Indian Simmer’s Roti. Amounts and proportions of bread ingredients pretty much depend on the flour you are using, as any […]
[…] 3/4 cup water. Mix well. Simmer on medium for 3-5 minutes. Turn off the heat. Serve hot with fresh roti or side of […]
[…] Add potato and peas. Mix everything well together. Add about 1- 1 1/2 cups of water if pressure cooking (almost double if cooking in a pot). Cover the lid. Cook until the potatoes are cooked through and tomatoes are mixed well to make a curry of the consistency of your choice. Turn off the heat. Garnish with cilantro. Serve hot with steamed rice, roti or poori. […]
You can find the rack easily in any Indian store. I’ve seen it almost in every Indian grocery store in the US.
[…] Roti: Recipe here. Following videos on an easy to follow method to make roti at home can be […]
[…] after every few minutes until its well cooked.Garnish it with chopped cilantro and serve with hot roti / paratha or with dal and […]
nice recipe eat & make easy at own home thank’x for sharing
Hello Prerna,
I made these wonderful rotis today and I loved them!
They are so easy to make!
I’ve just one question: how do you get them that lightly tan on the top? Mine had some brown dots on it as well but the rest was really pale…is that right? Cause on your photos they look so yummy and mine look like not being cooked enough..but otherwise they would have gotten too dark….the problem was that I dont have a rack so I used a flat pan for everything. Could this have been my ‘mistake’?
Thanks for your help 🙂
for a different take on roti try cooking some yellow split dahl till they are just done they should not fall apart ! drain and cool then grind in a foodprocessor the yellow split dahl garlic cumin and a nice spicy fresh pepper and into a fine crumbly mixture. next you have your roti dough devided in almost tennis ball sized parts ready to be filled with the mixture. flatten the ball of dough into a patti take a table spoonful of the crumbly mixture now take the ends of the dough and close it into a ball again flatten it carefully and roll it out flat on a flowered surface like a pancake put melted ghee all over the side facing upwards and flick this buttered roti on a piping hot iron plate repeat the ghee procedure on the other side quickly and once it swells and one side is ready turn it over to bake the other side.
Tried the recipe. But the dough became sticky. Can u plz give some tips for dat.
This looks so good. I’m going to try and make it. YUM!
hot roti with butter on it…too tempting!!
I loveeeeeee hot phulkas 🙂
I love your idea for placing the roti on a wire rack instead of a direct flame (the way I have seen everyone do it back home). This way mine will not get burnt so quickly! Thank you Prerna!
You have a beautiful blog out there, bookmarking yours …Nice pictures, wonderful job Prerna!
Tried the recipe and it came out well. Everyone at home enjoyed this parata. Thank you 😀
I was very happy to see your blog and all your posts. I specially loved this post. I have a coil based gas at home and never knew we could make phulkas by keeping a rack on the coil. I have heard this method from people but it really helps when you see a photo or any live demonstration. I am buying a rack today and will try this method tonight! Thanks for this post.
I just happened upon your blog and I want to say I am happy I did! My daughter is half Indian and I want to make sure she is exposed to the rich cultural heritage from her father’s side.
I love the recipes, they are very easy to follow. I also appreciate your beautiful, clear photos; they are so helpful!
Love your blog!
You can find the rack easily in any Indian store. I’ve seen it almost in every Indian grocery store in the US.
I also live in an apartment and have electric stove coils. Where did you find the rack that you can put right on the burner? I have been looking up racks forever but cannot find one or maybe I am looking under the wrong name.
Anja- No you don’t need to use any oil. Just the pan should be hot enough. You might want to heat it on medium high and when its hot enough for the roti not to stick then you can turn it to medium and continue cooking.
Let me know if you need any help or email me ant indiansimmer@gmail.com
Hi,
I’ve got a few questions: do you use any oil when cooking or do you put the rotis into a dry pan? Must the heat be on full power?
Anja
Goodness, your chapatis look so good, I could cry. Hehe. Bookmarked. Yummy in my tummy. Thanks, Prerna. 🙂
I’m definitely going to be trying this one day. I bookmarked it and will let you know how it goes. I’d love to start making Indian food. I’m terrified of it though for some bizarre reason.
Aww! that’s so sweet of you 🙂
Btw, how was your trip? Hope u had fun.
Thanks. I must have skipped that part looking at your beautiful pictures.
M I used simple wheat flour but as I mentioned in the post u can use a combination of whole wheat bread flour and all purpose flour.
Water at room temperature.
I have a few questions. What kind of flour do you use? What temperature does the water have to be?
These look delicious and so easy to make!