Finally!! After so many requests from you lovely friends and after a lot of pushing myself I am finally here with my first Food Photography post. Well! This post also has a good news for some of you which you’ll only get to know once you go through this WHOLE post (wait and desperation makes the result even more interesting, doesn’t it?) But let’s talk about some photography first!
If I were to pick between great food and great food photography, I’d honestly be torn. Because in the world of blogging (where I present most of my food), photography is truly the way to the palette. We all know a great food photograph when we see it we can nearly taste the food just by looking at it for long enough. That is what I strive towards when I photograph. I’ve had a few requests from my readers to share my photography process. Most of my workflow is a result of whatever I’ve picked up by reading books, browsing the internet for resources and most importantly studying the work of photographers I admire. Therefore, I am always looking to learn so please feel free to leave a comment and let me know if something can be done differently/better as it would benefit not only me but everyone else who is reading. There is so much involved in food photography, from gear to lighting to camera techniques to food styling to post-processing (phew!) that a single blog post can of course not cover it all. Broadly speaking, my workflow has these stages (not particularly in the given order):
Planning
Shooting
- Lighting
- Gear: cameras and lenses
- White Balance/Color correction
- Camera settings/tripod use (aperture, ISO, shutter-speed); RAW shooting
- Composition – rule of thirds, vertical or horizontal, breaking the composition rules
Styling
- Props
Post Processing
- Why post-process
- RAW Settings: White Balance, Exposure, Shadows and Highlights, Vibrance, Saturation
- Photoshop Settings: Cropping, Curves, Levels, Sharpness, Resizing
- Image Resolution
- Preparing images for the web
- Hosting photographs for blog display
I cannot talk about all the stages in a single post and this really was the part that kept me from coming to you with this post. It’s difficult to decide what is important and what is not, so I decided to start with something that any photography is impossible without. LIGHT. For starters, I’ll talk about my take on planning and lighting.
Planning:
As David duChemin says ‘Gear is good, vision is better’. Planning is important for me because it gives me a chance to think about the shots ahead of time and I can focus on the ideas/vision more in this stage and less on whether I’ll be able to get it all done at all. Considering that I have a 1-year-old, going into shooting without a clue about the setups is bound to give me a brain-freeze within minutes of shooting. But this is really up to personal preference – I guess some people are able to juggle a bunch of things at the same time better than others. I know I’m not the best at it especially if it involves the right brain.
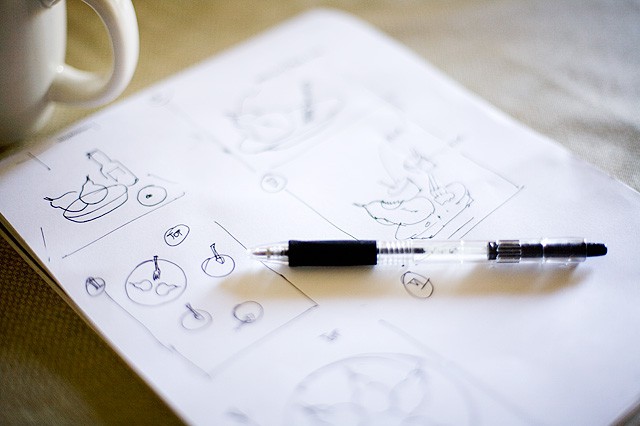
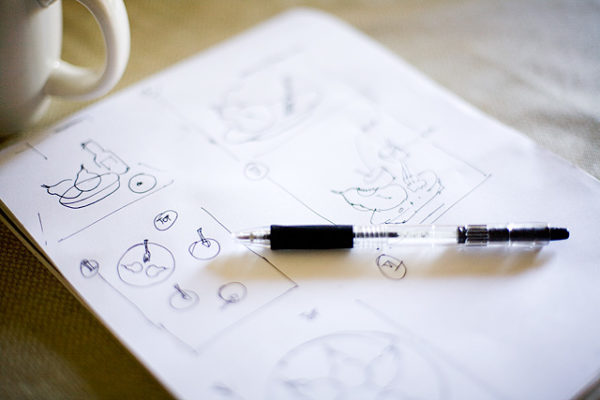
For me planning really means that I think about the setting in which I want to photograph and do some rough sketches to set a general direction while shooting. As you can see they are hardly detailed, but they give me a good starting point so that I don’t get brain scatter when I start to shoot.
Lighting :
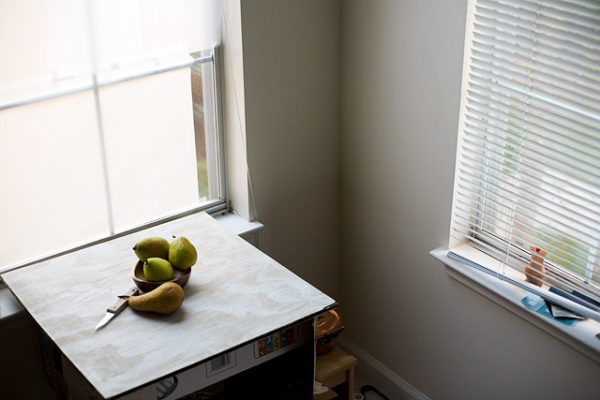
I don’t really experiment a lot when deciding on lighting. I photograph in 100% natural light so that makes my job easier. If you don’t own any studio lights, you check out all the windows in your house and pick one that gives you the right setting to place your food and photograph it. I chose a setting in my apartment that allowed me to photograph food with good back and side lighting.
Also, it left me enough room for the food to be placed at around 3 feet from the ground so that most pictures could be taken standing up. In some cases, I’ll drag a chair to stand up on it and photograph from higher level (for e.g. for top views). I do wish at times that I had bigger windows that would let more light in. Also on my wish list is a large window that gets lots of direct sun so that I can get really bright lighting. The left window in the setting above does get some direct sun but not for more than an hour. As you can see I have covered the window with a translucent sheet of paper to diffuse the light into a soft bright glow. If you don’t diffuse the light, you may get uneven contrast and patches of really bright highlights and shadows in your images. This set up usually works for me.
Now let me share with you some of my favorite lighting conditions:
Backlighting
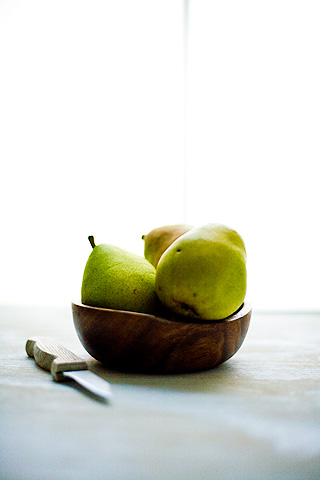
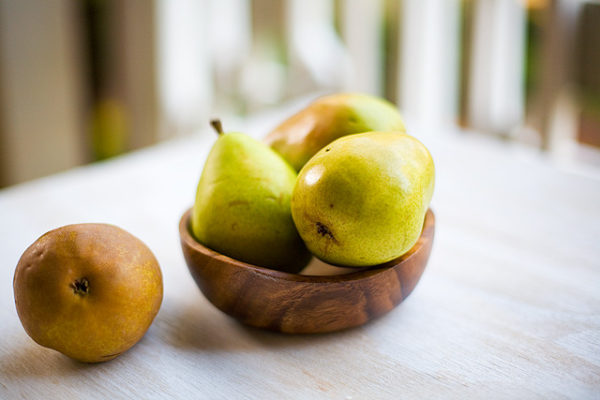
I use backlighting because I read somewhere that it is the best lighting condition for food. And for the most part, this has been true (so to whoever wrote that – thank you!). Here is a photo I took with the left window in the background (source of backlight):
This was taken with just one light source (the left window in the setting) behind the subject. If your light source is very bright, you may see the subject itself gets a bit dark (almost like a silhouette) – in such cases you can use any post processing software to brighten up the image which should illuminate the subject to an ideal exposure.
Fill Light
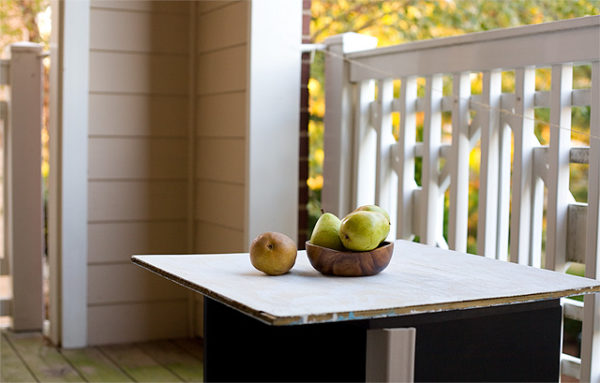
Another lighting condition I frequently use is a natural fill light. Technically speaking, a fill light scenario in a studio typically eliminates all shadows. I am using this term to describe a setup where I am shooting in a semi-outdoor setting. I could have called it “patio-light” too! Because that’s where I find soft light from all directions that gives the subject a uniform overall illumination. Here is an image of the setting:
And below is what I got under these conditions:
Dark Backgrounds/Reflection
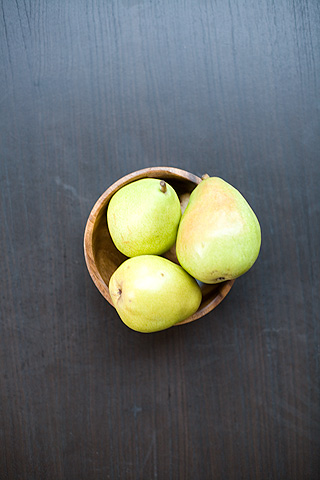
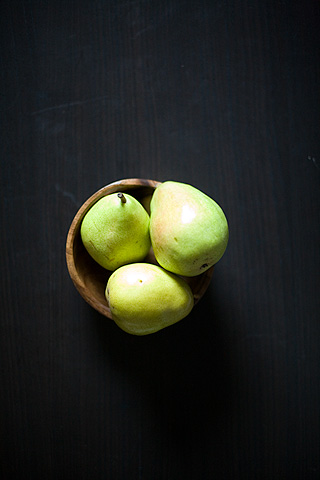
I usually work with white surfaces but depending on the subject, I at times use darker surfaces that serve as backgrounds. I find it more challenging to shoot against darker backgrounds – primarily because they reflect light. The dark surfaces I have are made out of wood with a coat of dark paint. Now you may be able to find a paint type that does not reflect light at all or perhaps a tile based background that is non-reflective. If that’s the case, do let me and my readers know! I know it exists. But if your surface is reflecting light you’re likely losing color saturation. Here is an example shot:
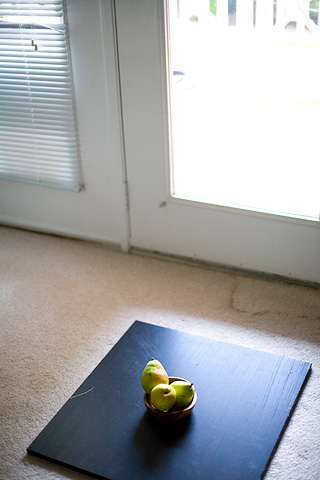
To get around this, I reduce the light significantly and keep it uniform to cut down on the reflection itself. So I pull all the blinds down and leave just one light source so that there is more control over reflection as well (if there are multiple light sources then it becomes difficult to assess where the reflection is coming from):
With such an arrangement, I am usually able to orient the subject in a way that I get the least amount of reflection from the background. Here is the same subject but with a single light source (and straight off the camera sensor):
Do you see how much more saturated the background is? Another setting that has worked for me in the past is surrounding the subject with three dark surfaces as walls around it and then shooting from the fourth side (opening). This would of course require you to set up your camera to photograph in low light (wide open aperture, high ISO; I will try to cover my typical camera settings later).
Controlling light with reflectors or foam-core boards:I am still learning to use reflectors. In some cases they seem to work but in others they seem to take away the natural beauty of a scene (my paranoia may be?). Adding a reflector effectively introduces another light source. You can hold it in the direction opposite to the natural light source and it would counter the shadows. But with reflectors I sometimes lose the predictability I get with photographing with just natural light. Also walls in my apartment are painted white so there is ample reflection already. But since I am still learning to use reflectors, I would suggest that everyone who is learning experiment and see what works and what doesn’t for them. Photography, just like any other art, is all about practicing and coming up with answers to your own questions!
Alright guys! I guess that’s enough of my monologue. Hoping that I didn’t bore you to death, I still don’t think I was able to cover a lot of what I set out for. All of these topics are so wide and ever-evolving and every one encounters different challenges. That is why it is so much better when it’s a conversation where I get to learn too – so with that in mind I am opening the lines for your comments here. Teach me what you know and ask what you would want to know or we can connect on twitter/facebook to share more. Happy shooting!
Oh wait, we have something else to share! We have two lucky winners today and http://www.random.org/ helped me find them.
So the winners areeee …..
runningblond wins Madhur Jaffery’s Cookbook.
waspyredhead wins my home made Garam Masala.
Yay! Congratulations you guys! Please send me an email acknowledging your win and also please send me your postal address so that I can ship your prizes.



Very nice blog. The images are simply superb. Really loved it.
Anybody who is seriously interested in learning photography would never get bored of long posts. In such cases, the longer, the better because the more details we get, the more we learn.
Brilliant post. ‘The reflection from dark surfaces’ part was new to me as I have never tried using one. Thanks for sharing your knowledge. Will wait for your posts in future!
Really nice article… its interesting to see the various possibilities
I use backlighting because I read somewhere that it is the best lighting condition for food.
This is not true. In your pear picture, for instance, the white background is almost blinding and detracts from the picture.
Also, any SLR using Matrix or Evaluative metering will underexpose the pic foreground because of the huge amount of backlighting, creating a darker picture with less detail.
hello prerna,i’m smita.I live in central india and m new to the world of food blogging and photography.I started my blog this january out of my insatiable love for food and soon realize it just wasn’t enough.My writing skills were put to test and my photographs were “bad”.I was in awe of all the fellow bloggers who would put up great looking pictures that were just as delicious looking as the food itself.I had grown apprehensive about whether i had these skills at all…Untill i read ur post a few days back.I love ur posts and more so ur photographs…now i know that i can get better with time and practice.thanx a ton…looking forward to ur recipes and “pikchas”.smita.
As a person fairly new to your blog (and loving your talent), I’m so happy you wrote about lighting! I’m not at all an expert on photography and have been struggling with my technique. I think it was kismet that I came across your glorious site!
Preru!!! u are doing awesome…. I loved the post and am so so PROUD of U 🙂 luv ya tc
Love the lengthy post.. i am new at cooking and fod photography.. i try to click in the natural light but fail in winter 🙂
This is a wonderful post and u have a superb space here with obviously beautiful pics… love it 🙂
Thanks a lot for stopping by my blog and ur encouragement… 😀
Heyy Prerna…
So sweet of u to share ur experience out here..
@Maggie I’ve never used artificial lights in my photography and I too am learning about it. However I came across an interesting post by Matt @Wrightfood (http://mattikaarts.com/blog/) on artificial lighting which you might wanna check out
Great post-very informative! Do you have any recommendations for those of us who are not lucky enough to have much natural light coming in during the day? Do you know of any good artificial light sources? Thanks!
You’re so lucky – you can draw too!
Very informative post. Thanks.
Your photos are amazing and this tutorial is spot on. Thanks for sharing.
Wonderful post prerna.. such a informative post and ur rough sketch oh my I loved it.. Congrats for the winners..
I want to thank you for the insight into your photos! I especially liked the info on light!
and Congratulations too the winners of your contest!
What fantastic tips, especially for newbies like me 🙂
Thanks for this post, Prerna. I am always trying to improve my food photography as I find it quite challenging without a DSLR, so I am always looking for tips that I can use in order to try and make my point-and-shoot photos better! 🙂
Very informative post. Thanks so much for sharing all of your great tips!
Hello Prerna!
I`m quite new to your blog but I instantly fell in love with your photos, and the food of course! This article is such a great help for a new learner like me. Thanks!
I have problems with lighting because I usually come home after sunset and my room space is so limited that it`s difficult for me to arrange my food near the windows. So what I use is my desk lamp and a styro board as a reflector.
But again, I learn a lot from your post! Thank you thank you thank you!
Great post! I’ve learned a lot from looking at photos I enjoy and reading tutorials online, too, but have yet taken the effort of putting something comprehensive together like this. I also sketch my layouts when I have time, though my sketches are way messier than yours ;).
Thnaks for the great feedback guys!I sure will try and discuss other topics soon.
@pickyin, @Shayma- I use photoshop. I sure will try and discuss the simple post processing techniques in one of my posts.
@HappyCook, @Evan- I’ve never used artificial lights in my photography and I too am learning about it. However I came across an interesting post by Matt @Wrightfood on artificial lighting which you might wanna check out.
@Alison, @Nithya- I definitely will try and write a post on camera settings and you can anytime ask the exif info of whichever photograph you want and I can email it to you.
@Alison- I bought a simple tracing paper pad from HobbyLobby and used them. One pad has like 100 sheets n it was for some 15 bucks.
Wow such a informative post…Luv ur draft sketching and planing methodology. Demanding to give more such photography posts to come 🙂
This is a very helpful post! I’m impressed that you dedicate so much planning and thought into each picture – and it shows!
Great post! Thanks for the tip about backlighting. I used to shoot mainly in my kitchen with the light coming from the right side, but recently decided to move all my equipment to my office as it has better direct/fill light. Now that I have more room to move around I can experiment with backlighting.
Prerna I really enjoyed reading this post- thank you so much! what post processing software do you use? Photoshop? Also, maybe you could do a post with photos and beneath them, a subtitle of the f-stop you used, shutter speed etc etc. Demands demands demands 😉 x shayma
I found this amazingly helpful – thank you! I am a complete and utter beginner with photography but I have well and truly caught the bug. You’ve inspired me to learn more and try new techniques. Thank you again!
cant thank u enough for the brilliant post!!!!
Lovely post Prerna! Your house is so beautifully lit.. I love the doodles that you use to plan. I should become more methodical with my settings!
I wanted to say exactly what Soma said. I know you have a gifted talent for photography but today I learned you have the greatest virtue of PATIENCE! Oh my God drawing a sketch, thats like WOW. Thats exactly what I don’t have! You are my genius tweetheart 🙂 But got to say I have a special appreciation for pictures with dark background. I find them more interesting and appealing though I know people prefer food photography with whiter backgrounds.
Prerna – thanks for the great lighting tips!!You have a beautiful site here 🙂
Great post! You are so talented! I would love to know more as someone said above regarding the settings and aperture you like as well. Also, what kind of paper did you use in the window? Where did you purchase it?
awesome post prerna..very informative for new learners…
congrats winners…my hardluck..
stuck and busy these days…wil catch up with all ur delicious posts soon….
Prerna I am looking forward to more posts from you like this. What a wonderful series this is going to be! I would love to see these posts linked on your Photography Page as you discuss each topic. Awesome. Awesome job on this.
Wonderful post, Prerna!
Thanks so much for sharing all of this great information. I love all of your photographs.
I’m mesmerized by the planning aspect! It would have never occurred to me to sketch out what I want my shots to look like. I’m still learning but I totally agree that no matter how good your recipes are, no one will want to try it if you don’t “sell it” in the photo! Great post!
Amazing post Prerna! Very informative and helpful. A lot of it seems to come down to practice, practice, practice! I will be referring back to this post in my own practice, so thank you 🙂 It’s so helpful to see the set-up, and then the shot that results.
Thanks for this post Prerna. You have given me much to think about for the next time I take photos! Looking forward to more in this series!
I have learned loads from this post,new terms, new light concepts. but what I have realized most is the patience u have even with a little one. From the drawing to set up.. Your pictures are splendid!
don’t think I can achieve much with the effort I put in my pictures 🙂 Waiting for more Prerna.
Dear Prerna,
Thanks so much for such a detailed post ….. You have done a fabulous job with a 1 year around 🙂 Your hard work is reflected through the excellent clicks you post. I would definitely look forward to more such posts from you.
Congratulations Winners !!
Have a lovely weekend.
Luv,
Satrupa
wow ! you spent a lot of time and energy writing this blog…and you have detailed it so well..Looking forward to your following posts on food photography..
What a timing-consuming post this must have been to create, but such great information. I love seeing how people conceive, set up & shoot their food creations. Each method yields such interesting results—I particularly like the images under “fill light.”
This is such an awesome post!
A rough sketch of the final pic definitely helps to click a better pic. I tried it once and I was happy with the results. But me being a lazy soul I find it really hard to do this prepwork everytime. So I try to picturize it in my mind..hehhe.. I love to use reflectors especially when I shoot in the dusk. It helps me to brighten up the pic to the right amount ofcourse I have to change my camera setting. Overall great post and loved reading it.
What an informative post! I can only imagine the time it took to put it all together! tahnk you for helping the rest of us here, i have a lowly P&S and food photography is soemthing I struggle with all the time =(.
and congrats to your winners too!
this post is so very helpful. I’ve learn a lot reading it and intend to experiment. I don’t photograph food, but consider myself a sponge when it comes to learning about photography and I’m soaking this up!
Congrats to the winners! Your shots are splendid!
Cheers,
Rosa
wow, this is really helpful. Sadly, living in a small apartment, window lighting is limited. And in the winter, I’ll have none when I cook at night. I need to learn more about low end professional lights, but these are great tips for when I cook during the day.
fantastic post I say.. Its sure gonna help me a lot 🙂 I would love to know more abt your general settings of ISO, Aperture etc in your posts to come.
Thanks! Love this. I love natural light as well. Backlighting is a great trick because it adds depth to the subject.
Good post, I like the way you arrange it for better understanding. Looking forward to the post processing bit which I don’t do but am always curious on how much work goes into it.
I loved reading this post. Wish i had so much light now here. In the summer it was good as there was lo of sun, now that it is almost winter, it is always dark and dull weather 🙁 when i take a pic. I am so waiting for spring and summer.