I’ve been very bad with keeping track of time lately. I’m planning just a lot of things right now while trying to balance a life with a toddler, a hungry family and a million other things on my hand. I am mostly successful at this but my plan for doing a post on food photography Q&A kept falling outside the ‘mostly’ category. Until now! I was very happy to see lots of emails with interesting questions. I tried to pick three or four questions which were common and I am trying to answer them here today.
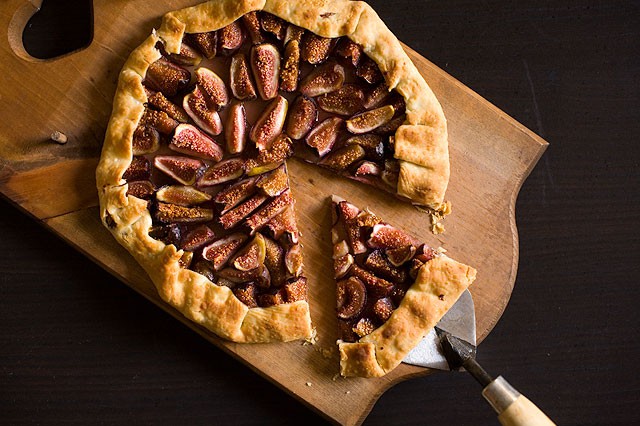
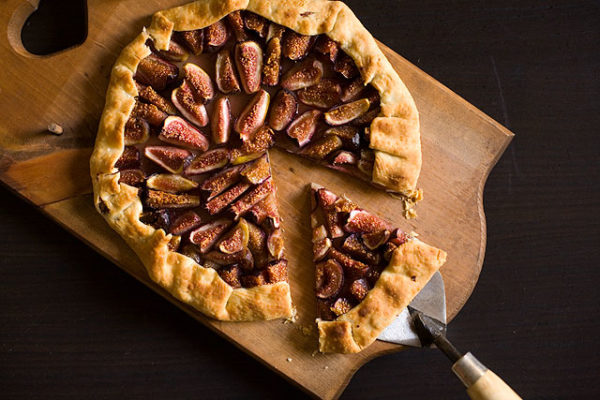
This photo got most of the questions so I’m discussing it first. Following is the camera setting for the photo:
Lens: 50mm f/1.4
ISO:1200
f-stop: f/5.6
Shutter Speed: 1/60
Photo was taken in the afternoon around 4-5 pm when sun was not very harsh in a room with just a single source of light coming from 3 o’clock right.
Question: I read that you use 50mm f1.4 lens for food photography. I want to know if you use the same lens to take top view photographs and what minimum f-stop range do you use so that everything is in focus?
Response: Yes, I use the 50 mm f/1.4 lens most of the time to take my food photos. In order to take a top shot and to keep everything in focus I first set my camera to aperture mode and then I try to use as high an aperture value as possible while keeping the shutter speed more than 1/80 seconds to prevent any shake (I hand-hold the camera). Typically I’d be happy with f8.0 but even a 5.6 is good enough. Photos with dark backgrounds and single source of light get tricky because the dark background and less ambient light usually ask for a small aperture value so that the shutter speed is high enough to prevent any shake. Again, I hand hold the camera – if you have a tripod that helps you position the camera well for a top view, that might be an option to explore (that way you can have long exposures and still not see any shake/blur in the image). For me the obvious option is the dial up the ISO, so I go as high as needed to prevent the shake. The downside of high ISO is high grain in the image but post processing software will allow you to remove that noise.
Another point that I keep in mind while taking a top view like this is to use props that are not too tall because taller props are more likely to go out of focus and become distracting.
Question: I see that you mostly use natural light. What if light in my house is not very good?
Answer: I’m lucky to have good source of light in the house but still sometimes its not very bright outside and if I still need to take photos I first try to get as close to the source of light as possible. Again, in this case too I rely on higher ISOs. Reflectors come to rescue as well. White foam core boards from art and craft store are my best friends. Set them up as close to the subject as possible opposite to the source of light.
Camera Settings:
Lens: 50 mm f/1.4
ISO: 320
Shutter Speed: 1/400
f stop: f/2.0
Question: What’s your thought process while styling a “not so sexy” food?
Answer: That’s a fabulous question! That’s what I asked the famous food stylist Tami who also blogs at Running with Tweezers once. You can get a detailed answer to that question on her post. As far as I am concerned, I try to make it look sexy by sometimes adding props, adding color to a flat colored food or sometimes by playing with light.
Lens: 50mm f/1.4
ISO: 500
f-stop: f/2.2
Shutter Speed: 1/250
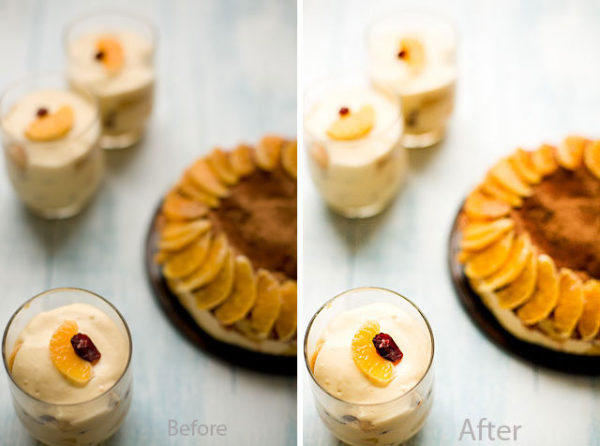
Question: How much do you rely on post processing or would you recommend post processing software?
Answer: Although I don’t like to post process my photos a lot but I do recommend having software that can help you brighten things up. I use Photoshop to increase the exposure of photos that don’t look well-lit and I also sharpen them as needed. Curves is my favorite tool because it helps in accentuating the contrast while keeping the subtleties intact. I am also exploring Lightroom. A cheaper option is Photoshop Elements. If you don’t want to spend money, then you can try using photo editing software that came with your camera. They will typically have very good implementations of common actions such as exposure and sharpness. I’ve heard good things about open source software such as Gimp as well.
I hope some of these were questions that were also in your mind and that I was able to answer them. If not then do let me know and I’ll try to cover them in my next Food Photography Q&A post.
After seeing your wonderful response and having some great discussions with some of you I would like to request one thing here. If you have any tips/techniques that, even though small, help you in your photography, please share them here so that others can also benefit from them!


You are an artist taking pictures. I love the top picture. Are those figs?
Was searching for composition and bumped into this one 🙂
This is a great and very helpful post.. Thanks Girlie..
It was a awe-inspiring post and it has a significant meaning and thanks for sharing the information.Would love to read your next post too……
Thanks
Regards:
ISO 9001
Great post! Stumbled 🙂
Hi Prerna,
First time on your blog and loved your post…I am stll learning with my DSLR and i found the 50mm to be a very fast lens so i am guessing you can play around with the ISO and the aperture WITHOUT A tripod. Wow you must have solid firm hands! Bt I cant believe your ISO setting was 1200 as i can hardly make out any grain! Dont you miss having a 100 mm for macro shots? I felt that with my 50 mm a lot wen I wanted a closer shot. Also could you elaborat eon teh white foam boards? Didt quite catch that!
Shobha
Thanks for the tips! I struggle with cloudy days and windows that don’t offer much light. But I have to ask, what is that you photographed? Some kind of crostata? Looks divine!
I jumped to your blog from Delishhh’s interview- I really enjoyed that, as well as your website. I will definitely be checking it out more, following you and taking you up on the offer to try your recipes and send you link. You really have an artistic eye, as well as great-looking recipes.
Looking forward to seeing more.
http://homestyleworldcook.blogspot.com
Hi dear! Been *so* bogged down with house hunting (ugh) and photo shoots (oy) that I got distracted from stopping by here and dropping you a note. What an AWESOME post! So informative and your photos are just lovely. Thanks for the shout-out but…really…you don’t need MY help 🙂
xoxo
– t*
You’re awesome with your camera. Awesome. But you know that already. 🙂
very nice and informative post, Prerna. it’s all about the person, not the instrument 🙂 x shayma
First time on your blog – Congratulations on this remarkable milestone and wishing you many more- I know how much time and passion and effort goes into writing a food blog…You have a great collection here 🙂
This is a wonderful post Prerna.I am trying to get hold of reflectors for now.The biggest challenge I face is avoiding glare and dark spots in pictures..Even in natural light, I recently learnt that early mornings or late afternoons are the best time to shoot for the same reason as in your post.Thanks for all the tips.
I got my dslr back in November and still haven’t even learned about 10% of its capabilities. I am learning more and more though, the more I use it. My issue is the lighting, it’s hard for me to get that soft and bright look. There probably is a way, but I haven’t discovered it yet. Thanks for this post, it helps everything make sense. I just usually keep fiddling around with the f-stop and all until it looks ok to me. hehehe
Love your explanations! I wish I could have afforded the 1.4 v 1.8, but I still love my 50mm.
You’re so gifted, I love watching your thought process while shooting. You’re a true inspiration.
Thank you, thank you, a very useful post.
Good info on food photography, will be a great help.
What a great post, and it’s so wonderful of you to share your knowledge to assist others! Your photography is stunning.
I loved the idea of your Q&A post for your photographs. Shooting in RAW has helped me immensely with the quality of the photographs, but the time spent post-processing is a slight downside for me.
I only have a ISO800/1600 jump on my cam, your image at 1200 looks almost grain-free. Must be really helpful in low-light.
Thanks for this post Prerna! I struggle a lot with light especially because of the crazy Sydney weather we have been having, but have come to appreciate the wonders of natural lighting and some good old vellum. I love experimenting with props and hunting for quirky ones. Your tips will be appreciated and adapted over and over again 🙂
This is an awesome post. Thanks so much for sharing all of these wonderful tips with us.
awesome advice from a true talent!
Love this post Prerna – you’re such a trooper for sharing out your photo tips and tricks. It took me a long time to get out of Auto mode and comfortable playing with Aperature. My real problem is I have poor lighting in the house and don’t have an office studio. So I’m limited by taking pictures outside, which of course limits me more because of the time of day. Very frustrating.
Fabulous post! Your photography is so incredible.
Most of my cooking/food photography is done in the evening after dark, so I really rely on my SB-600 external flash and bounce it off the walls and ceilings to avoid the washed-out look. I dream of a kitchen with strong natural light at some point in my life.
Great post, Prerna! Having natural light to work with is definitely key for my photos, but I still have a lot to learn about what my camera can do.
Lovely post, Prerna. I typically shoot at ISO 200 and rarely go to 400 and beyond. Of course, I’m lucky to have a lot of natural light.
Prerna I am bookmarking this post. Right now what I have figured is I need to understand how camera works. I do not use camera in manual mode and the iso aperture shutter speed goes over my heard 🙁 I need a tutorial.
This is very useful – between you and Jenn I feel like I have private photography classes. I have a lot to learn about food photography and the learning curve is huge for me right now, not to mention I don’t really have the time to explore as much as I would like to right now but this summer I plan to give it a lot of attention. Have printed out this info for future reference!
great post Prerna! Just so you know, I’m planning to completely pick your brain about photography when I see you!! 🙂
Here from Add a Pinch… and am hooked! Love this post and am off to explore more!!
Your food photography is amazing!! Thanks for sharing. Maybe its time I used my prime lens for food shots instead of always zooming with my 18-55….
I made it here thanks to a mutual Twitter friend, and I’m glad I did. Thanks for the tips. I have made myself a DIY light box, which has solved a lot of my night-time lighting woes. Your tip about the ISO is the one I am going to try first. Thanks a lot for the inspiration.
Oh Prerna, this post is awesome! Will try your tips on taking top-view pics. Thanks!
Outside the kitchen, I do use a “reflector” and two simple desk lights. By reflector I meant aluminium sheet supposedly used for covering kitchen wall from oil splatter, lol. I did use a DIY white-paper covered board, but then it was really easy to get dirty (probably I was the problem, too messy).
For the editting, I use Picasa 3 and I`m perfectly happy with it. Tried learning Photoshop many times, but always ended up using Picasa. Not really a techie I suppose 😀
You are so nice to share your knowledge with us:) I recently took a Photography class at a local community college, and it was an eye-opener:) It concentrated mostly on the artistic nature of photography, but at least I learned the basics. Now I have to read that manual until I know it by heart and shoot every day.
You have such a great eye for photography and I am delighted to have you as my teacher:)
Thanks for sharing your tips! Will keep in mind for future reference.
Wonderful post prerna. The phtography tips with the Exif data makes this psot very educative. Thanks for sharing 🙂
Great post, Prerna! I definitely remember having a lot of those same questions only a few months ago and scouring the internet desperately for guidance :). If only I’d had you then! I have an older version of Photoshop, but I honestly have found noise to be an issue at times and never ever go above ISO 200 anymore. At the same time, I have the cheapest dSLR available and know for sure that graininess is one area where camera model matters.
Great post Prerna! And very insightful into your photographic thought process!
Very interesting! Thanks for sharing.
Your clicks are always fabulous.
Cheers,
Rosa
thnks for this informative post
love this post Prerna. I have always loved that first picture of yours. You are so kind to share what you know not many people out there like you 🙂
I have recently started exploring Photoshop and the more I learn the more I realize a good photo should depend less on the post processing. I still am trying to understand the technicalities of photographing the ISO etc but you post will make me a little more confident when I hold my camera!
Hi Prerna Thanks for answering my question…that helps…I really should bump up the ISO more so I can increase f stop…
Cheers, Ann.
this is awesome Q&A. Loved reading it. Thanks Prerna for taking time to do this. 🙂
Siri
Great post. Such helpful tips. I love that you are so giving of your time and talents in order to inspire and push others along in their passion. You do beautiful work.
For those looking to shoot with DIY fake light, a white light bulb diffused with a white collaspible laundry bag is a simple solution. Pro – you can angle it from any direction or height, con – you need another person to hold it while you shoot.
My thoughts on post processing, I try to minimize post-processing requirements because that’s the only way I can learn to be a better photographer.
Prerna, Thank you so much for this informative post! I have bookmarked it and I will be coming back to brush up on your helpful photography tips! I’m still clueless on ISO, Fstops & shutter speeds! Thanks Again!
great post, your a pro, for me I wish I had the patience and passion for it with a toddler as well and one on the way I take as good as I can
hats of to you
As discussed on twitter: 🙂 I think increasing iso to max is okay for blog/web photos. But keep in mind that if you want to print the photos out, higher iso results in “grainy” look.